Set Up the Neo Group View Template in GoHighLevel Calendars
Updated March 27, 2024
Choosing the right group calendar template shapes how clients perceive and interact with your booking experience — and the default Classic view may not reflect your agency's brand. Using the Neo Group View Template in GoHighLevel, you'll configure a polished, image-rich group page with enhanced staff selection and a smoother booking flow.
Introducing the Neo Group View Template, an innovative solution designed to elevate your group management journey. Within this guide, we’ll explore the intricacies of this fresh template, unveiling its capacity to elevate your group presentations with sophistication and visual allure.
Introduction to Group Templates
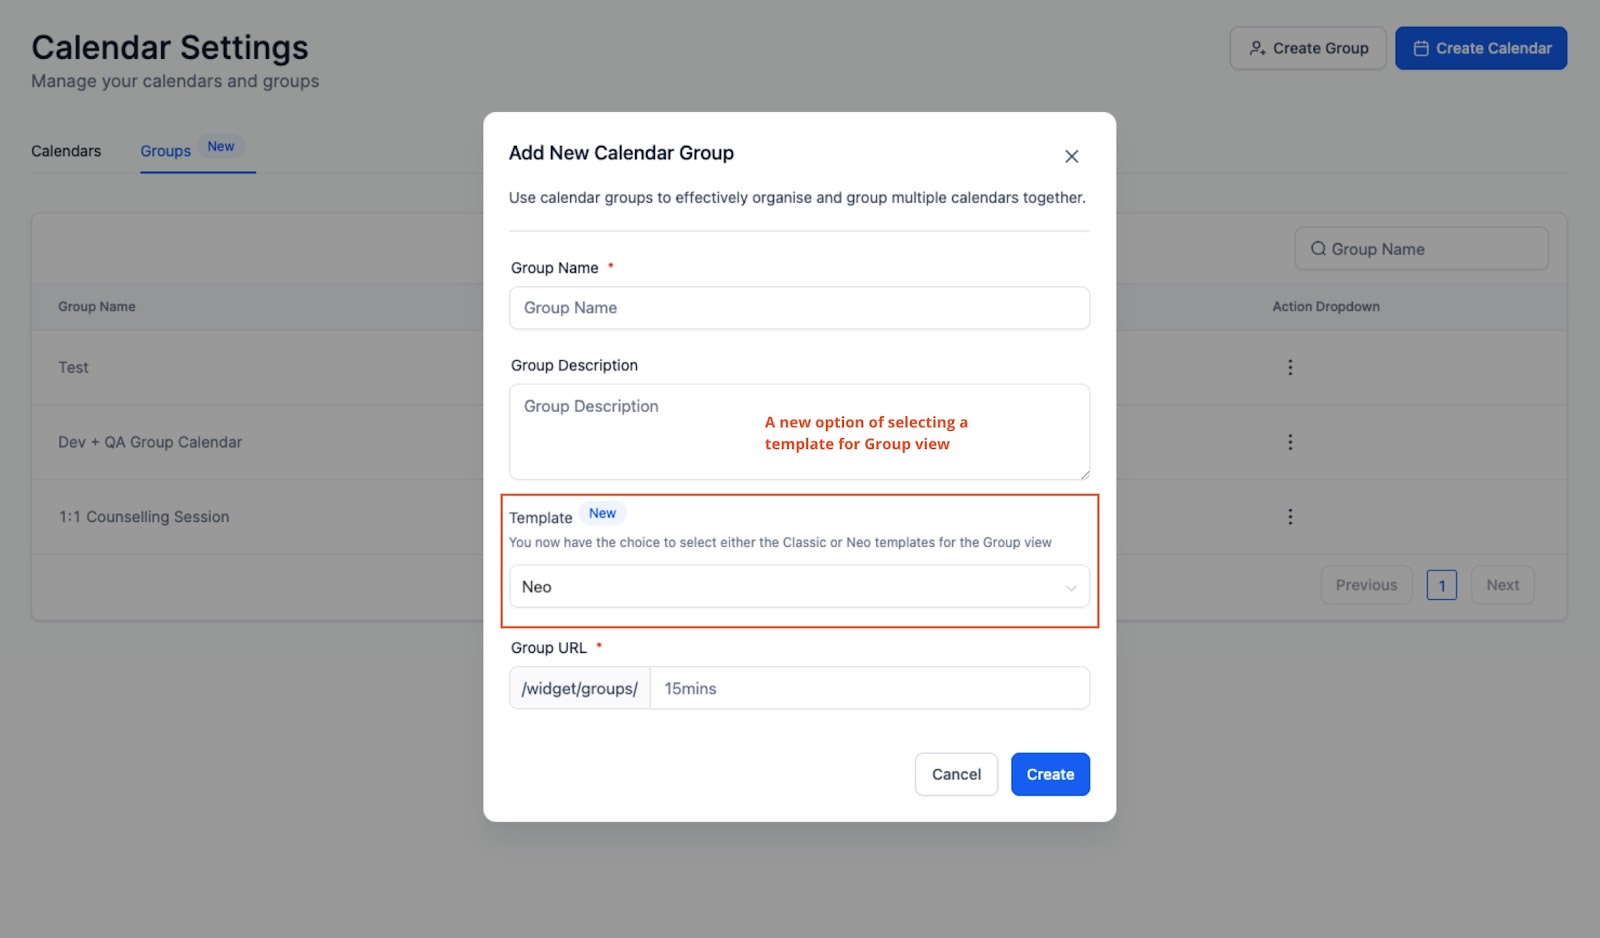
With this new enhancement users can now select how their Group page would appear to their end users. Users would have the choice between Classic and Neo templates for Groups which can be selected from the “Templates” dropdown.
About Neo Template
Revamping Your Group Experience
The Neo Group View Template offers a contemporary and stylish makeover for your group organization, injecting a fresh and modern vibe. Embracing this template can revolutionize the presentation and accessibility of your groups, leading to a sleeker and more appealing interface that captivates users.
Key Features
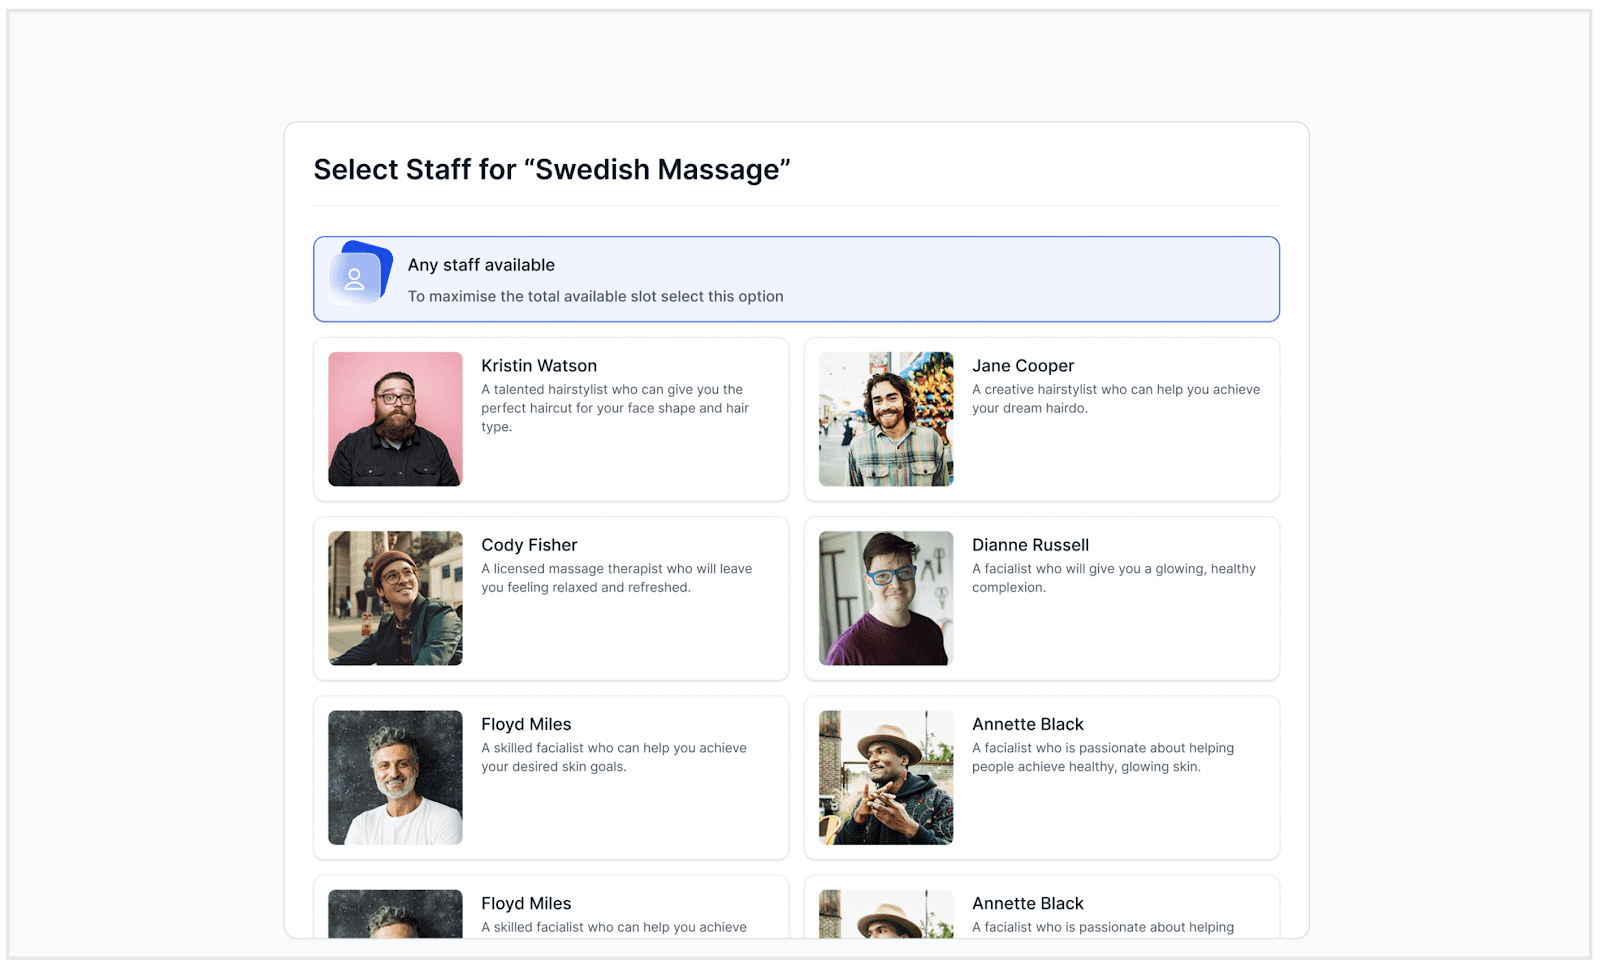
- Staff Selection: new enhanced experience for Staff selection for a particular service. If the calendar has enabled staff selection for it from the calendar settings.
- Sophisticated Design: Neo offers a sleek and sophisticated design, elevating the visual appeal of your groups. It combines aesthetics with functionality for a refined user experience.
- Calendar-Specific Images: One of the standout features of the Neo template is its ability to display calendar-specific images. This adds a personalized touch to each calendar within your group.
- Streamlined Flow: Neo optimizes the flow of information, making it easier for users to navigate and access the content they need swiftly.
Using the Neo Group Template
- Access Calendar Settings: Start by navigating to your Calendar Settings. This option is usually found in the menu or settings area of your calendar application.
- Select Groups: Within the Calendar Settings, locate and select the “Groups” option. This is where you manage and create new groups.
- Create a New Group: Click on the “Create Group” button to initiate the group creation process.
- Template Selection: In the group creation interface, you will notice a new field labeled “Template.” By default, this field is pre-selected as “Neo,” providing a modern group view. If you wish to use the previous “Classic” group view, you can change the selection to “Classic.”
- Add Group Details:Below the template selection, you will typically find fields to input the following group details:
- Group Name: Enter a name for your group.
- Group Description: Provide a brief description or summary of the group’s purpose.
- Group URL: Optionally, add a URL or link relevant to the group.
- Creation: Once you have filled in the necessary information and selected your preferred template (“Neo” or “Classic”), click the “Create” button to finalize the group creation process.
Using Templates
- Go to “Calendars” > “Calendar Settings” (top navigation menu) to access your Calendar Settings
- Select the “Groups” tab
- Click the “Create Group” button
- In the group creation pop-up, you will find the “Template” field, with “Neo” as the default selection. You can change this to “Classic” if desired. However, Neo is recommended as it will allow for much more customization and features.
- Fill in the Group Name, Group Description, and Group URL fields.
- Click “Create” to finalize the group creation process.
Neo Template: Group view
Here is a list of Calendars with and without Calendar cover image

Here is the staff selection on Group View
How to Upload Cover Image for Calendar
- Access Calendar Settings: Start by navigating to your Calendar Settings. This option is typically found in the menu or settings section of your calendar application.
- Edit an Existing Calendar or Create a New One:
- If you want to upload a cover image for an existing calendar, click on “Edit Calendar” for that specific calendar.
- If you’re creating a new calendar, proceed to the “Advanced Settings” section during the creation process.
- Access Customization Options:
- In the “Edit Calendar” or “Advanced Settings” interface, look for the “Customization” tab. Click on it to access customization options for the calendar.
- Upload Calendar Cover Image:
- Within the “Customization” tab, you should find an option to upload a calendar cover image.
- Click on this option to initiate the image upload process.
- Choose Image Source:
- You have two options for selecting an image:
- Upload from Your Local Device: If you already have an image on your computer or device, you can choose this option to browse and select the image file.
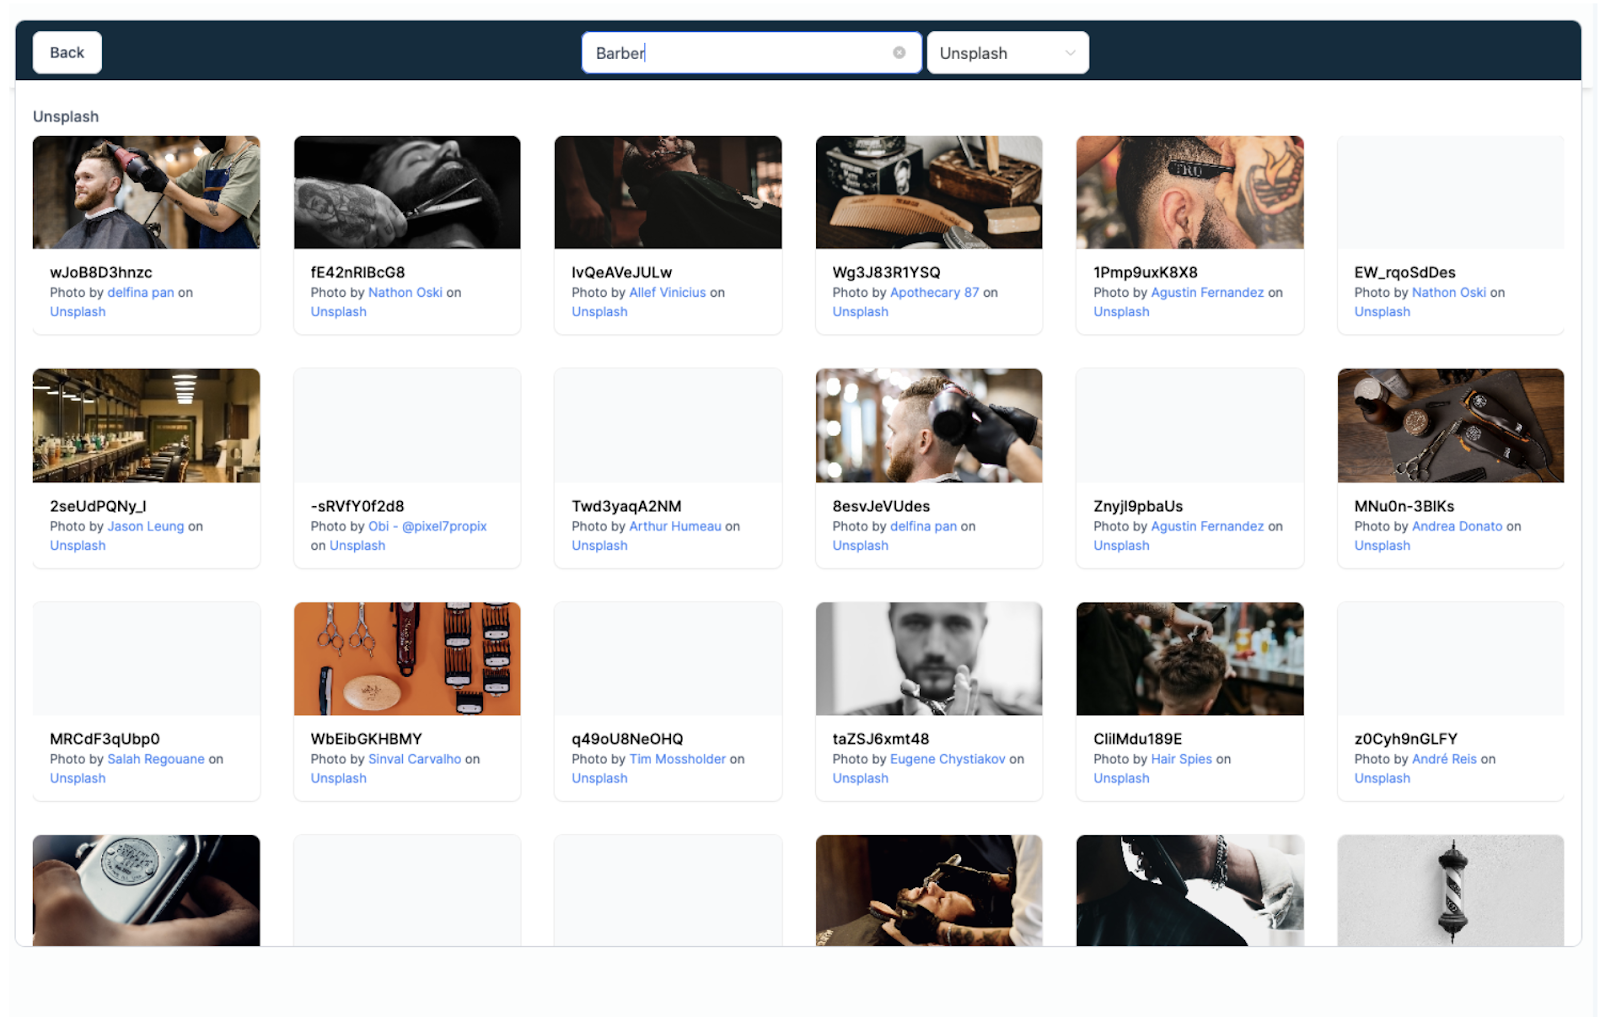
- Enhance Your Visuals with “Unsplash”: If you don’t have a suitable image, you can use the “Unsplash” option to search for and select a relevant image from their extensive library.
- You have two options for selecting an image:
- Select and Upload Image:
- Depending on your choice in the previous step, either browse and select an image from your device or search for one on Unsplash.
- Depending on your choice in the previous step, either browse and select an image from your device or search for one on Unsplash.
- Once you’ve chosen the image, click on the “Upload” or “Select” button to add it as the calendar’s cover image.
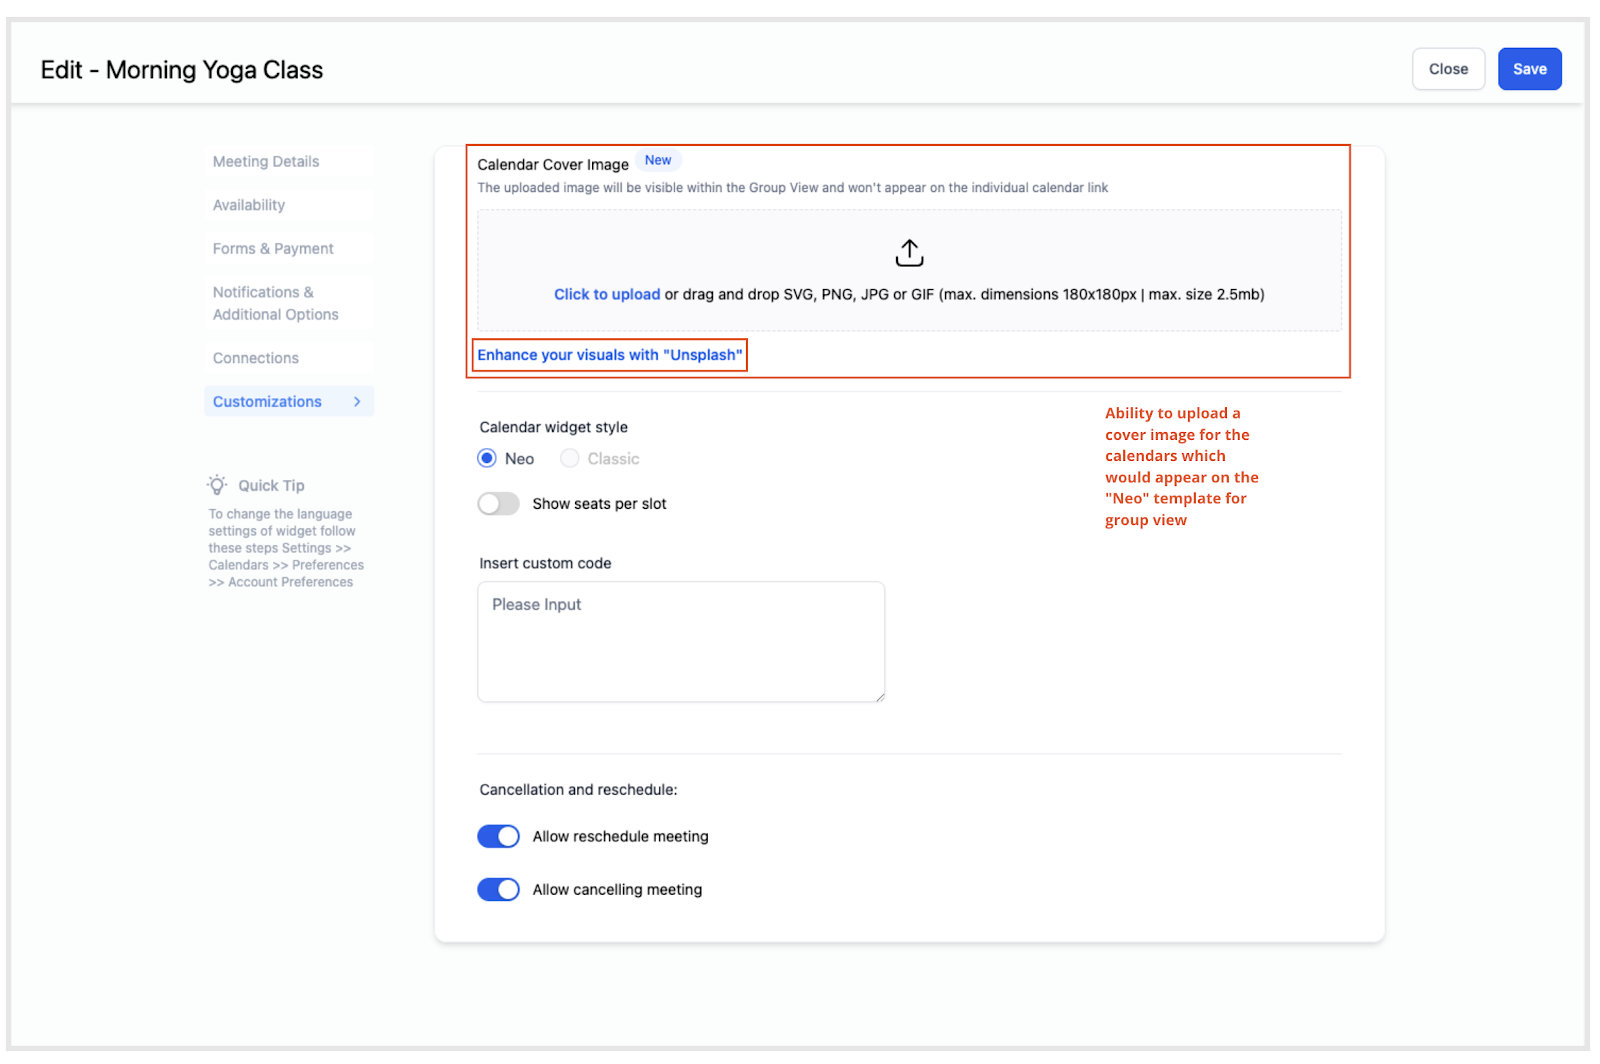
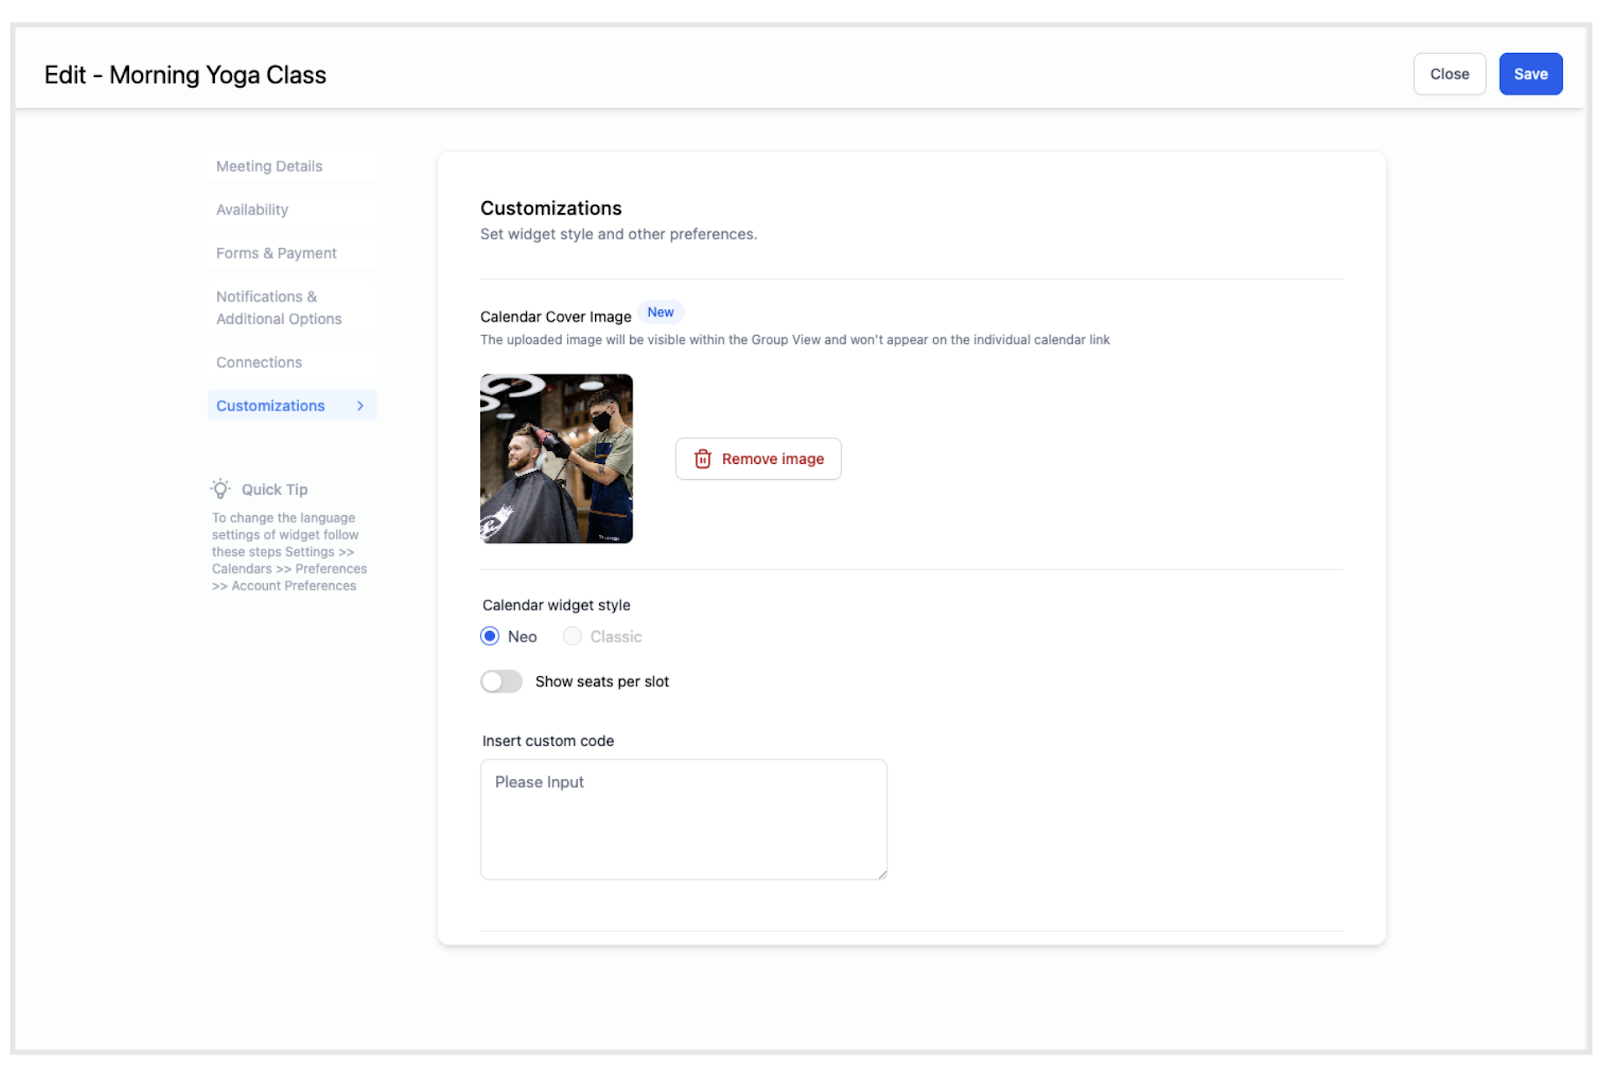
Recommendation for Neo Template
It is recommended to add a calendar cover image, especially if you plan to use the Neo Template. A cover image can enhance the visual appeal and professionalism of your calendar.
How do you add the Group Calendar to a page or send it as a link?
To do that, go to Calendar Settings and click on “Groups”. Look for the Group Calendar you want and click on the 3 dots which correspond to the Action dropdown.
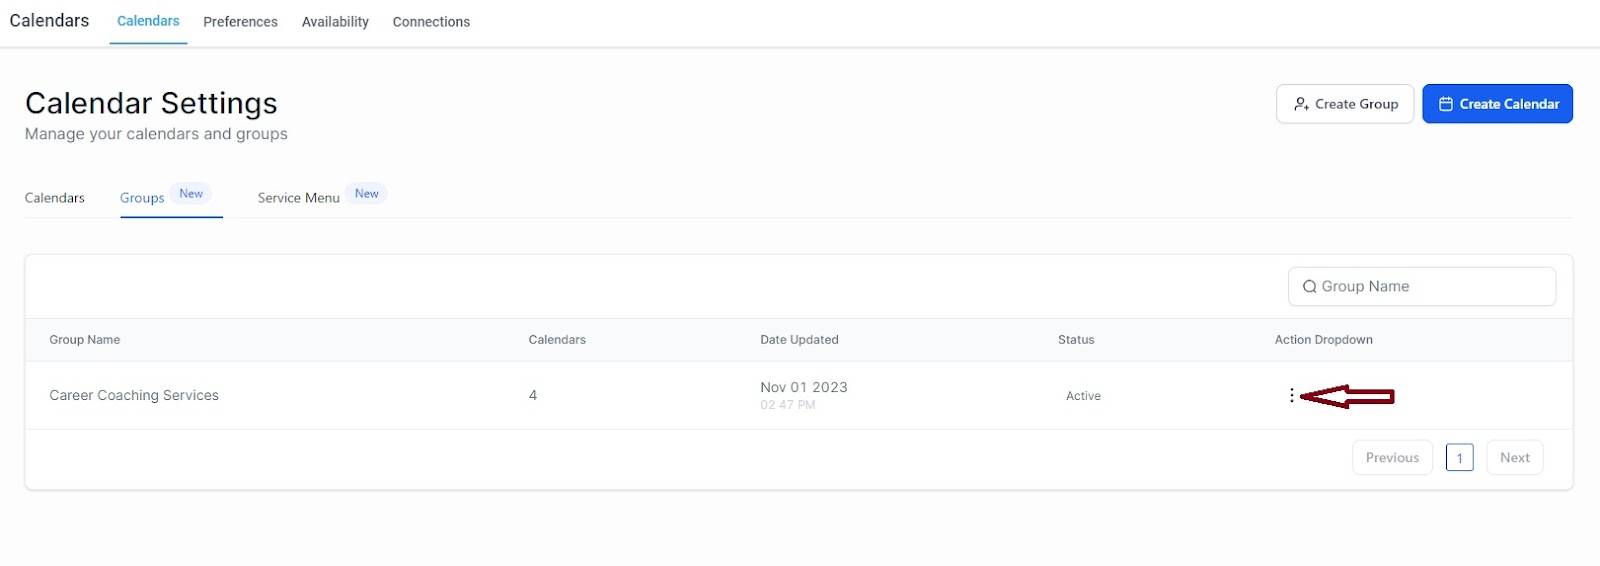
You can choose the “Scheduling link” to send to your clients or the “Embed code” to integrate the calendar to your page.

FAQs
Question: What is the Neo Group View Template, and how does it improve group management?
Answer: The Neo Group View Template is our more advanced version of the Calendar widget designed to make group management easier. It offers a more polished and visually appealing group view, simplifying the user experience for both administrators and end users.
Question: How can I access the Neo Group View Template in my calendar settings?
Answer: To access the Neo Group View Template, go to your Calendar Settings and select the “Templates” dropdown. Here, you can choose between the “Classic” and “Neo” templates for your groups.
Question: What are the key features of the Neo Group View Template?
Answer: The Neo Group View Template offers several key features, including staff selection for services, a sophisticated design, calendar-specific images, and a streamlined flow of information. These features aim to improve the overall group experience.
Question: How do I create a group using the Neo Group View Template?
Answer: To create a group with the Neo Template, follow these steps: Access Calendar Settings, select Groups, click on “Create Group,” choose the “Neo” template, fill in group details, and click “Create.”
Question: Can I switch between the “Classic” and “Neo” templates after creating a group?
Answer: Yes, you can switch between templates even after creating a group. Simply access the group’s settings and choose your preferred template.
Question: How do I upload a cover image for a calendar using the Neo Template?
Answer: To upload a calendar cover image, access Calendar Settings, click on “Edit Calendar” (for an existing calendar) or proceed to “Advanced Settings” when creating a new calendar. In the “Customization” tab, you’ll find an option to upload a calendar cover image.
Question: Why is it recommended to add a calendar cover image when using the Neo Template?
Answer: Adding a calendar cover image enhances the visual appeal and professionalism of your calendar, making it more engaging for users. This visual enhancement aligns well with the Neo Template’s modern and polished design.
Keep learning