How to Set Up the Service Menu in GoHighLevel Calendars
Updated April 3, 2024
Managing multiple services across separate calendars frustrates clients and costs your business bookings. With GoHighLevel's Service Menu, you'll set up a centralised scheduling hub where clients can browse services by category, choose staff, and book multiple appointments in a single session.
Experience the convenience of the Service Menu, your centralized hub for showcasing all your services effortlessly. Picture a well-organized array of services, simplifying navigation for your clients. Moreover, this menu empowers your clients to seamlessly book multiple services, whether for themselves or their guests, using just one booking widget.
The Service Menu showcases selected Service Calendars, uniquely tailored for service-oriented businesses. Within these calendars, users can craft diverse services, assign staff, categorize them efficiently, and present them all through a single scheduling link – the Service Menu.
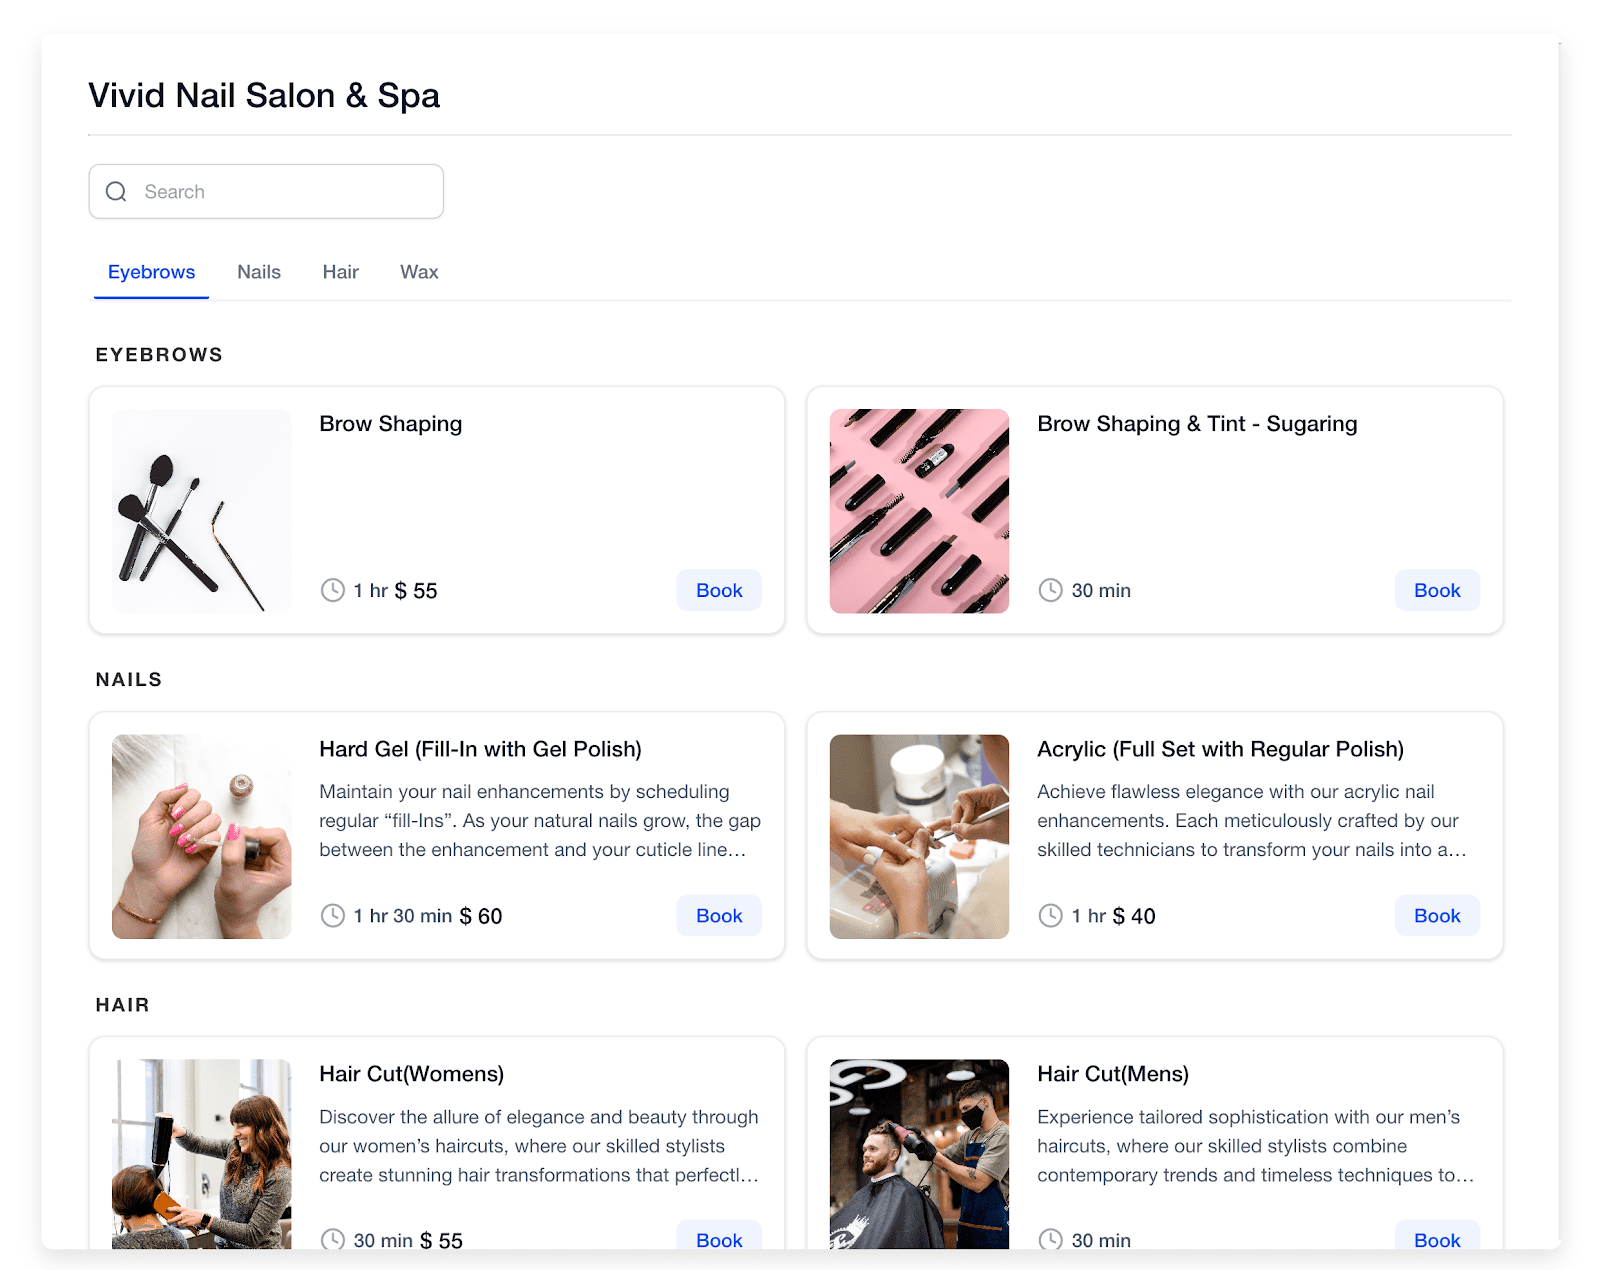
For example, In a salon, you’ll find an array of hair services such as ‘Hair Cut, Hair Spa, and Hair Coloring’ categorized under ‘Hair’, while skin treatments like ‘Facial, Clean Up, and Bleaching’ are classified under ‘Skin’. This categorization enables clients to easily select their desired services and effortlessly book appointments.

What can you do with the Service Menu?
Empower your service-based business to reach new heights with the dynamic capabilities of a Service Menu. Explore the boundless opportunities it offers and unlock your potential for unparalleled optimization. Here’s a glimpse into what awaits you:
1. Create Calendars for Each Service:
- Easily set up a dedicated calendar for each service you offer
- Assign staff members to these service-specific calendars
2. Organize Calendars into Categories:
- Group your calendars into categories, simplifying navigation
- Choose which groups / services to display on the scheduling page
- Create a centralized booking widget for all your services. No more navigating through different calendars and becoming overwhelmed
3. Streamline Booking for Clients:
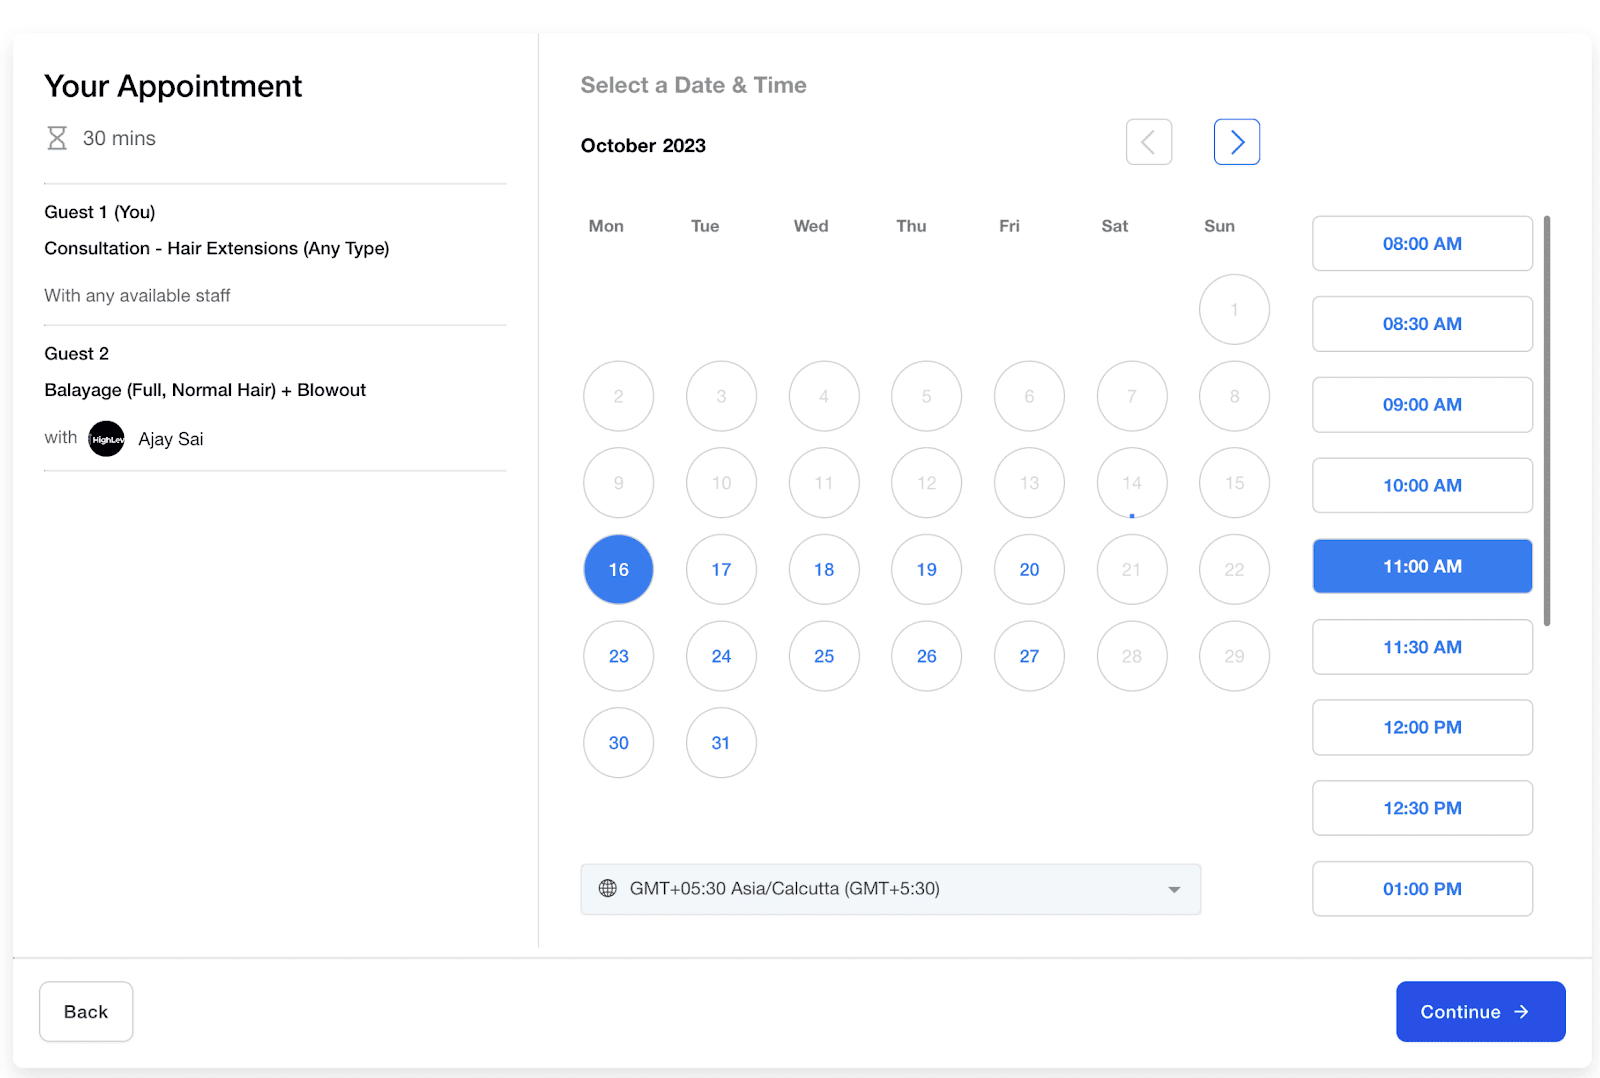
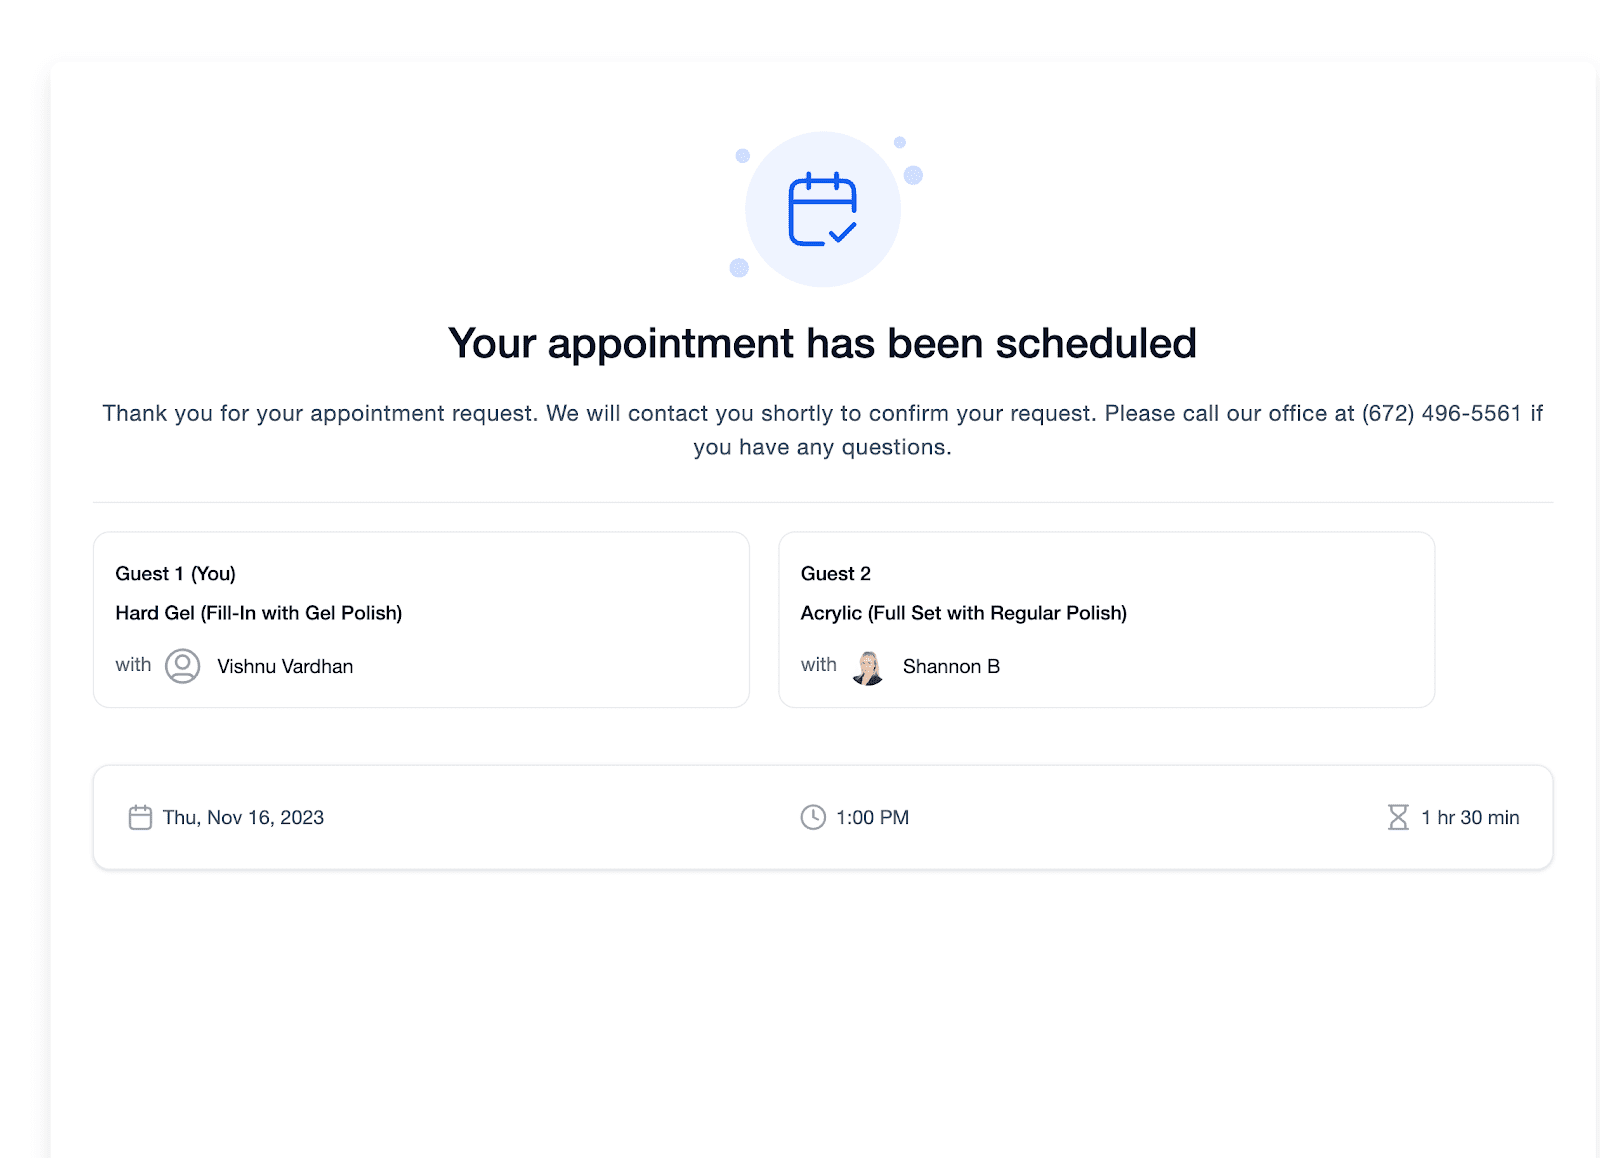
- Clients can easily book multiple services or schedule appointments for multiple people from one booking
- They can also select their preferred staff member while booking an appointment
- Clients get important information related to the duration, cost and assigned staff member for each appointment
Who Can Use It?
The Service Menu is perfect for a range of businesses offering services. This includes but is not limited to:
- Salons and Hairdressers
- Spas and Wellness Centers
- Massage and Therapy Clinics
- Fitness Studios and Trainers
- Healthcare Providers
- Event Planners
- Pet Groomers
- And many more!
If you’re in the business of providing services and want to enhance the booking experience for your clients, the Service Menu is your ideal solution.
Getting Started: Prerequisites
1. First, create a Group: Think of a group as a category for your services. Any calendars added to a group will appear under that category tab on the appointment widget. To create a new group, simply head to Calendar settings > Create Group.
For Example: You can create the Group “Hair Care” for your hair related services like Hair Cut, Hair Spa, Hair Coloring etc.

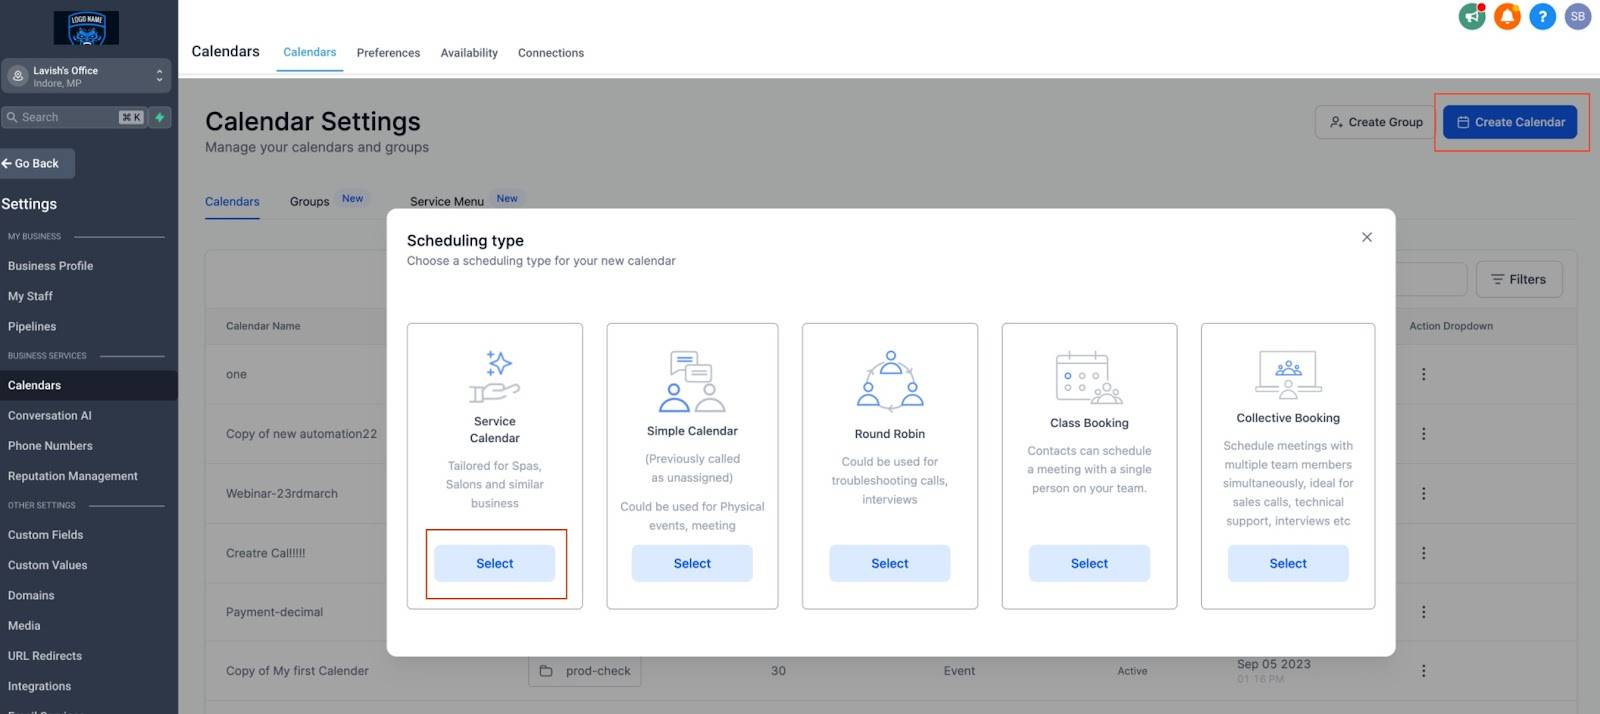
2. Then, create a Service Calendar: Design a dedicated calendar for each service you offer and assign the calendar to its respective group.
For Example: You can create different calendars for your Hair Care services. Here you will have four service calendars, one for each service – Hair Cut (Male), Hair Cut (Female), Hair Spa, Hair Coloring.
3. Finally, create a Service Page Menu: Decide which service calendars and groups you want to display on the appointment widget and give your clients a single place to make bookings.
For Example: Your service menu can have two categories “Hair Care” and “Skin Care” with different services listed under them.
By following the above steps, you’ll be able to efficiently schedule your appointments.
How to create a Service Menu?
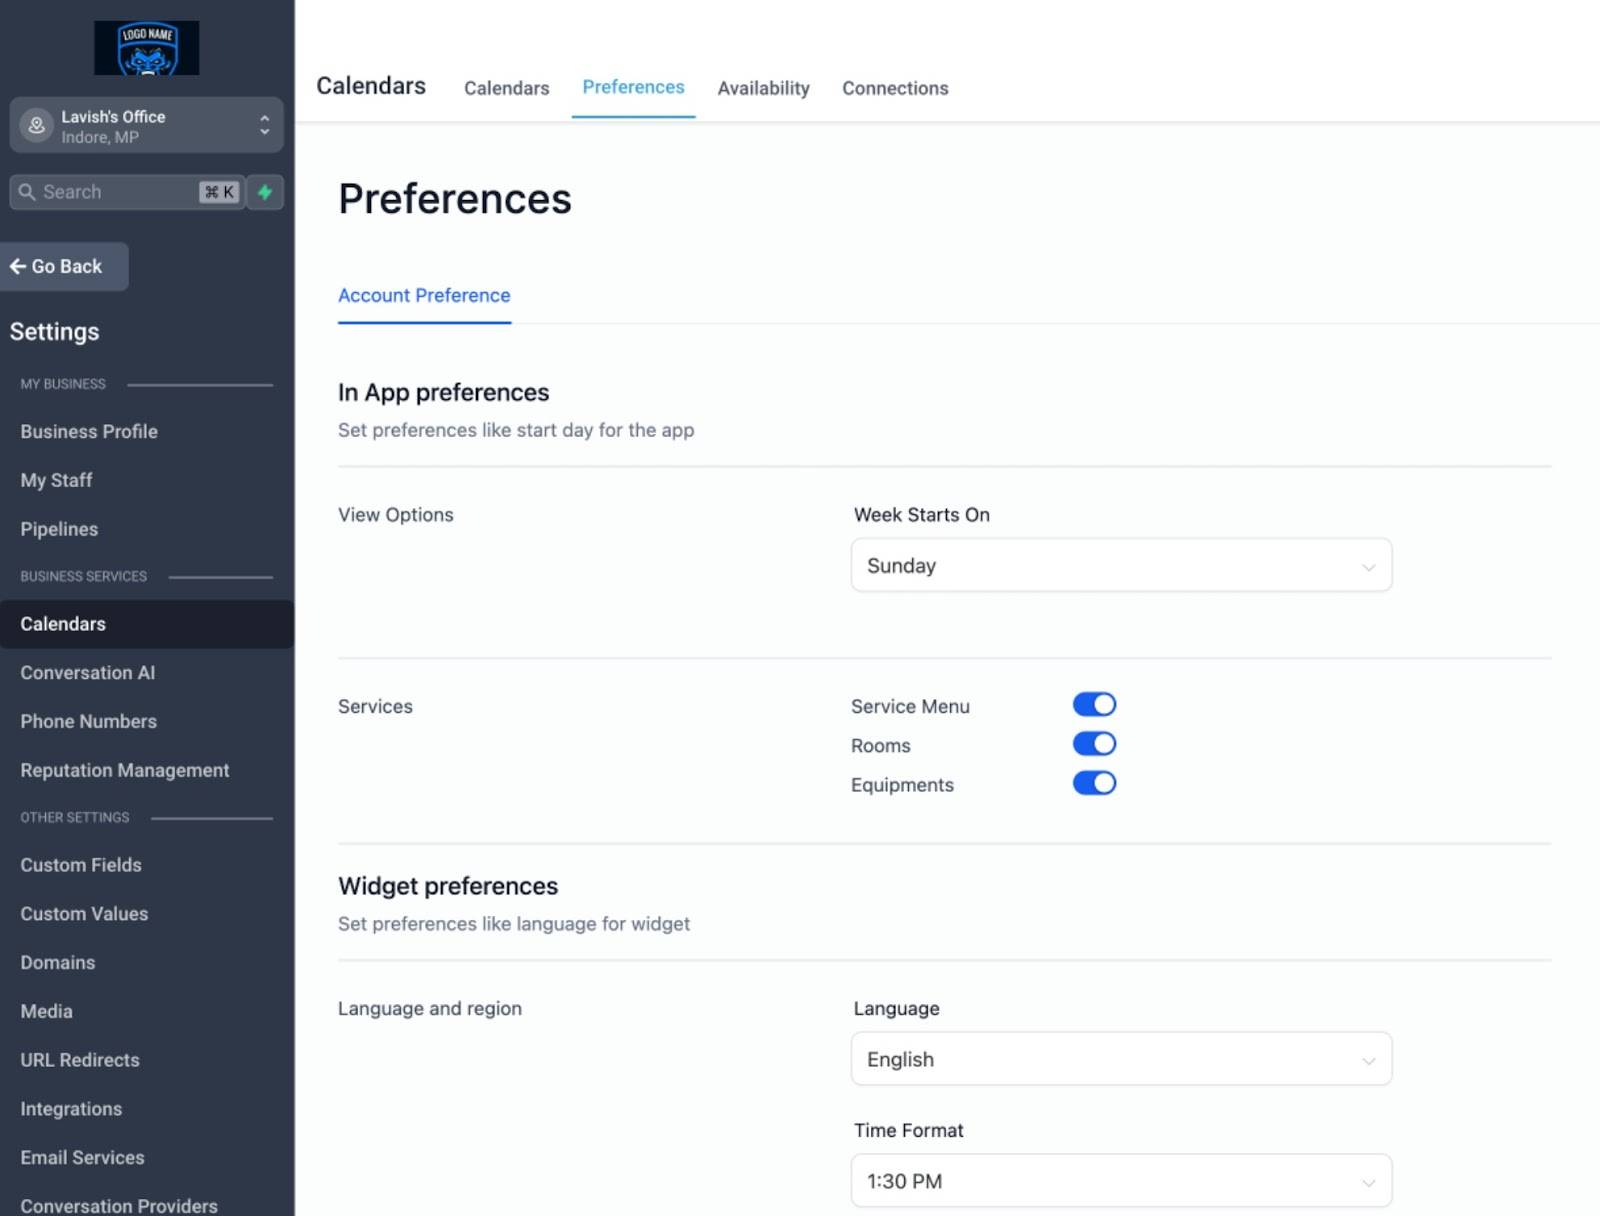
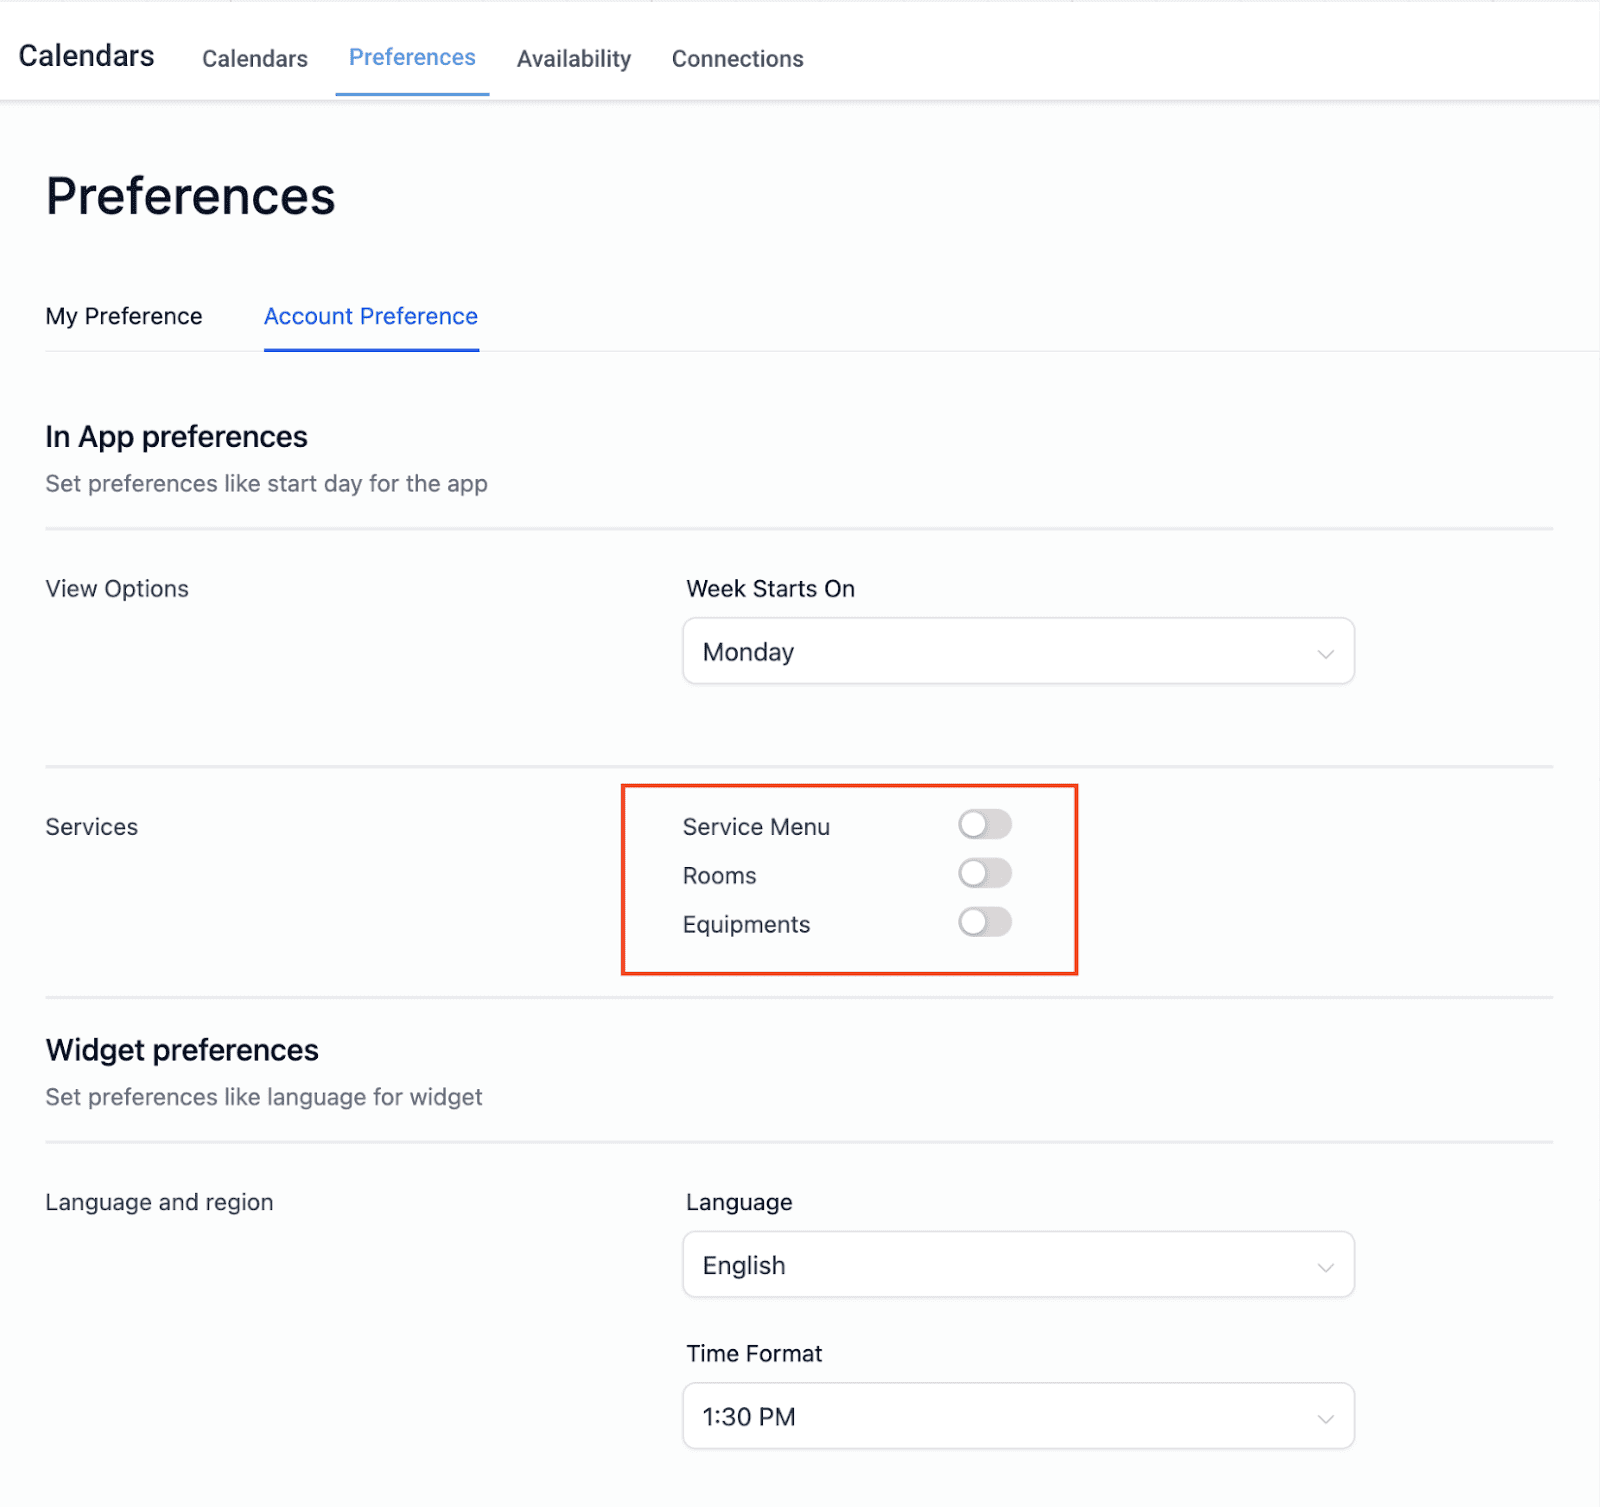
Step 1: Enable Service Menu
- Go to Calendar Settings.
- Click on “Preferences.”
- Under “In-App Preferences,” toggle the “Service Menu” option to turn it on.
- You will now see a “Service Menu” tab under “Calendar Settings” > “Calendars.
Step 2: Prepare your Service Calendars
Before you create a service menu, ensure that you have created your service calendars and added them to groups. Here’s how:
- Create your service calendars in the “Calendar Settings.”
- Add these calendars to relevant groups.
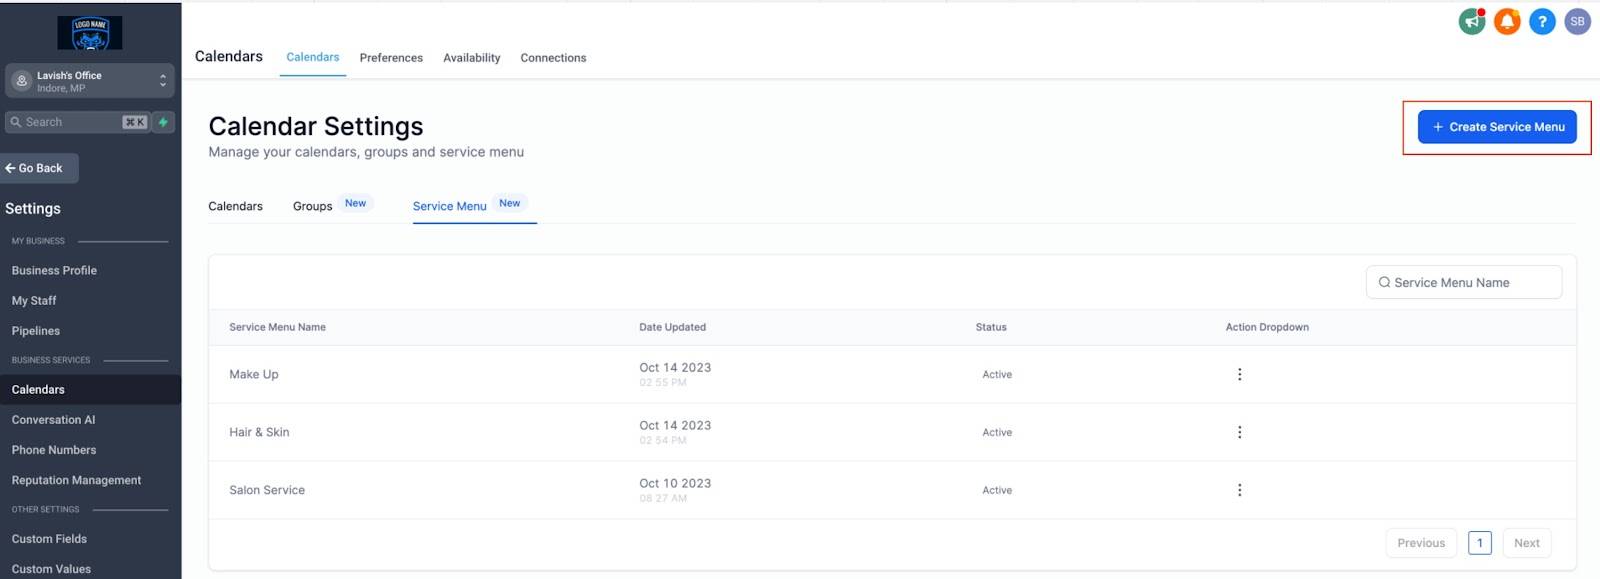
Step 3: Create your Service Menu
- Head to the “Service Menu” tab.
- Click on “Create Service Menu.”
- Fill in the following details for your menu:
- Name: Provide a name for your service menu.
- Description: Add a brief description of your services.
- URL/Slug: Customize the URL for your service menu.
- You can also:
- Toggle the consent checkbox on/off.
- Customize the consent message.
- Choose to show a thank you message after booking or redirect users to an external URL.
- Enable/disable bookers from adding additional guests, limit bookers to booking only one service instead of multiple, and determine whether bookers can select their preferred staff member.
- Insert Custom Code to customize the look and feel of the service menu.
- Once you’ve filled in the details, move to the next step – “Select Services”


Step 4: Select & Arrange your Services
1. In the Select services tab, select the groups or individual services that you want to display in the menu.
Note: If you haven’t created service calendars or added them to groups, you’ll need to do so before they appear in this list
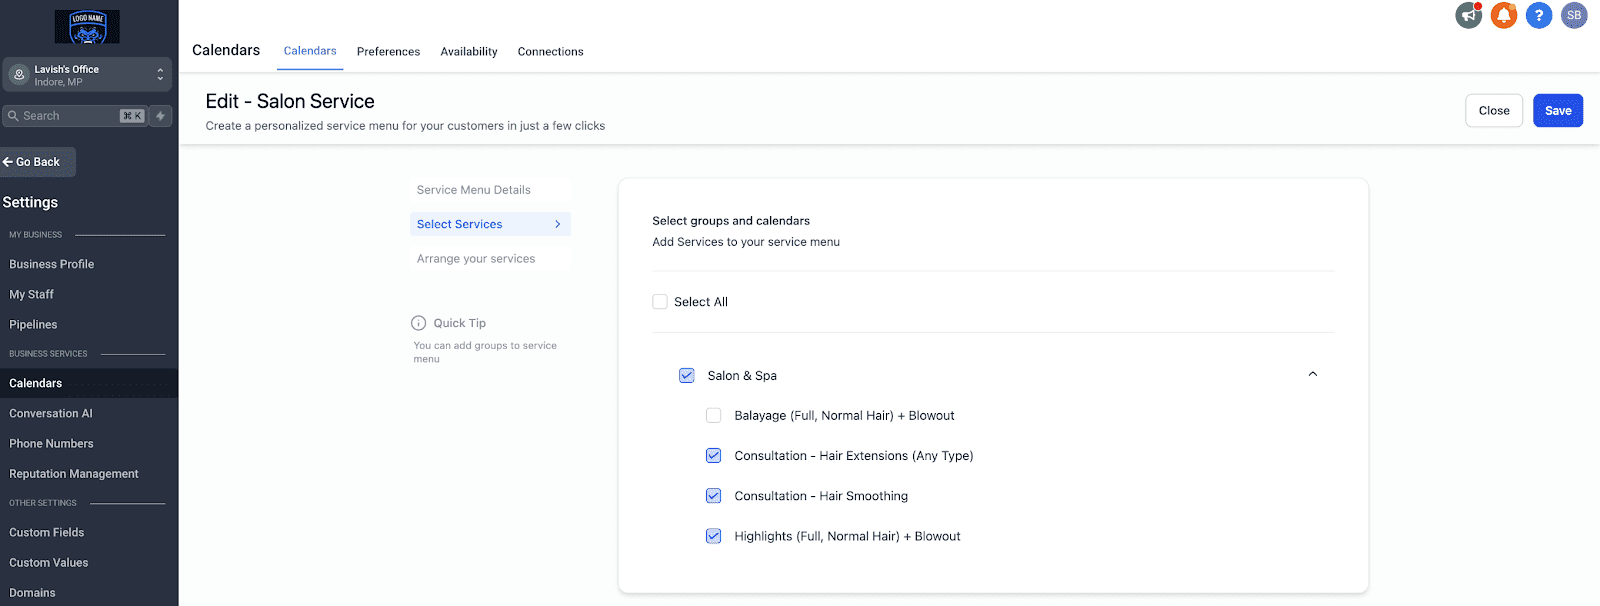
2. After selecting the services, arrange them in the order you want them to appear on the service menu..
3. You can decide the sequence in which the groups are displayed from here.
4. Once you’re satisfied with the arrangement, click “Save.”
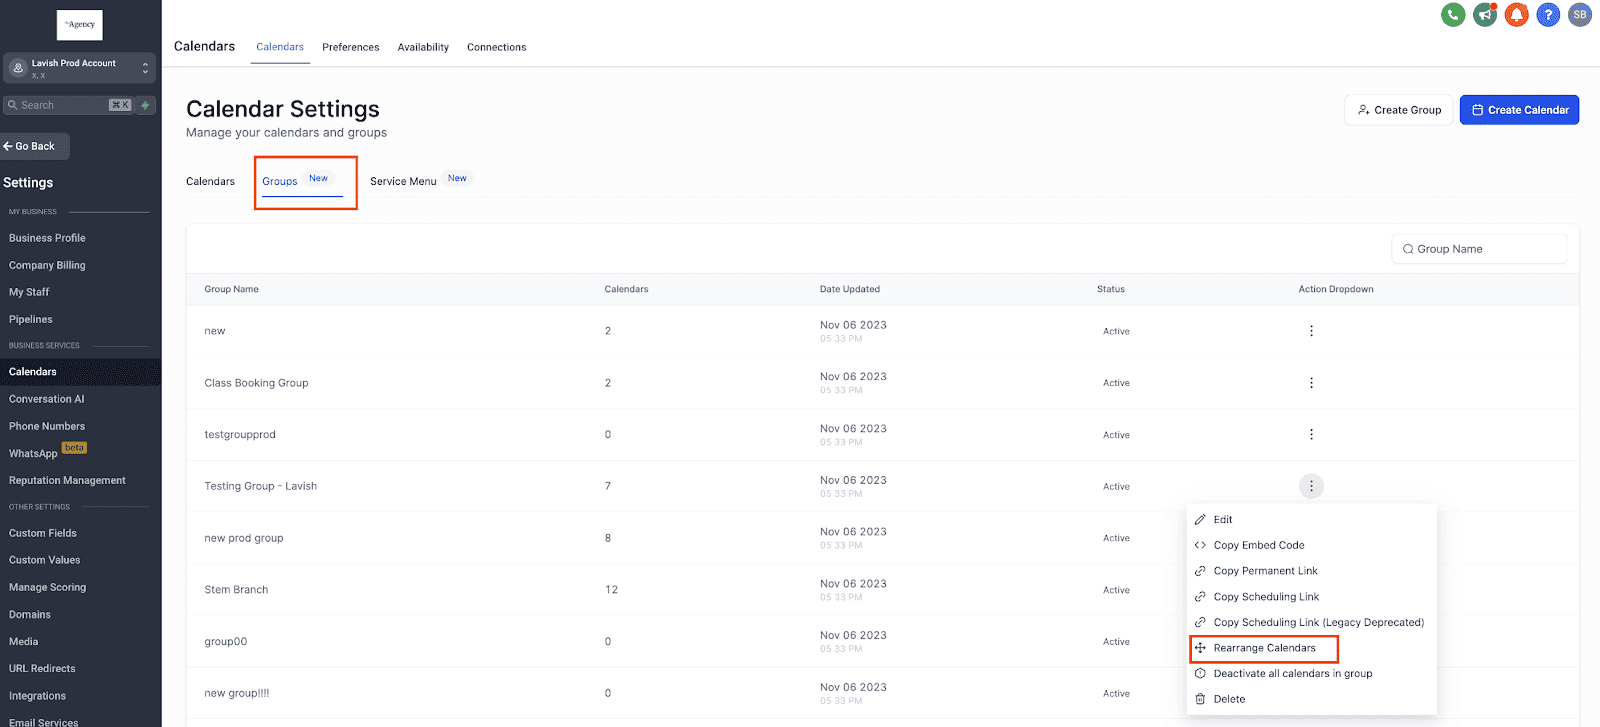
If you wish to change the order of services within groups:
- Go to the Groups Tab.
- Click the three dots next to your chosen group.
- Select “Rearrange Calendars.”
- Adjust the sequence and click “Save.”
Voila, your service menu is now ready to be used. You can use the scheduling link provided to direct your clients to the service menu.
How to Disable Service Menu?
To disable Service Menu, follow these steps:
- Go to Calendar Settings.
- Click on “Preferences.”
- Under “In-App Preferences,” toggle the “Service Menu” option to turn it off.
- After turning off the “Service Menu” option, note that the “Service Menu” tab under “Calendar Settings” > “Calendars” will no longer be accessible.
Keep learning