How to Automate One-Time Booking Link Generation in GoHighLevel
Updated April 4, 2024
Manually creating and sending individual scheduling links wastes time and introduces errors that disrupt the booking process. By automating one-time booking link generation inside a GoHighLevel workflow, you can deliver unique, self-expiring calendar links to every contact the moment they trigger your chosen condition.
Understanding One-Time Links
A singular scheduling link, known as a one-time link, possesses a distinct quality of self-expiration upon its usage for booking. By employing the ‘Generate One-Time Booking Link’ feature, users can seamlessly integrate the creation of such links into their workflow with ease.
Key Benefits of Integrating One-Time Links into Your Workflow
- Effortless Scheduling: Say goodbye to the laborious task of creating links manually. Our streamlined approach ensures scheduling is smooth and error-free every time.
- Adaptable Workflow Integration: Seamlessly integrates into a variety of workflows, catering to unique needs and becoming an essential tool for diverse scheduling situations.
- Improved Booking Control: Revolutionize your booking management with our dynamic and flexible system, empowering users with enhanced control and adaptability.
How to Generate Dynamic One-Time Links
For effortlessly creating dynamic One-Time Links within your workflow, just adhere to these straightforward instructions:
1. Create a Workflow: Begin by crafting a customized workflow within your account. Establish the trigger that sets the workflow in motion, tailored precisely to your requirements.

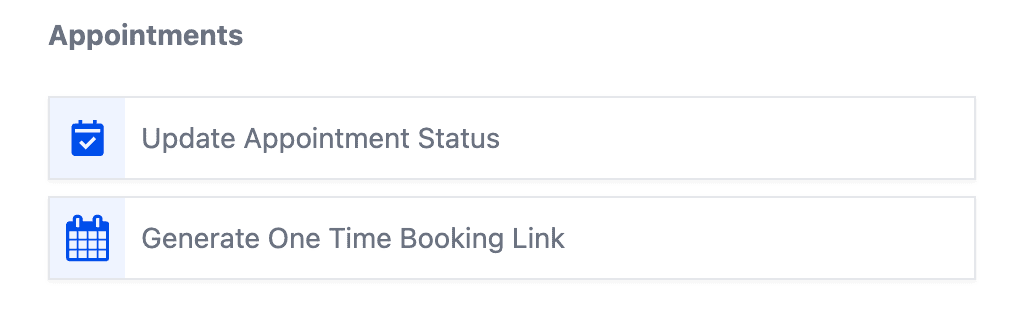
2. Add the ‘Generate One-Time Booking Link’ Action: Enhance your workflow by incorporating an action. Simply go to the ‘Appointments’ section and opt for ‘Generate a Single-Use Booking Link.’
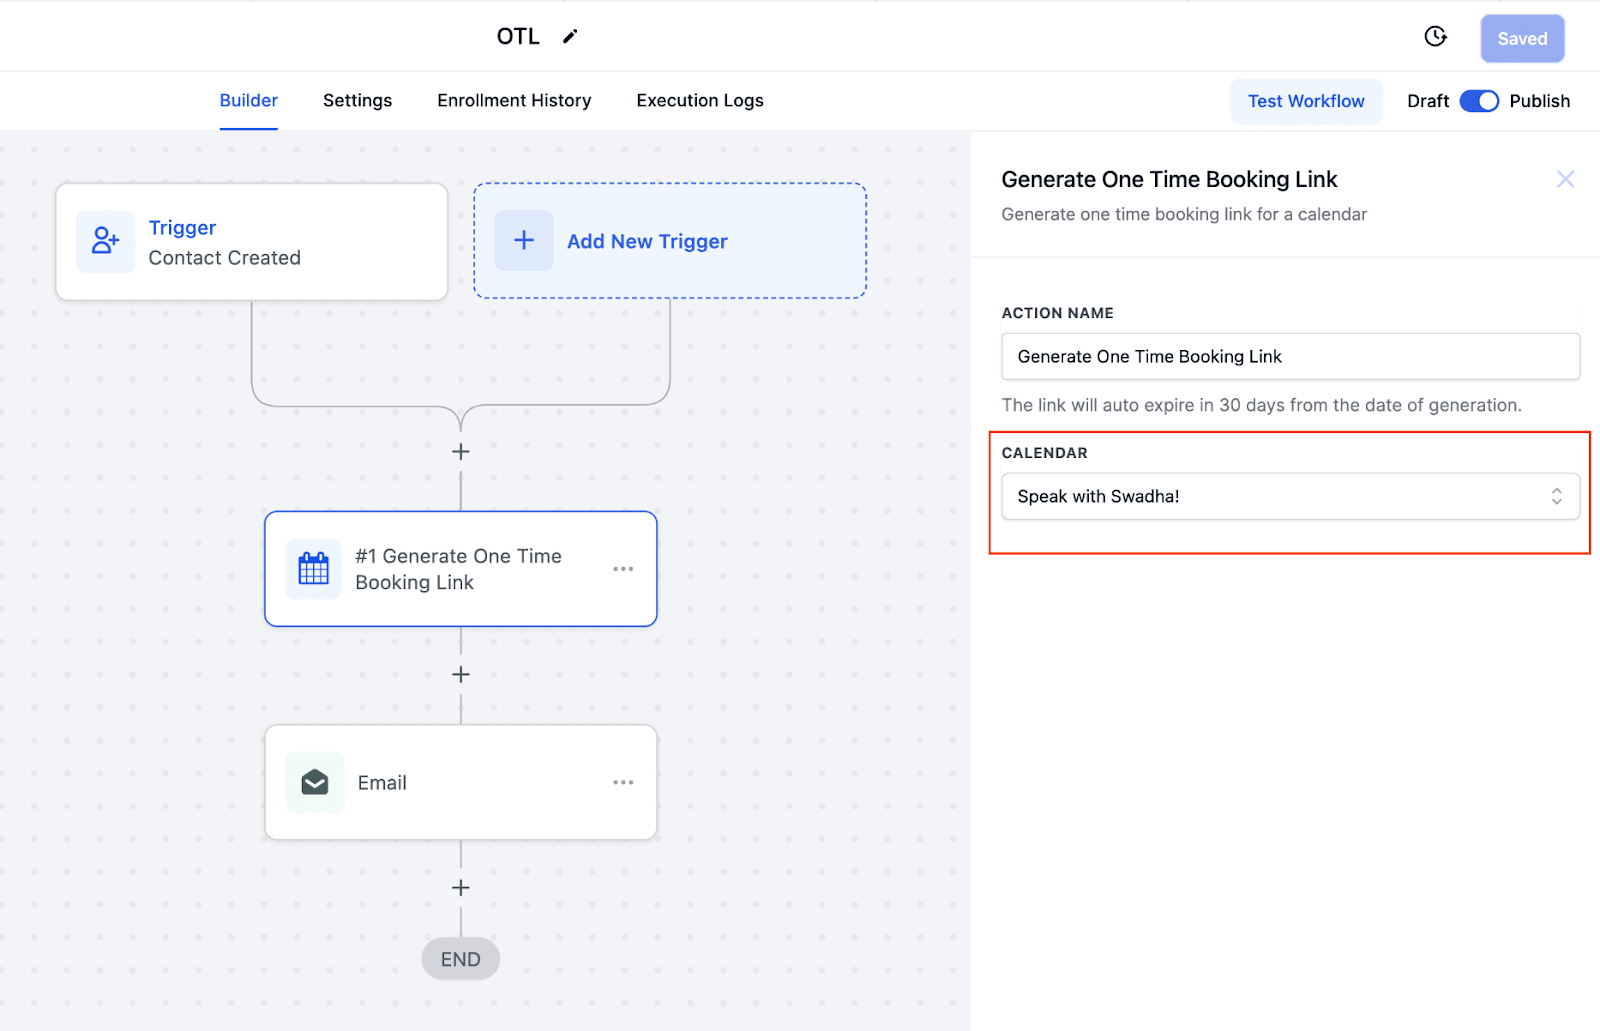
3. Choose the calendar for which you want to generate the one-time link.
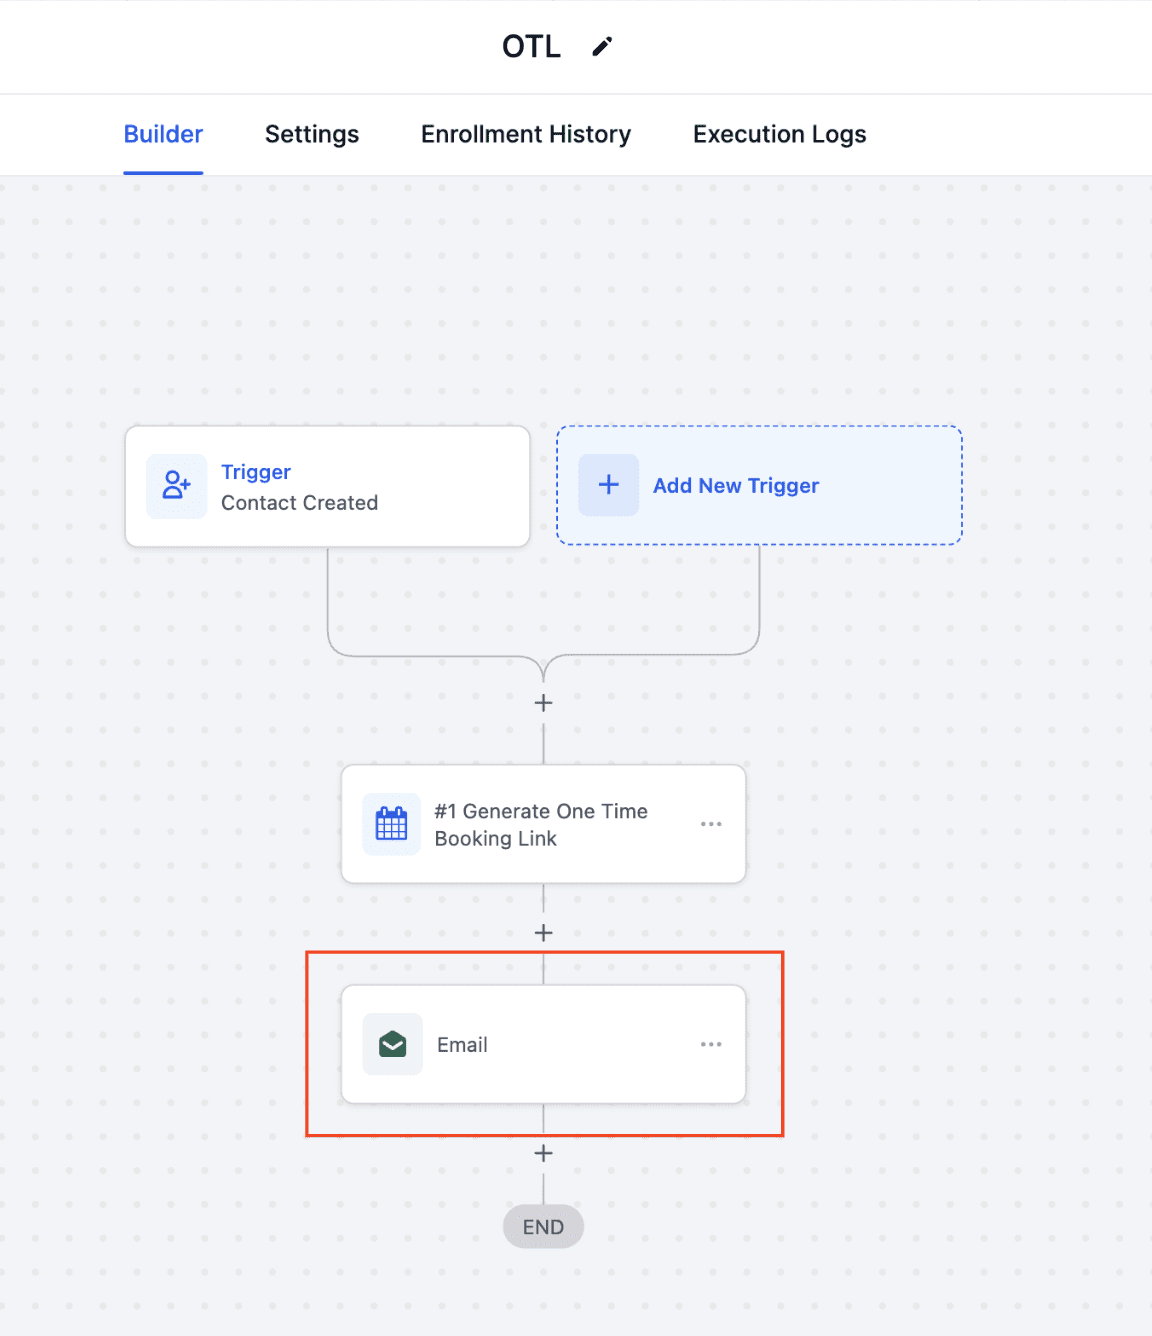
4. Share the Generated Link: Incorporate a communication action, such as email, into your workflow to easily share the link with your contacts.
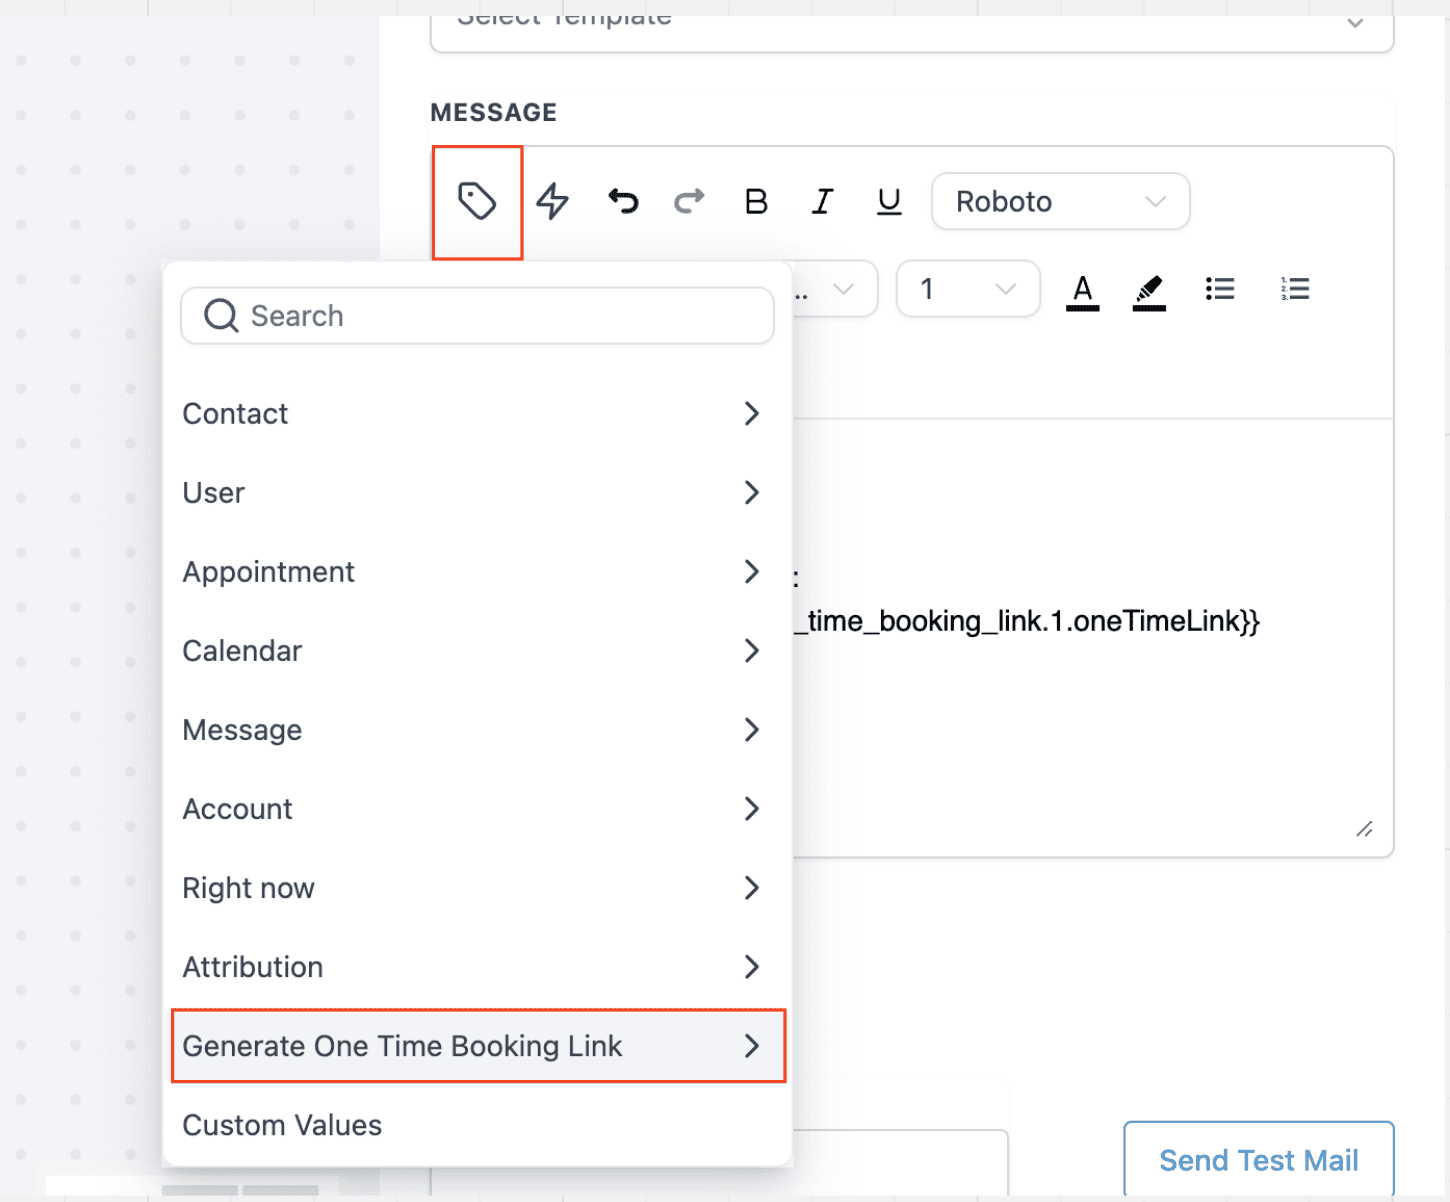
5. Add the Custom Value: Incorporate the distinct one-time link, which dynamically generates upon each trigger activation, into the email content via a custom value insertion. Opt for ‘Generate One-Time Booking Link’ and then select ‘One-Time Link’ for seamless integration.
6. Customize Email Body: Customize the email body as needed and click ‘Save.’
7. Publish Workflow: After configuring your workflow, activate it. From then on, whenever a contact meets the specified condition to trigger the workflow, a distinct one-time link will automatically be created and dispatched to them via email.
Keep learning