GoHighLevel Calendar Setup: Configure Availability, Slots & Groups
Updated March 9, 2023
Misconfigured calendars in GoHighLevel lead to double-bookings, missed appointments, and frustrated clients before a single lead converts. This guide walks you through creating and configuring a GoHighLevel calendar — from slot duration and buffer settings to group distribution and office hours.
Calendars are a valuable tool for managing appointments within your system. However, before creating one, it’s important to have a clear understanding of unassigned calendars versus group calendars. For more information on groups and setting up group calendars, please refer to our other articles.
Part 1: Creating and Managing Calendars
Step 1: Navigate to Calendars
- Select + New Calendar
Step 2: Calendar Team & Event Setup
- You can select your appointment distribution preference for services offered by group calendars. However, this option is not applicable for individual calendars. This setting determines how appointments for services will be allocated among members of the group.
- Optimize for availability – For each member of the group, you can choose their user, priority level, and location. Availability is determined based on the priority level selected for each member.
- Optimize for Equal Distribution – You can select a user and specify their location for each member of the group. Appointments are scheduled in sequence, beginning with the top user on the list and moving down.
- Calendar – Description on Calendar
- Calendar name – Name for your calendar
- Description – Written representation for event
- Calendar URL – Path Name for your calendar link
- Appointment title – Name for appointment (add title after {{}})
- Event color – Color the event will appear in
- Save & Continue.
Step 3: Managing Availability
- Customize Appointment Slot Settings
- Slot Duration – Duration of each appointment (30 minutes, 1 hour, etc.)
- Slot Interval – Frequency of appointment availability
- Buffer Duration Between Appointment – This setting controls the minimum time interval between appointments, ensuring a buffer period between them. For example, if you have 30-minute appointments and set a 15-minute buffer, once an appointment is booked for 10:00am-10:30am, the system will automatically create a 15-minute buffer and the next appointment could be scheduled for 10:45am.
- Appointments Per Slot – This feature sets a limit on the maximum number of appointments that can be booked for a user during a given time slot. If the number of appointments exceeds this limit, the system will either move to the next user in the round-robin queue or indicate that the slot is unavailable for the prospect to book.
- Appointments Per Day – Maximum number of appointments permitted per day on this calendar
- Choose Scheduling Notice
- Minimum Scheduling Notice – Days to be notified before appointment
- Date Range – Days events can be scheduled in the next entered days
- Set Office Hours
- Select days – Blue = Days selected, Gray = Unselected Days
- Select + Hours to add additional hours to specific days
- Select Apply All to copy hours for the rest of the days selected
- Save & Continue
- NOTE: If the timezone of the company is not the same as that of the user, the calendar availability must be adjusted to match the user’s timezone instead of the company’s timezone. For instance, if a user is available from 8am-5pm PST and the company is based in EST, the calendar availability must be set to 11am-8pm EST to display the correct availability.
Step 4: Confirmation Settings
- Form Settings
- Custom Form – Instead of using the default form, which only includes fields for first name, last name, email, and phone number, you have the option to create a custom form for the booking widget.
- Use Sticky Contact – This system tracks the journey of contacts and stores any information they have provided.
- Use Stripe Payment – In order to use this feature, your account must have Stripe integration. You can select the amount, currency type, and a message for the charge description.
- Notification & Additional Options
- Let calendar auto confirm my appointment – Auto confirm an open sport on your calendar
- Send appointment alert emails to the assigned group member – It’s important to keep in mind that if this option is chosen, there may be instances where the emails make it appear as though the appointment was not automatically confirmed.
- Allow google calendar to send invitation or update emails to attendees – Allow google to notify attendees of appointment
- Allow rescheduling – Option for client to reschedule
- Allow cancellation – Option for client to cancel
- Additional notes – Contains link to reschedule or Cancel
- Pixel ID – It will come through as part of your schedule
- Form Submissions
- Form submit Redirect URL – In case you have a confirmation page and want visitors to go on the next level of the funnel
- Customize Thank You Message – Type in the box here if you want something different then the default message
- Click Complete to confirm your changes and save your settings.
Step 5: View Your Calendar
- The Calendar settings will display all the calendars that have been saved to the account.
- Click on … to make changes:
- Edit – Make Changes to Calendar
- Disable Service – Disables calendar until it is enabled again
- Delete – Delete calendar from the account
Part 2: Using the Calendar
Step 1: Access Your Calendars
- You can access your calendar(s) directly from the Dashboard menu to view your appointments and blocked off time visually.

Step 2: Filter The Display
- If you have multiple calendars, you can switch between them by using the dropdown menu labeled “My Calendar”.
- Within the “All” section, you can filter your calendar to display either appointments, blocked time, or both.
- In the “Weekly” section, you can change the calendar display to show a monthly, weekly, or daily view.

- You can click on the ? icon to access the Event Guide or legend, which explains the different color codes used for appointments/events in your calendars.

Step 3: Adding Appointments to Your Calendars
- To schedule an appointment, either click on the desired date/time or use the “Book Appointment” button.
- In the pop-up window, select the “Book an Appointment” option.

- Choose the contact that you want to schedule an appointment for.

- Enter the appointment details and then save it by clicking on the “Save Appointment” button to add it to your calendar.
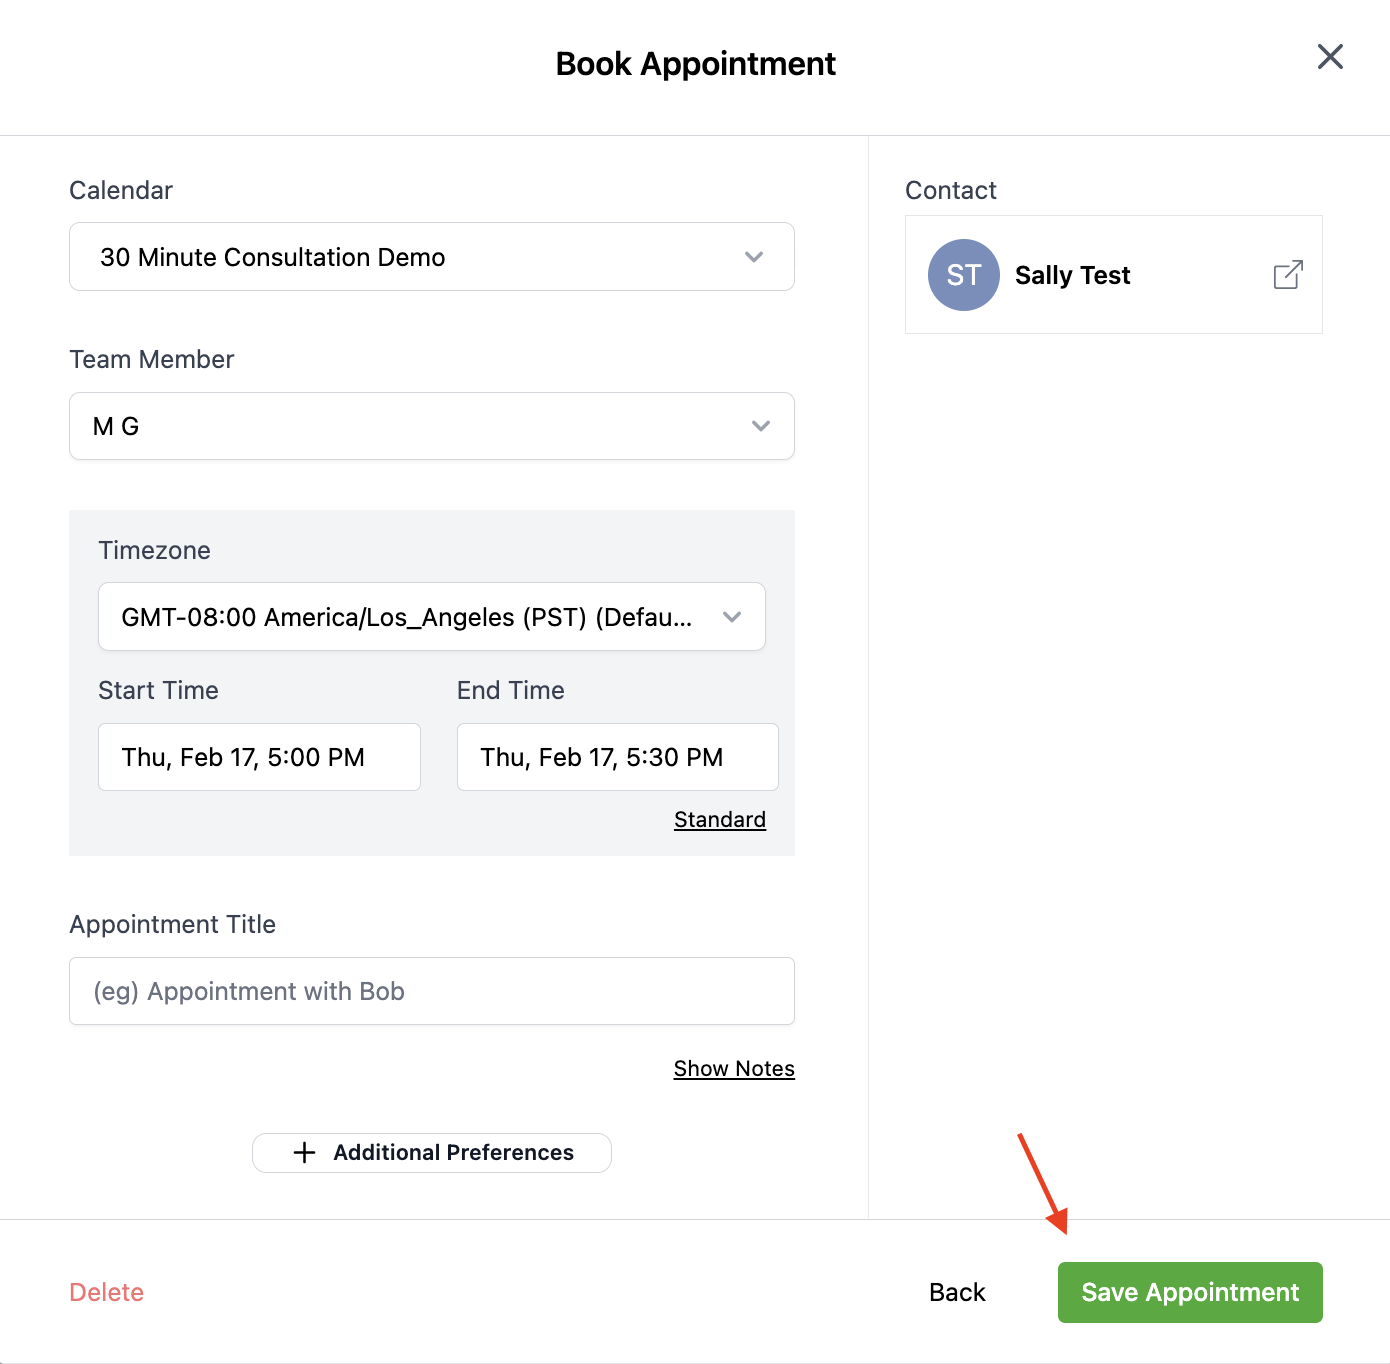
- The appointment you scheduled will be visible on your calendar at the designated date and time.
- At any time, you can edit or delete the appointment by clicking on it.

Step 4: Adding Blocked Time to Your Calendars
- To start blocking off time in your calendar for reasons such as vacation, PTO, or an offsite meeting, click on the date/time you want to block off.
- Then, select “Add Blocked Off Time” in the popup window.

- Enter the necessary information such as time zone, start and end date/time, a title and description, and the days and times you want to block off.

- To confirm and insert this time into your calendar, please click on the “Save Event” button.
At this point, you should possess a basic comprehension of how to handle and exploit the Calendar segment of your system. You have the option of configuring various personalizations and functionalities to optimize the Calendar’s performance based on your particular requirements. You may return to your Calendar Settings directly from the calendars page by utilizing this icon.

You may also access the Settings menu and then proceed to Calendars to modify any aspects. Should the need arise, you have the flexibility to make changes whenever necessary. In any case, you have the option to personalize and upgrade your calendar settings to ensure that it operates at its optimal level for you and your company.
Keep learning