How to Customize Every Membership Setting in GoHighLevel
Updated March 2, 2023
Poorly configured membership settings lead to broken branding, missed welcome emails, and a frustrating experience for your course members. By the end of this guide, you will have fully customized your GoHighLevel membership site details, custom domain, and drip email settings to match your agency's exact requirements.
In the Membership section, you have the ability to personalize multiple settings and attributes to ensure that the Membership experience for your users functions precisely as you desire.
Step 1: Accessing the Settings
- Go to the Membership section located in Sites, where you can view and modify “Site Details,” “Custom Domains,” and “Email Settings.”

Step 2: Customizing the Settings
- Select “Site Details” to revise the Site Information, Branding, and Builder Settings.
- Site Info: Add your site title, subdomain, support information, and any custom code.
- Branding: add a logo and favicon
- Builder Settings: toggle on or off the download video option

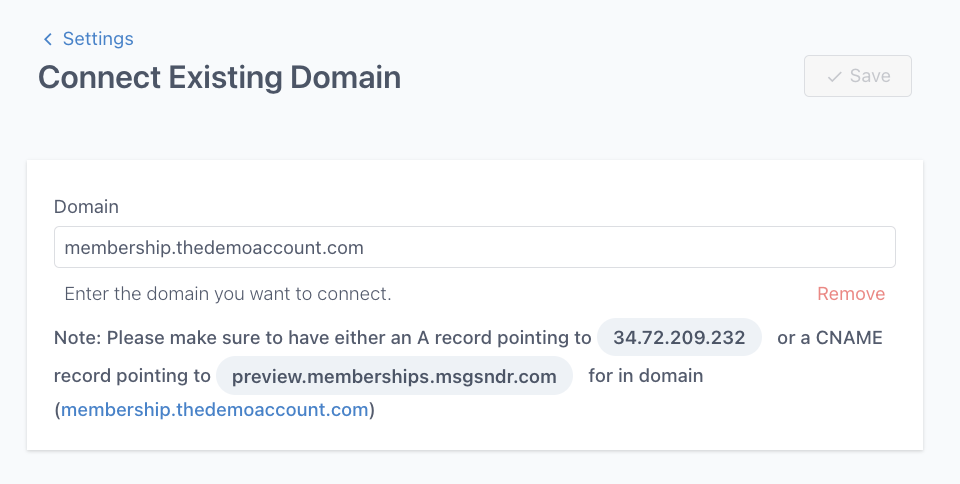
- Click into “Custom Domains” to add a custom domain.
- Access “Email Settings” to edit the email configurations for the welcome and drip emails.
- Enable or disable the feature to automatically send a welcome email upon the completion of an offer checkout.
- Enable or disable the feature to send an email when a drip category becomes available.

- Remember to save any modifications you make before exiting the Settings sections.
Keep learning