How to Create and Use Custom Values in GoHighLevel
Updated March 2, 2023
Manually inserting contact details into every email, SMS, or automation wastes time and introduces errors across your GoHighLevel campaigns. This guide shows you how to create Custom Values in GoHighLevel settings and deploy them in templates, triggers, and mass communications for fully automated personalisation.
Merge Fields, also known as Custom Values, are pre-defined values that you can incorporate into a template, which will automatically fill in when producing communication with your contacts. These fields are an efficient way to save time and optimize your system by automating data, allowing you to send customized communication promptly. For instance, by inserting “{{ contact.name }}” into an email template, it will automatically populate the name of the contact, enabling you to send personalized emails to a group of contacts or an ongoing campaign with a steady flow of added leads.
Here are some common examples of custom values you may use in your system:
- Contact > Full name: {{ contact.name }}
- Contact > First name: {{ contact.first_name }}
- Contact > Last name: {{ contact.last_name }}
- Contact > Email: {{ contact.email }}
- Contact > Phone: {{ contact.phone }}
- Contact > Company name: {{ contact.company_name }}
Your system has pre-built custom values that are inherent and frequently used, such as name, email, and phone number. These standard fields are advantageous for common merge fields, like a greeting or introduction in an email, such as “Hey {{ contact.name }}”.
You also have the option to create your own custom values that cater to your specific business or system requirements. Custom values are advantageous if you intend to establish automation by predefining values. For instance, in the following example, the “Custom Email” field will always fill in “test@demoaccount”, so you do not have to type it each time.
Step 1: Creating Custom Values
- To make your custom values, go to Settings > Custom Values.
- Click the +Add Custom Value button to create a new one.
- To remove an existing custom value, click on the trash can icon, or click on the pencil icon to edit.
- These will be pre-set custom values with predetermined values.
Step 2: Using Custom Values. You have the option to add either a standard or a self-made Custom Value into an email or SMS template, trigger, campaign, or other elements.
- Go to the communication you want to modify.
- In the video demonstration, a custom email is sent through a trigger that was established.
- In the following screenshot, a mass email is being sent from the Contacts section.
- Select “Custom Values” and a drop-down menu will emerge, along with its sub-menus.

- Click on the desired custom value, and it will be inserted into the message body.
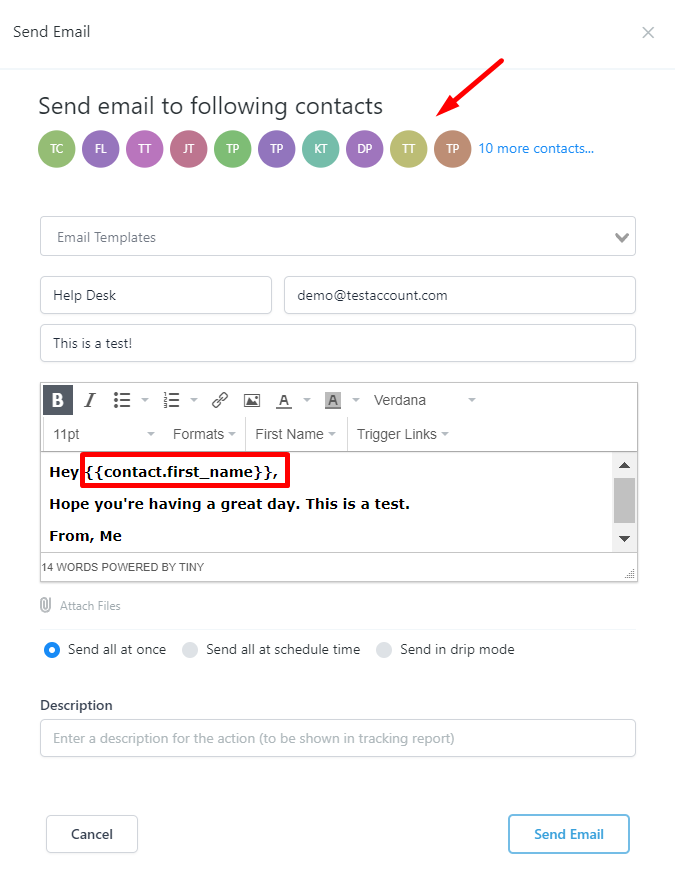
- After adding the custom value to the email template, the greeting or intro of the email will display “Hey _____” where the system will automatically populate the first name of each contact when the email is sent out.
NOTE: In the example shown, there is a space between the symbols { } of the custom values used, but in practice, there should be no space between the symbols and text.
Keep learning