How to Set Up a Cloudflare Domain Redirect for GoHighLevel
Updated January 17, 2023
When both the www and non-www versions of your domain resolve separately, leads can land on inconsistent pages and your SEO authority becomes split. This guide walks you through configuring DNS records and a Cloudflare page rule to create a permanent 301 redirect that unifies both versions for your GoHighLevel website.
This tutorial will walk you through how to set up a domain redirect in your Cloudflare account. (This is assuming you’ve already added your domains into Cloudflare. If not, check out our Cloudflare setup tutorial and then come back to this article.)
Setting up a redirect means that you’re ensuring the www. and non-www. versions go to the same page . In our example, we’re using thehelpdeskteam.com, so we’ll be setting up the redirect for thehelpdeskteam.com to direct to www. thehelpdeskteam.com, so either version a lead uses goes to the same place.
Step 1: Confirm your DNS records.
- Log in to your Cloudflare account.
- Navigate to the DNS page using the blue buttons at the top of the screen.
- This is an example of what your setup may look like:

- Be sure you have these 2 CNAME records: the root domain, and www.
- The root domain will be proxied. The www. version will be DNS only.
- This is because we have the www. version in our CRM under Settings > Domains.
Step 2: Set up a permanent redirect page rule.
- Navigate to Page Rules.
- Create Page Rule or click the tool icon to edit an existing rule.
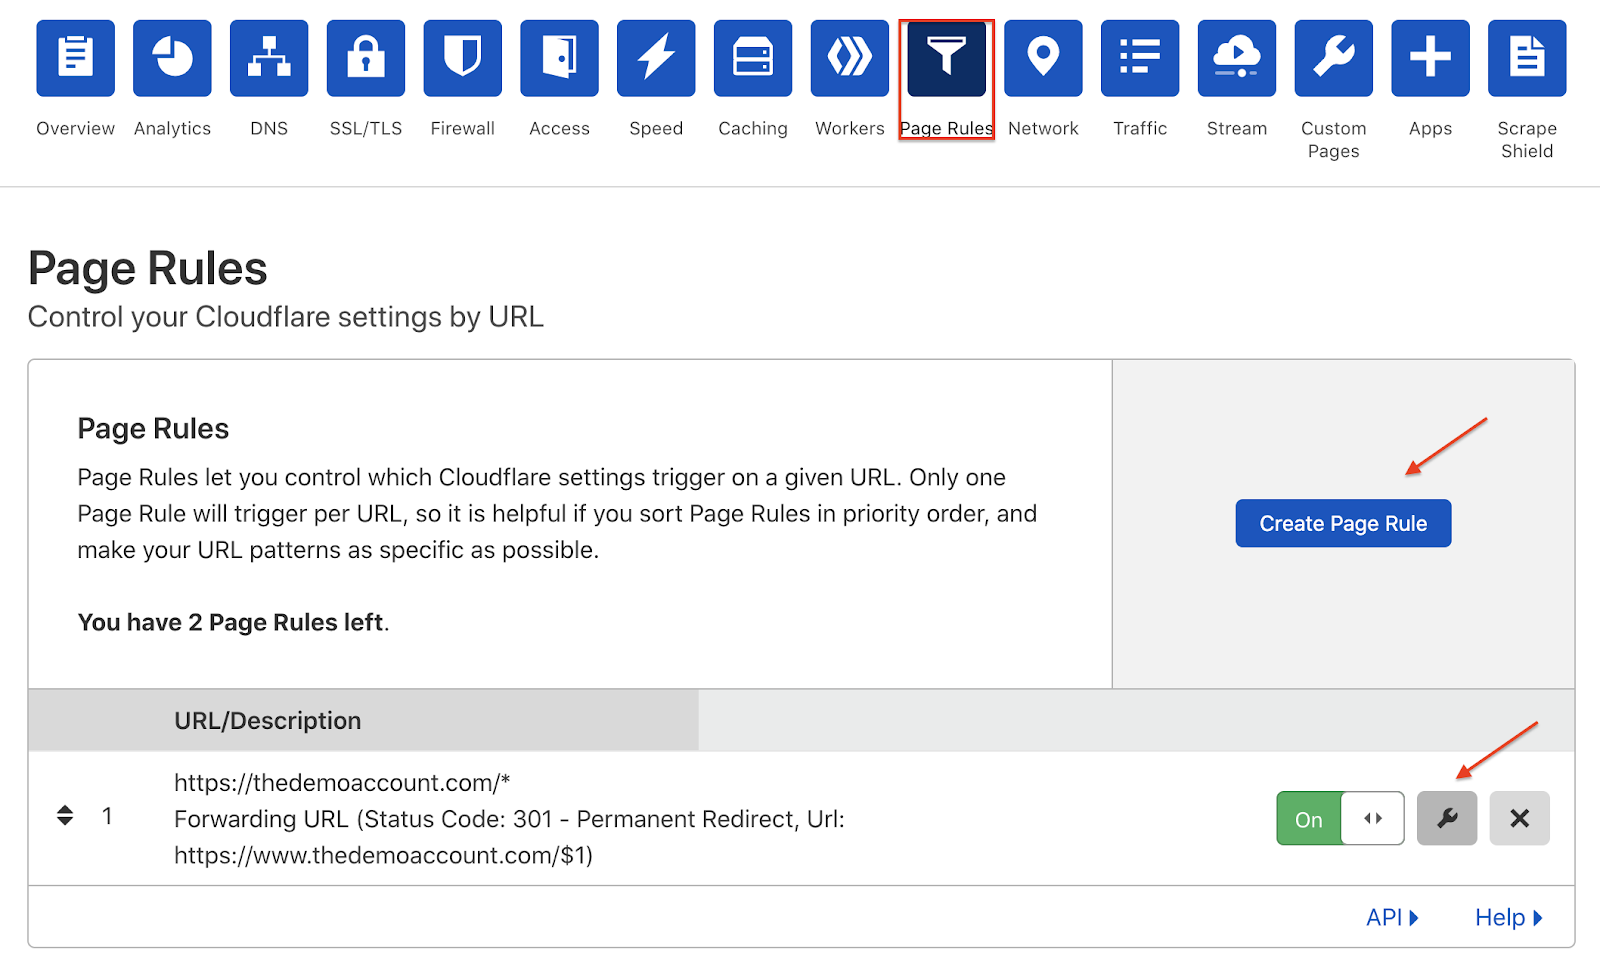
- Create a permanent redirect, which is Status Code: 301.
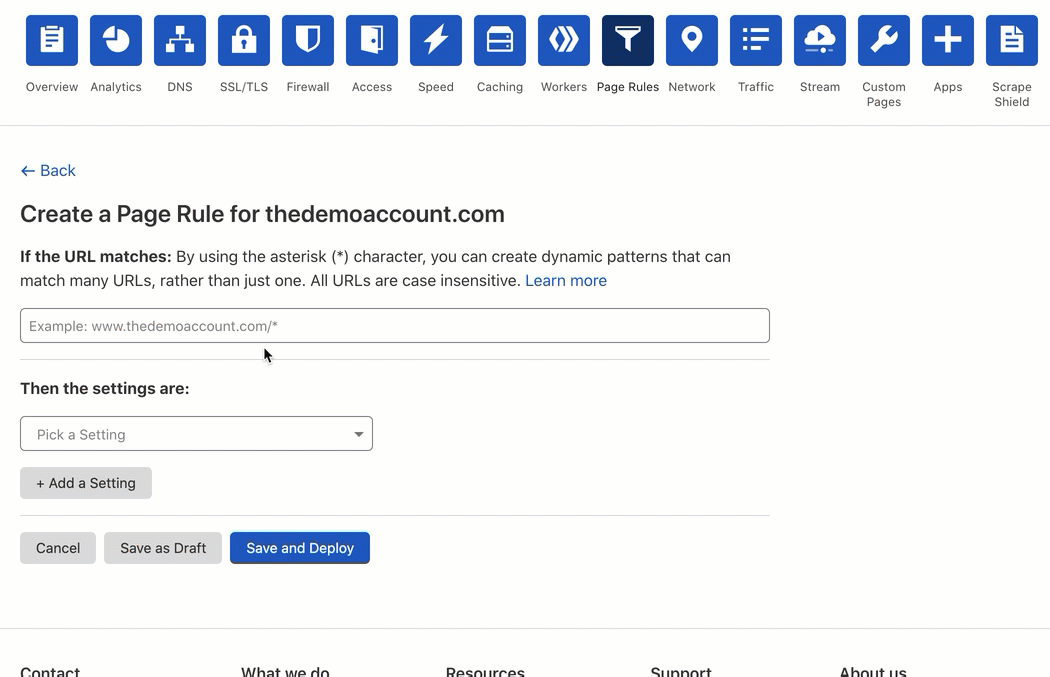
- In the top section, enter your root domain, and be sure to include a /* at the end, like this: https://thehelpdeskteam.com/*
- The * functions as a wildcard.
- In the bottom section, enter the www. version, and include a /$1 at the end, like this: https://www.thehelpdeskteam.com/$1
- The $1 functions as a copy of the wildcard.
- Click “Save and Deploy” (or just “Save” if editing an existing rule.)
Keep learning