Enabling Cross-Site Tracking in GoHighLevel (3rd Party Cookies)
Safari on MacOS Chrome on MacOS Coming Soon Chrome on Windows Coming Soon Firefox on Windows Coming Soon Microsoft Edge on Windows Coming Soon

John Mamado

If you want to confirm your domain on Facebook using GoHighLevel, you can use the ‘Meta Tag’ verification method. These instructions will help you complete the process.
Step 1: Copy the Meta Tag
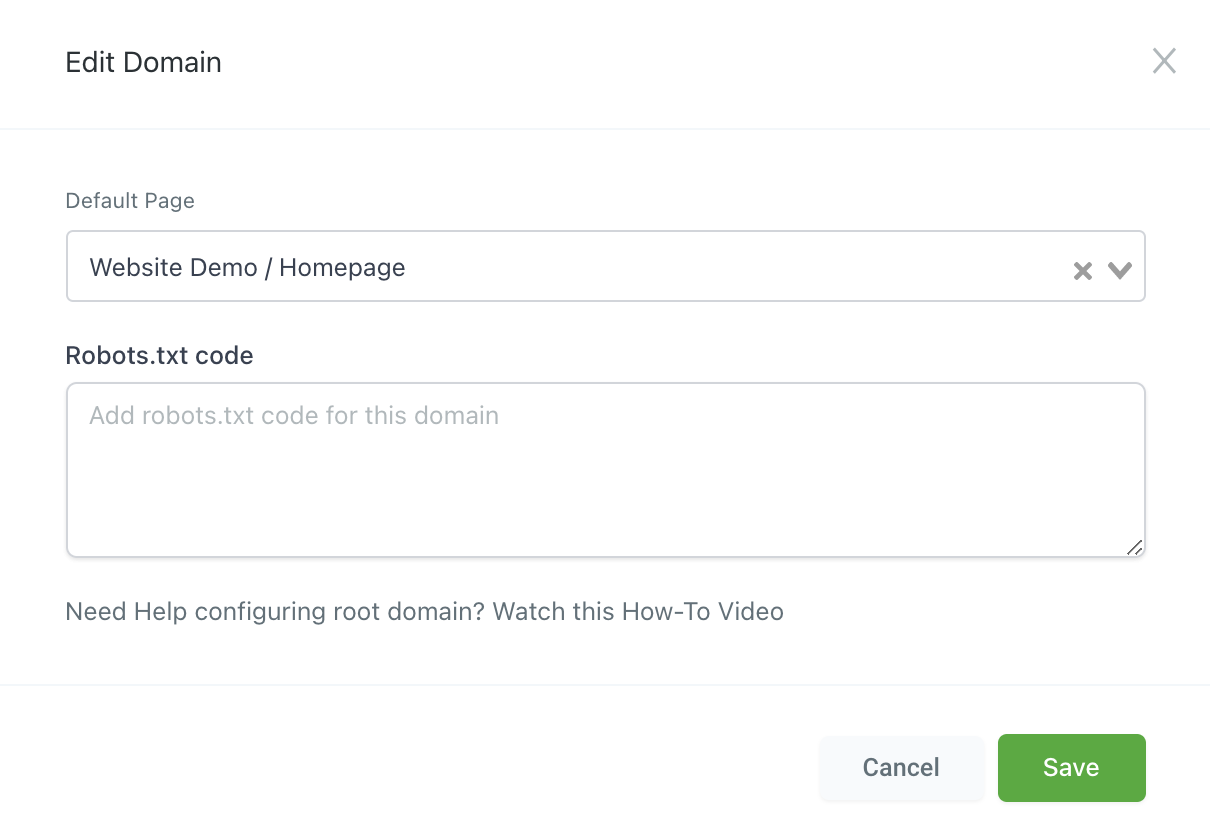
Step 2: Locate the Default Page
Under the Settings menu, navigate to the Domains option.
From there, edit the domain that you want to authenticate.
Take note of the Default Page associated with the domain. (If there isn’t one, ensure that you connect one.)
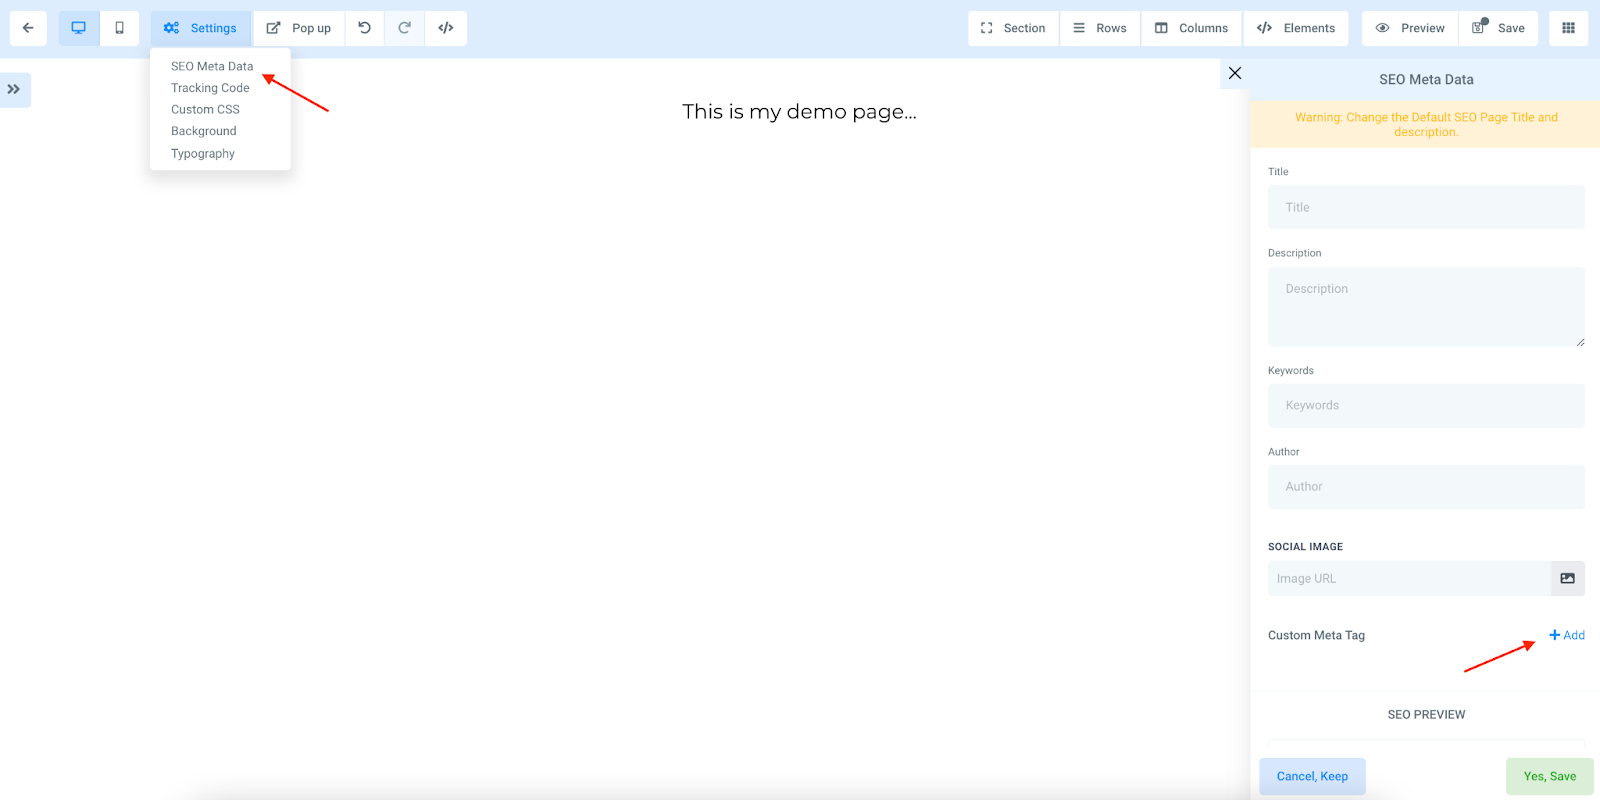
Step 3: Modify the Default Page Builder
Go to the website or funnel that contains the default page you selected in the previous step.
Open the page builder or editor for the default page.
Select the Settings option and then navigate to the SEO Metadata section.
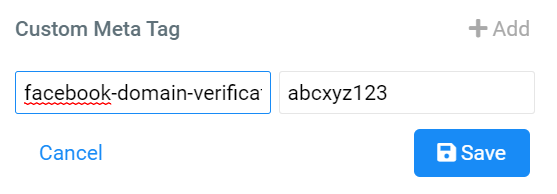
On the right-hand menu, scroll down until you find the “Custom Meta Tag” option, and then click on the “Add +” button.
Step 4: Insert the Meta Tag
Copy the meta tag name provided by Facebook and insert it into the designated “Name” area of the tag. As an example, the name given in the tag might be facebook-domain-verification.
Copy the information found in the meta tag and insert it into the designated “Content” section of the tag. As an illustration, the content inside the tag might be the alphanumeric string “abcxyz123”.
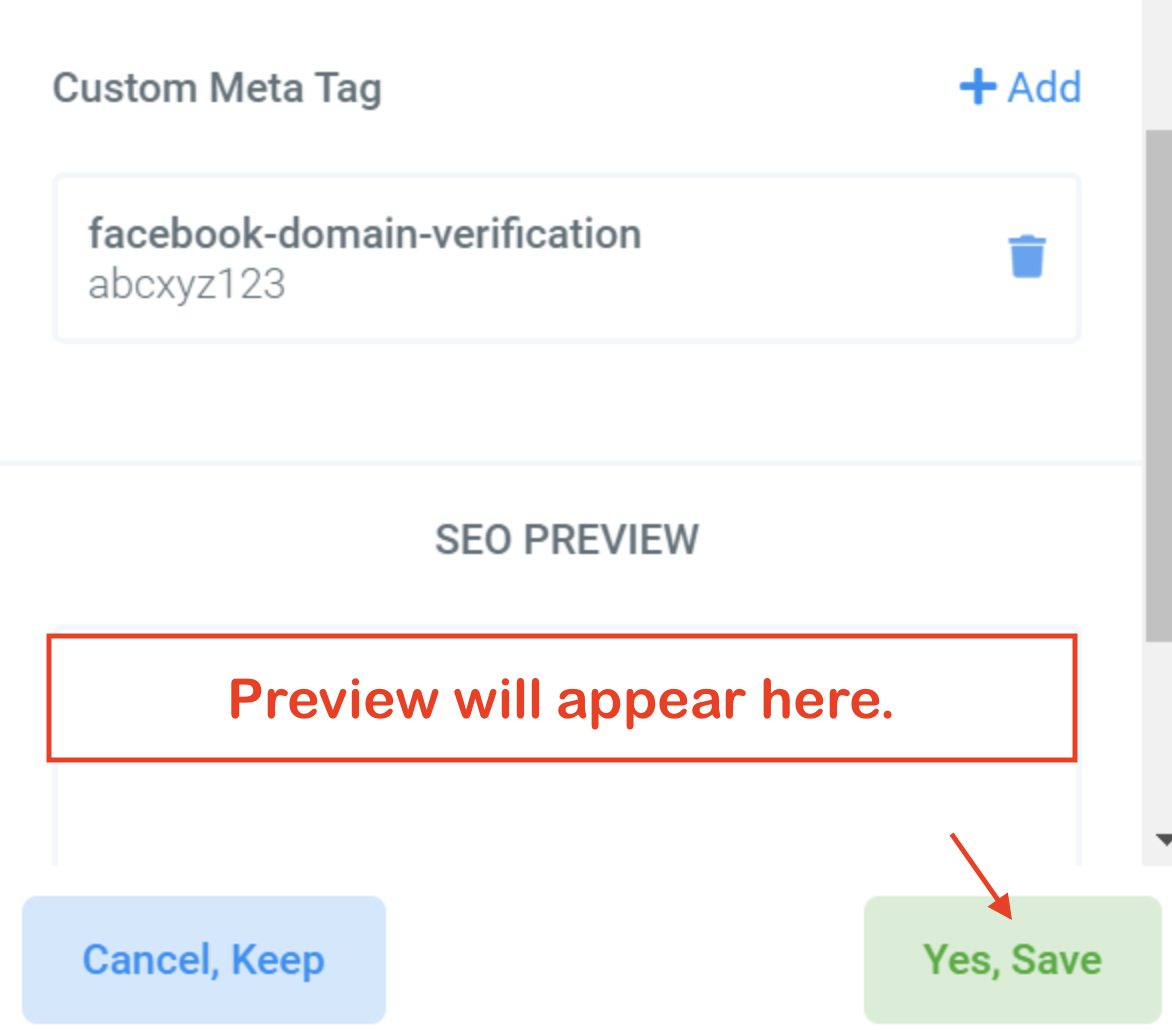
Step 5: Save the SEO Metadata settings

Step 6: Authenticate the Domain in Your Facebook Account
Log in to your Facebook Business Manager.
NOTE: You must have admin or developer access to your domain within your Facebook Business Manager to complete the verification process.
Click “Add” to add a new domain.
Enter the root domain without any prefixes. For example, input website.com instead of www.website.com.
Click “Add.”
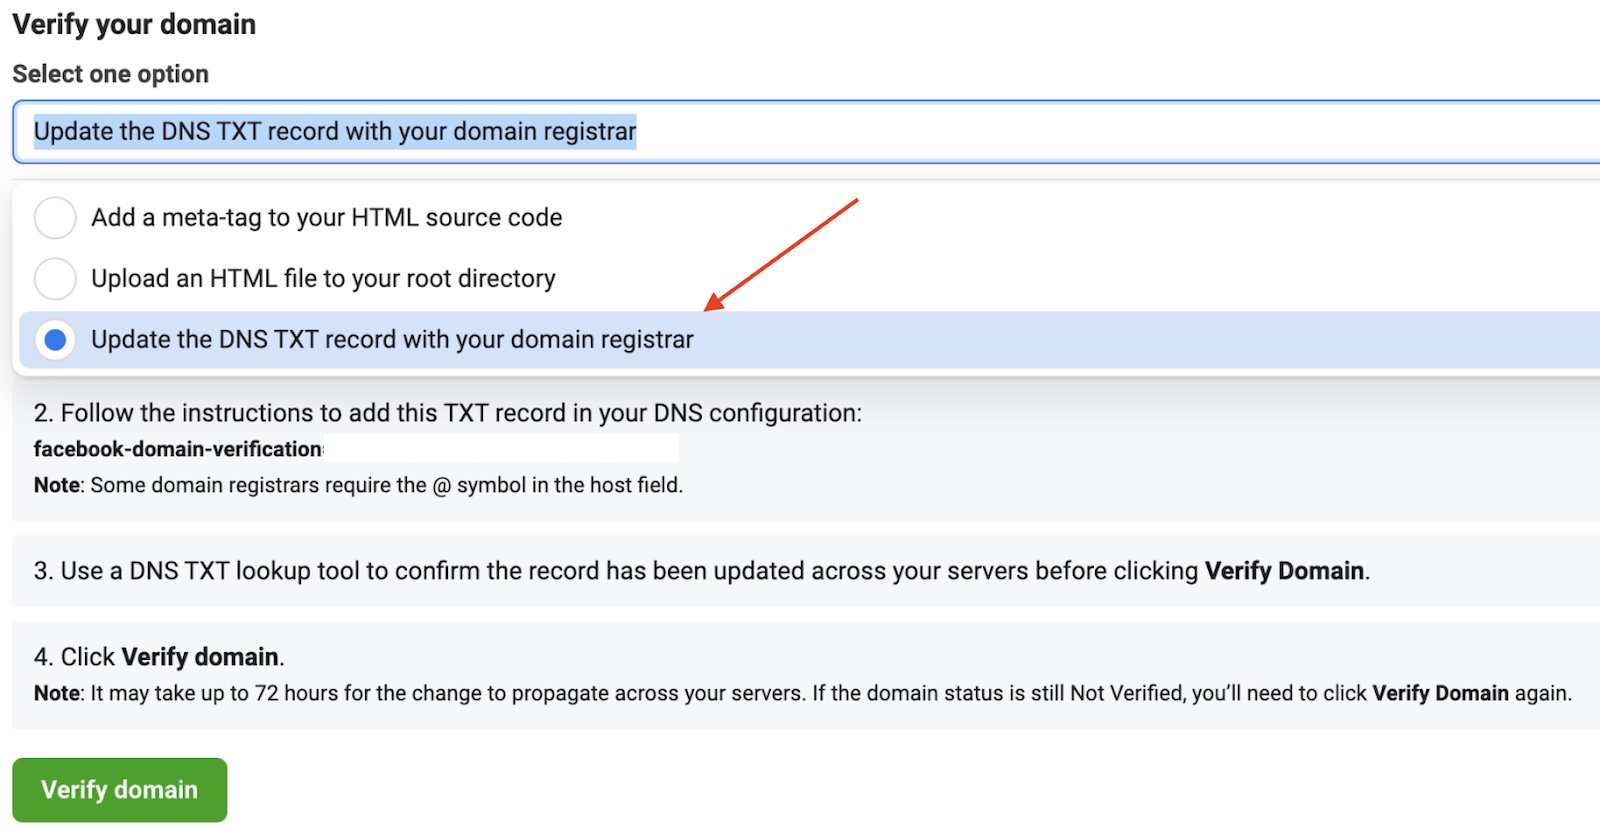
Choose one of the three methods below to verify your domain:
Select Verify Domain on your Business Manager to examine.
NOTE: Verification of the domain is restricted to the root domain only. If you have added a subdomain, the process outlined here will not work. If your root domain is pointing to a different service, you can verify it by adding a TXT record in your DNS manager. To change your verification method, access the dropdown menu at the top of the page and select the option named “Update the DNS TXT record with your domain registrar.” Then, follow the steps provided to add the TXT record to your DNS manager.
To learn more from Facebook, visit this link on how to Verify Your Domains in Business Manager.
Safari on MacOS Chrome on MacOS Coming Soon Chrome on Windows Coming Soon Firefox on Windows Coming Soon Microsoft Edge on Windows Coming Soon

We’ve made major improvements to our platform’s loading functionality. Instead of the classic 9-dot loader, we’ve introduced a sleek, modern spinner. This updated design features distinct visual states to clearly represent processes such as app initialization, data retrieval, and user detail loading. What Statuses to expect when the HighLevel is loading? Initializing the App: This […]

Sales velocity refers to the rate at which opportunities progress from being identified to achieving the “Won” status and generating revenue. Note: Sales velocity is calculated by dividing the total sales value in USD by the average sales cycle duration in months. The components of the calculation are as follows: Total Sales Value: The sum […]

When setting up campaigns, triggers, settings, forms, and other elements within an account, if you intend to use that account as a blueprint for creating accounts for different clients, you can employ a feature called “snapshot.” This feature enables you to replicate all the components from the initial client’s account and import them into the […]
To create a new snapshot, navigate to your Agency View and follow these steps: Fill up the Snapshot name and the account you want to copy the snapshot from. To load a Snapshot into an existing client account, please follow the steps outlined below: To create a new client account based on a Snapshot, please […]
We continually assess plugins for compatibility and optimization in our ongoing efforts to enhance reliability, performance, and security. However, specific plugins duplicate existing features or prove incompatible with our environment. Our system administrators maintain a list of banned plugins to ensure a smooth experience and prevent potential performance or functionality concerns. Please find below the […]
Accelerating Support Resolution: Strategies for Expedited Assistance We understand the frustration of seeking assistance and experiencing delays in response time. To ensure you receive the swiftest resolution possible for your support requests, we have compiled a list of hacks and tips below. Following these recommendations and clearly and concisely describing your issue, our agents can […]

Audit logs monitor modifications made to specific information in your system. It can be useful to identify which team member executed certain actions or to troubleshoot customer problems if an error occurred. Please note that only the system’s admin user will be able to access this data. Follow these simple steps to use your audit […]

Occasionally, you may unintentionally create a loop in your system by linking two actions or by having an action feed back into itself repeatedly. This can result in a never-ending loop of actions that can cause system slowdowns and other problems. To address this issue, we have introduced a Loop Lock feature that detects and […]