How to Group Social Media Profiles in GHL Social Planner
Updated March 25, 2024
Managing multiple social media accounts in GoHighLevel means selecting profiles one by one every time you create a post, which slows down your workflow. This tutorial shows you how to create and configure social media groups in the Social Planner so you can publish to all relevant profiles in a single selection.
Occasionally, we encounter situations where numerous social media profiles or networks are involved. Choosing individual profiles every time we create a new post can be challenging. Implementing Social Grouping would streamline the process significantly, allowing us to select all relevant profiles at once, saving time and effort.
How to create a Social Group?
Social Planner offers versatile options for creating groups, whether it’s from the overview page, during the post creation process, or within the Settings menu. Users can efficiently manage their social accounts within these groups, ensuring ease of organization and access.
Each Social will become unique inside the group.
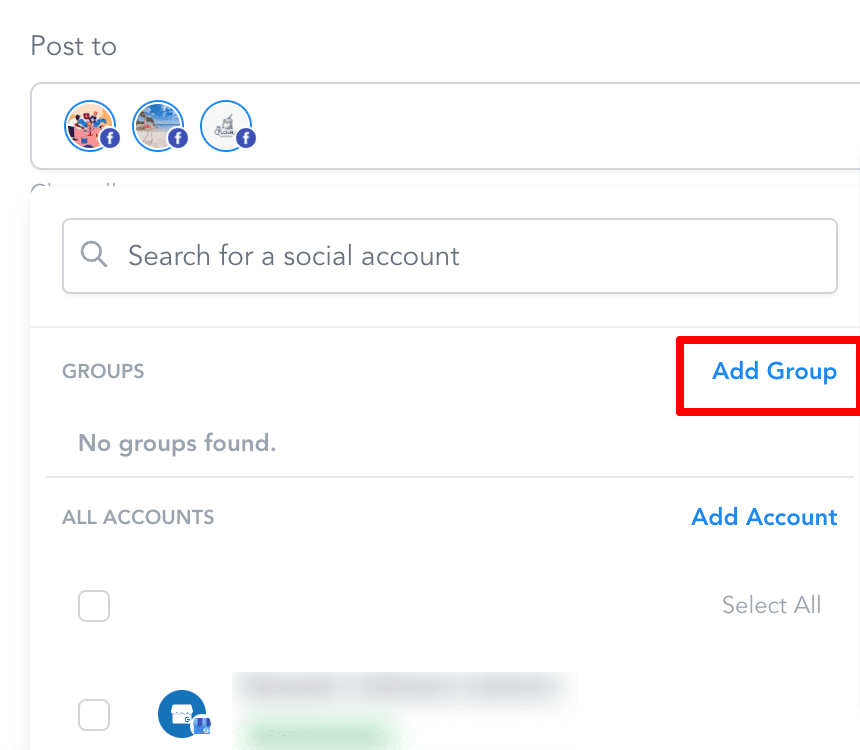
Step 1: Click on Add Group
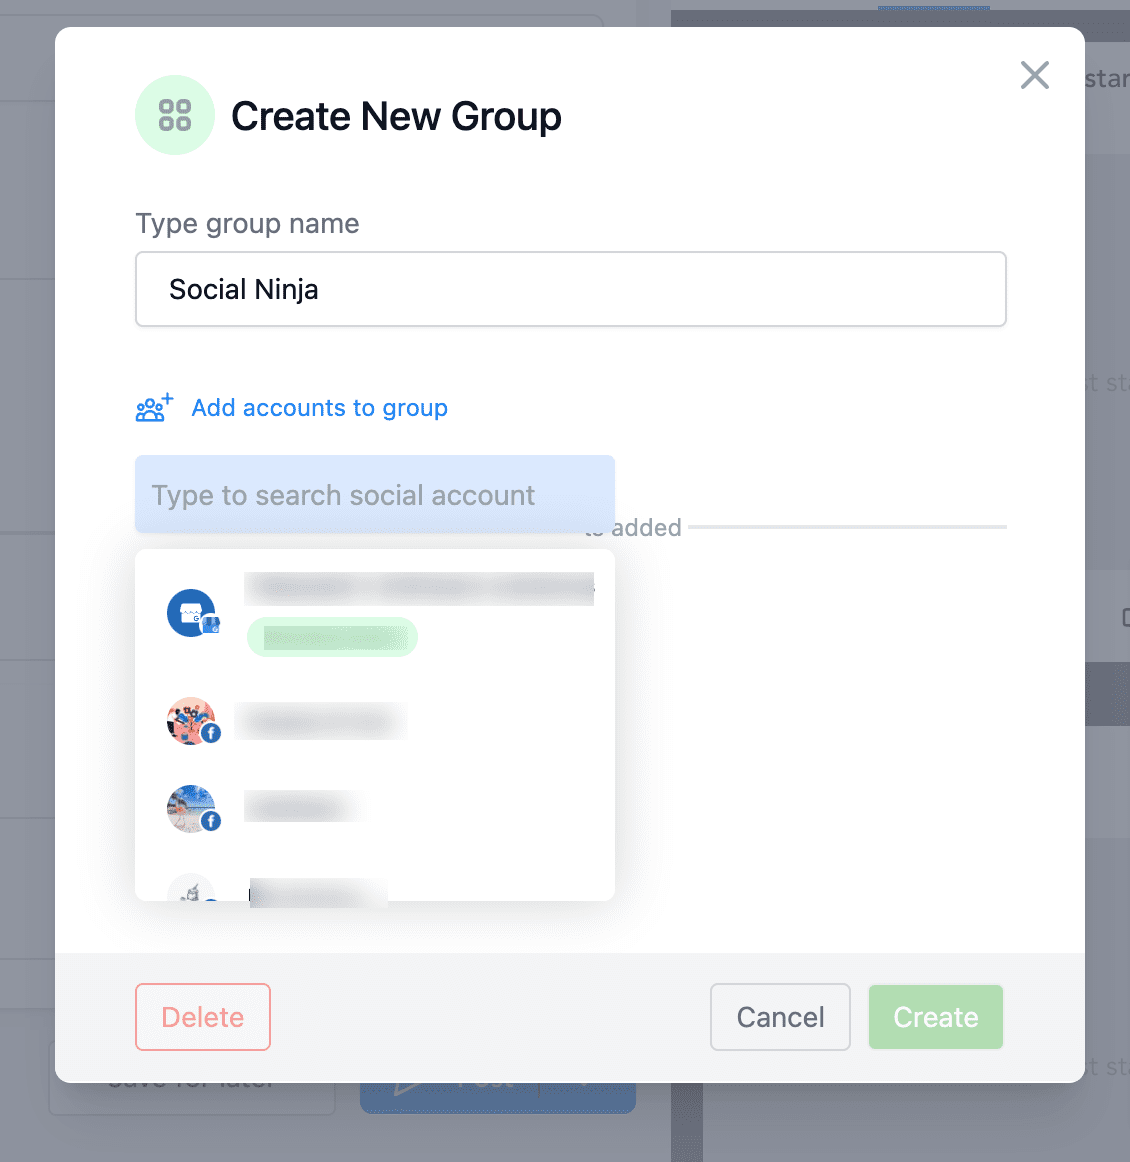
Step 2: Enter the Group Name

Step 3: Click on Add accounts to group and select your social channels
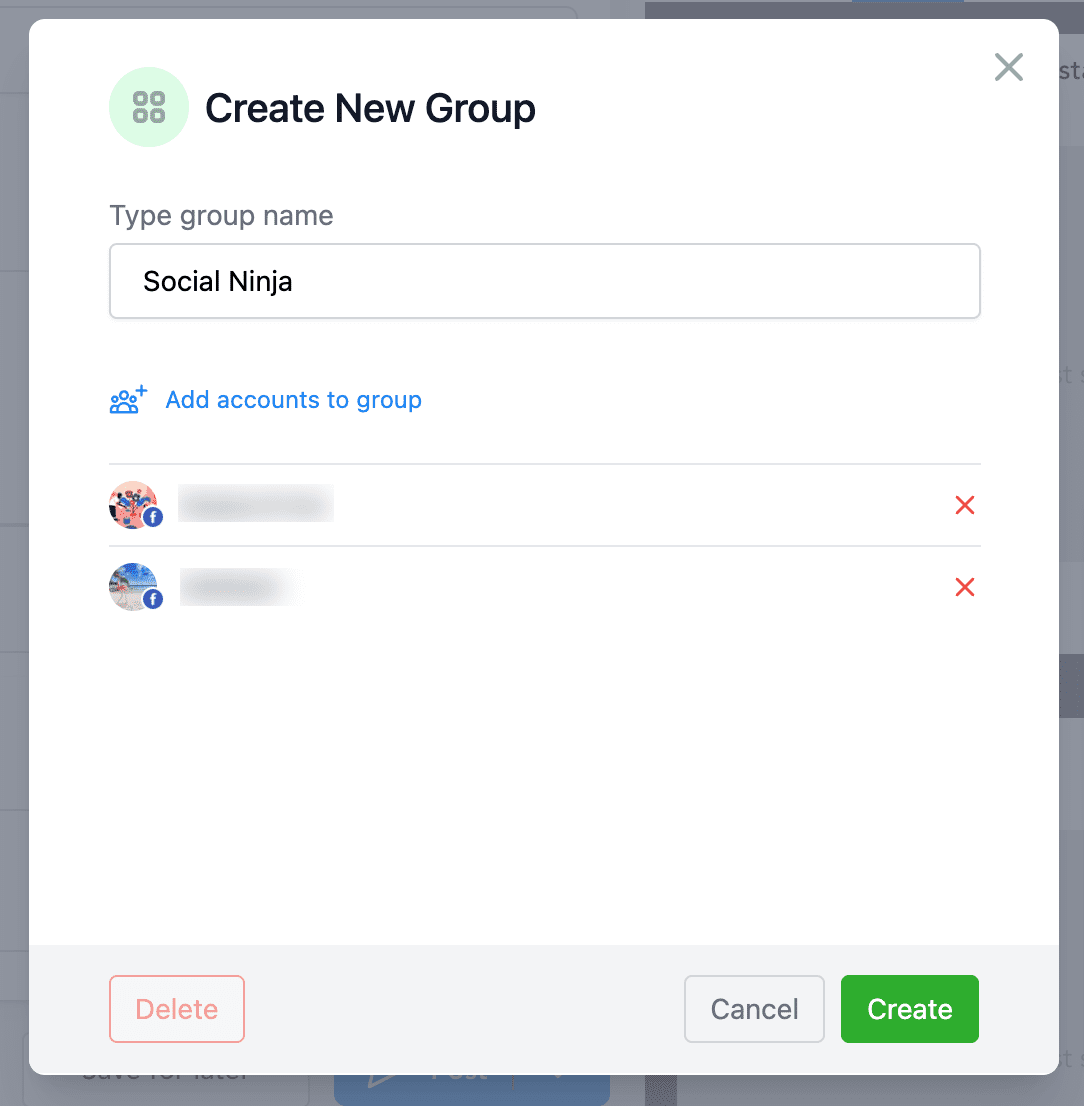
Step 4: Click on Add Group
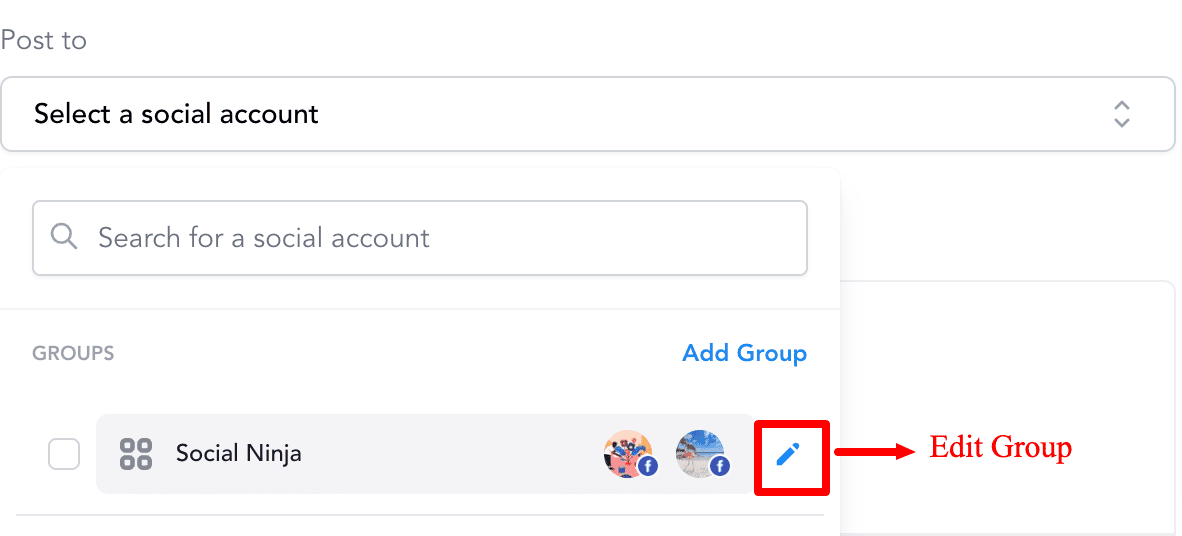
Step 5: If needed, you can edit the Group by clicking on the pencil icon
Keep learning