GoHighLevel Triggers: How to Create, Name, and Activate Rules
Updated April 23, 2024
Without automation triggers, every lead action in GoHighLevel requires manual follow-up, costing agencies time and revenue. This guide walks you through how GoHighLevel triggers work and how to create, name, and activate your first rule from scratch.
Think of triggers as the backbone of a platform, akin to the intricate connections found in Zapier’s Zaps. These conditional statements seamlessly link various modules, acting as the ‘secret sauce’ that powers the platform’s functionality and brings its coolest features to life.
Example:
Imagine you’ve configured a Zap within Zapier to transfer leads into a campaign on a platform once they complete a form integrated into a ClickFunnels landing page. Additionally, you aim to trigger an SMS notification to inform your client promptly whenever this occurs, serving as a notification of a new lead.
How would we do this?
Answer: Set up a trigger!
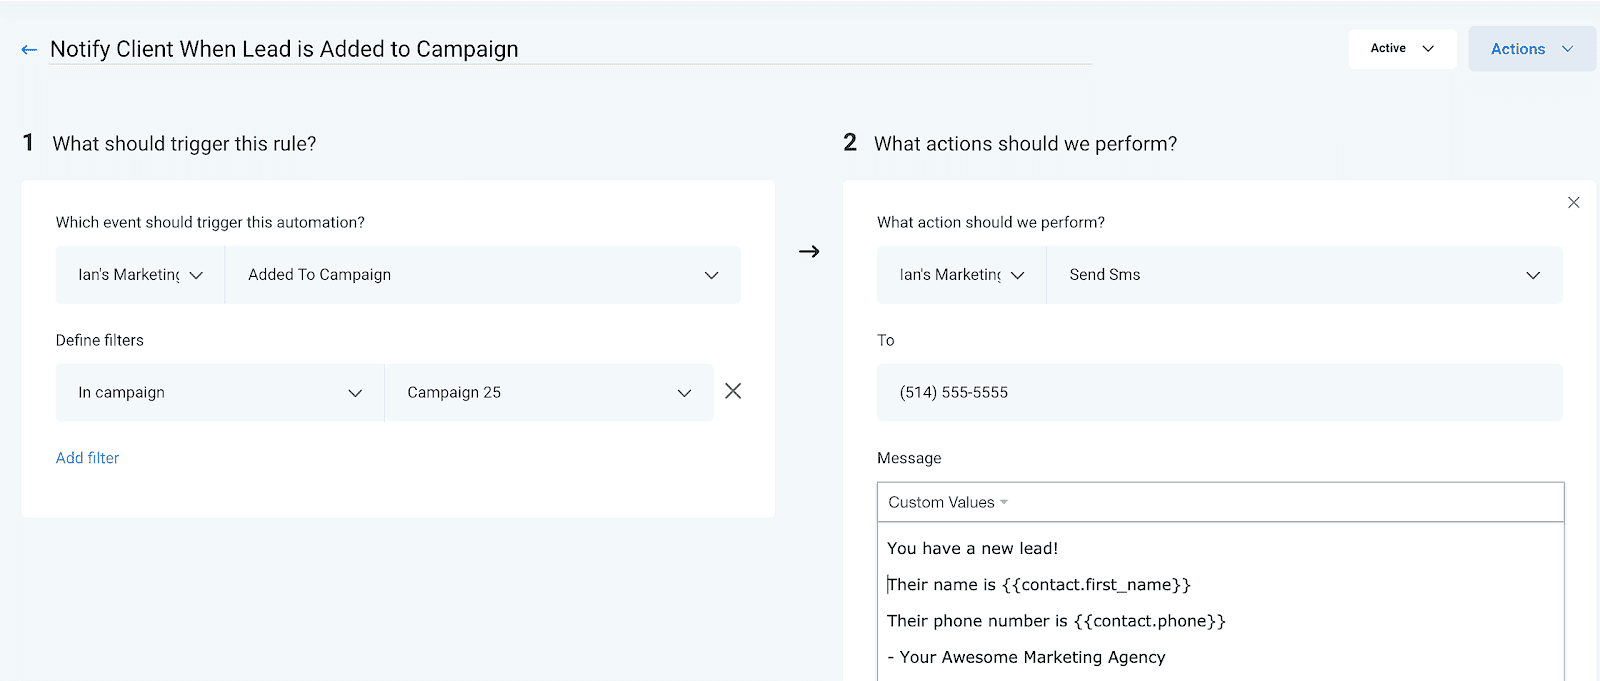
Create, Name and Activate Triggers
Follow the steps below to create, name and activate a trigger:
- Click Triggers
- Click + New Basic Rule
- Choose a trigger from the Choose a trigger dropdown and add all the necessary filters
- Click +Add action
- Choose an action from the Choose a action dropdown and all the necessary filters
- Name the Trigger in the Trigger name field
- Click the Draft dropdown and click Activate
Keep learning