How to Connect Shopify to GoHighLevel in 5 Steps
Updated November 22, 2022
Managing e-commerce data across separate platforms creates gaps in your automation and reporting inside GoHighLevel. This guide walks you through creating a Shopify private app, retrieving your Admin API access token, and connecting Shopify to your GoHighLevel CRM.
Shopify is a widely used e-commerce platform for online and retail shopping. By integrating Shopify with your system, you can enhance your e-commerce capabilities in several ways, including workflows, the use of Shopify-specific custom values, and more. Follow these steps to integrate Shopify with your system:
Step 1: Create or Log In To A Shopify Account
Step 2: Enable Private App Development (if already enabled, skip to Step 3.)
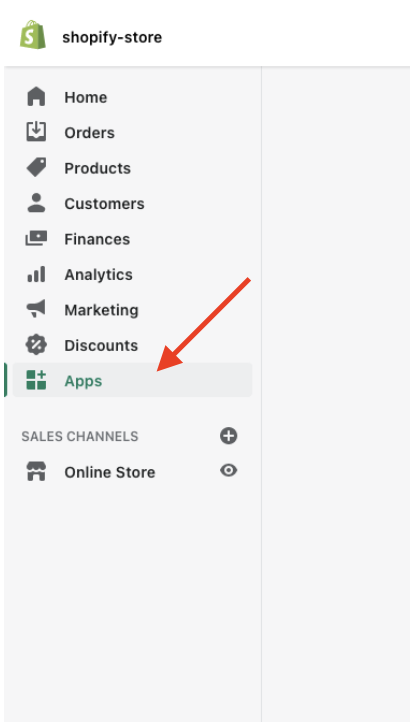
- Once logged in to your Shopify store, navigate to “Apps” from your dashboard.
- Click “Develop Apps” in the top right of the screen
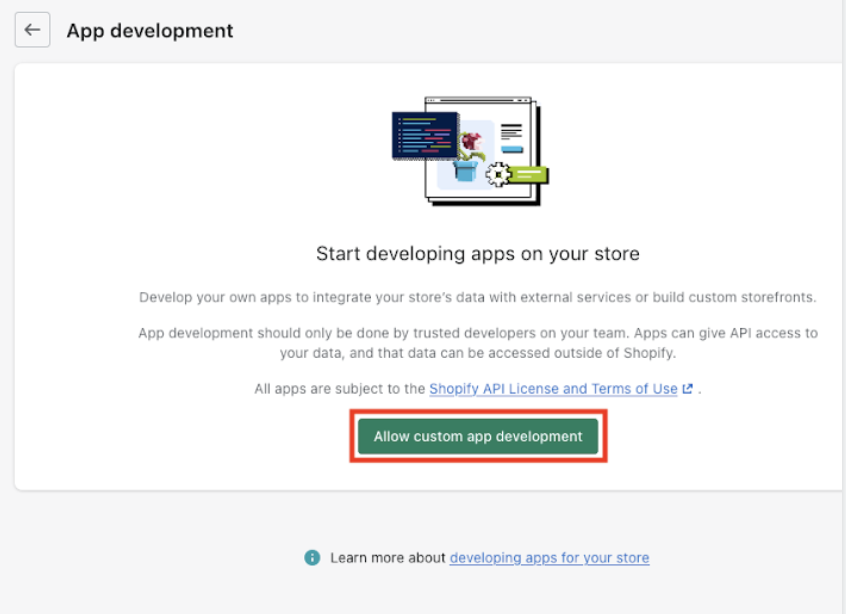
- Click “Allow custom app development”
- NOTE: IF you already had enabled the private app development, you’ll be directed straight to the create/develop apps button and won’t need to re-accept the terms/permissions.
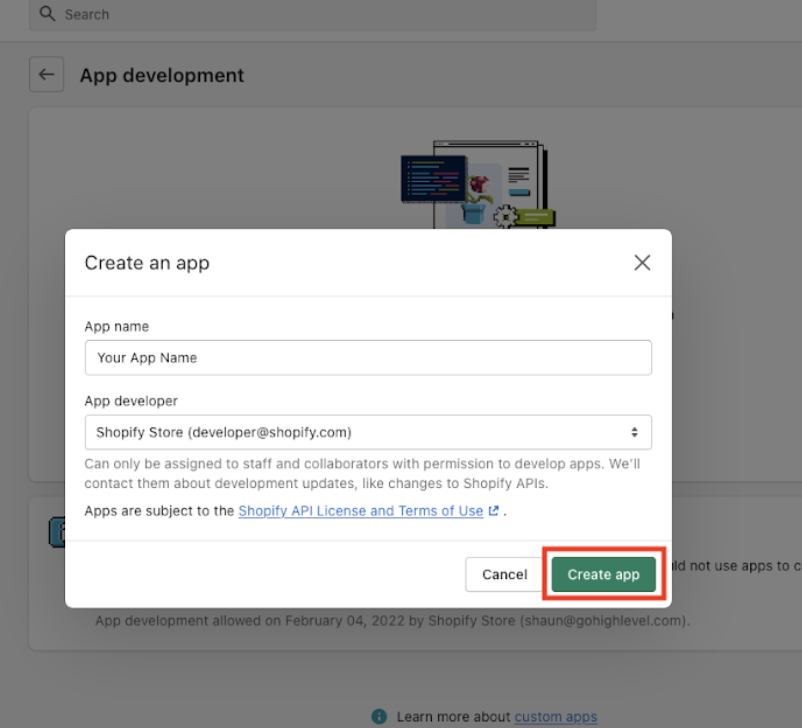
Step 3: Create Your Private App
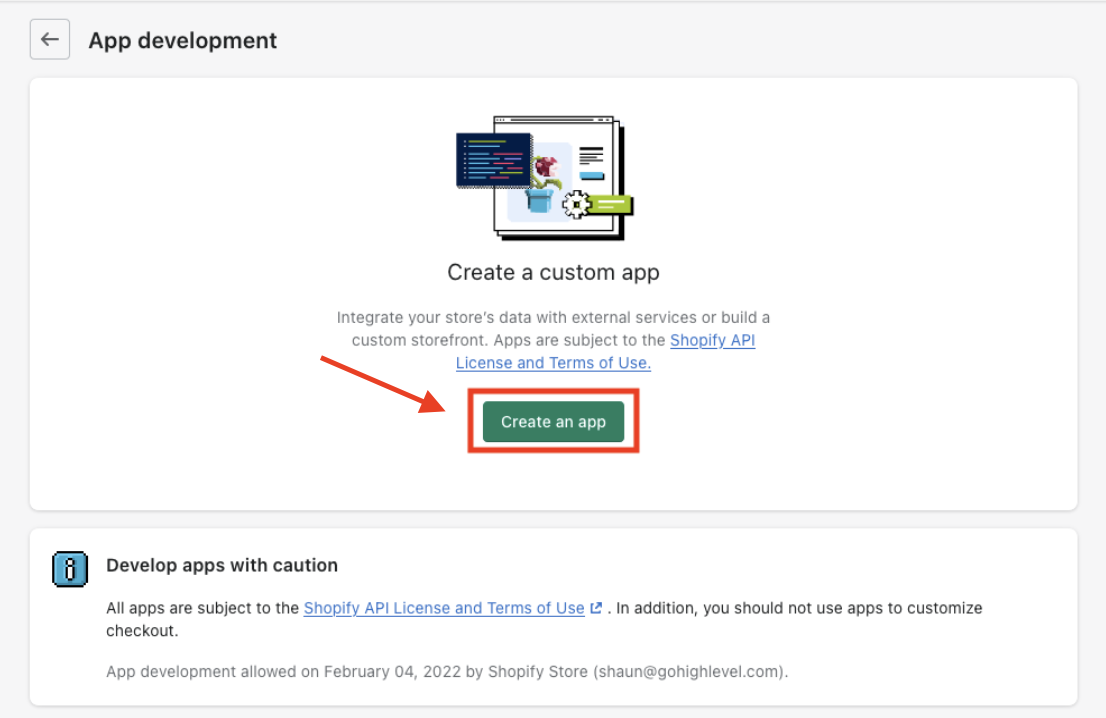
- Click to Create an App
- Enter a name for your app such as “my App” or “Sally’s Shopify Store”, and enter your email address in the appropriate field.
- Click “Configure Admin API scopes” to configure Admin API integration.
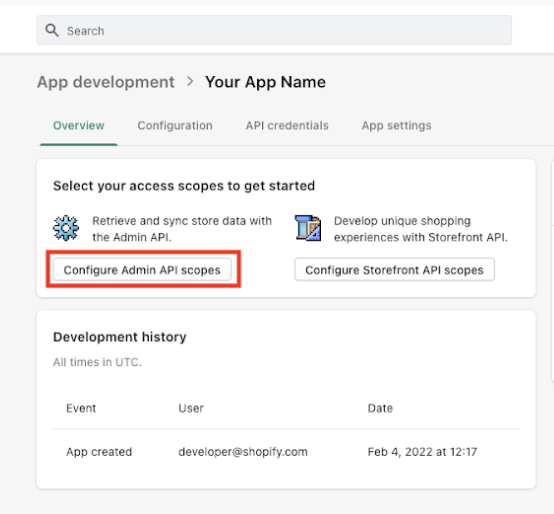
- Scroll down to “Orders” and enable at least “read_orders” access
- Scroll down to “Products” and enable at least “read_products” access
- Click the “Save” button on the top right.
- Click the “Install app” button on the top right.
- Click “Install” in the popup window that appears.
Your app is now ready to be integrated.
Step 4: Retrieve the Admin API Access Token for Integration
- After the installation is complete, you will be able to find the Admin API Access Token under the API Credentials Section.
- Click “Reveal Token Once” to get access.
- Copy the “Admin API access token” by clicking on the clipboard icon or highlighting it all and using the control+c or command+c keyboard shortcut ono your computer. Keep this password copied, as you’ll need it in the next step.
Step 5: Connecting Shopify to your System
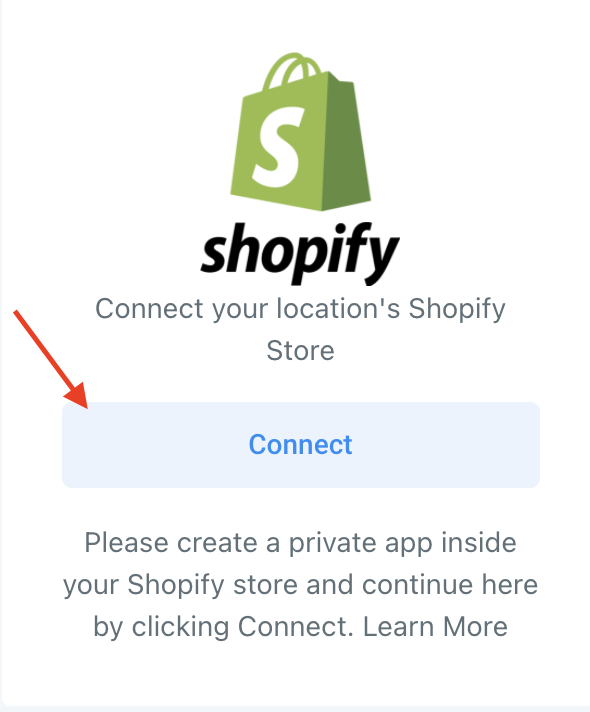
- Back in your CRM system, navigate to Settings > Integrations.
- Click “Connect” under Shopify.
- In the popup window, paste the previously copied password and type out your Shopify App name.
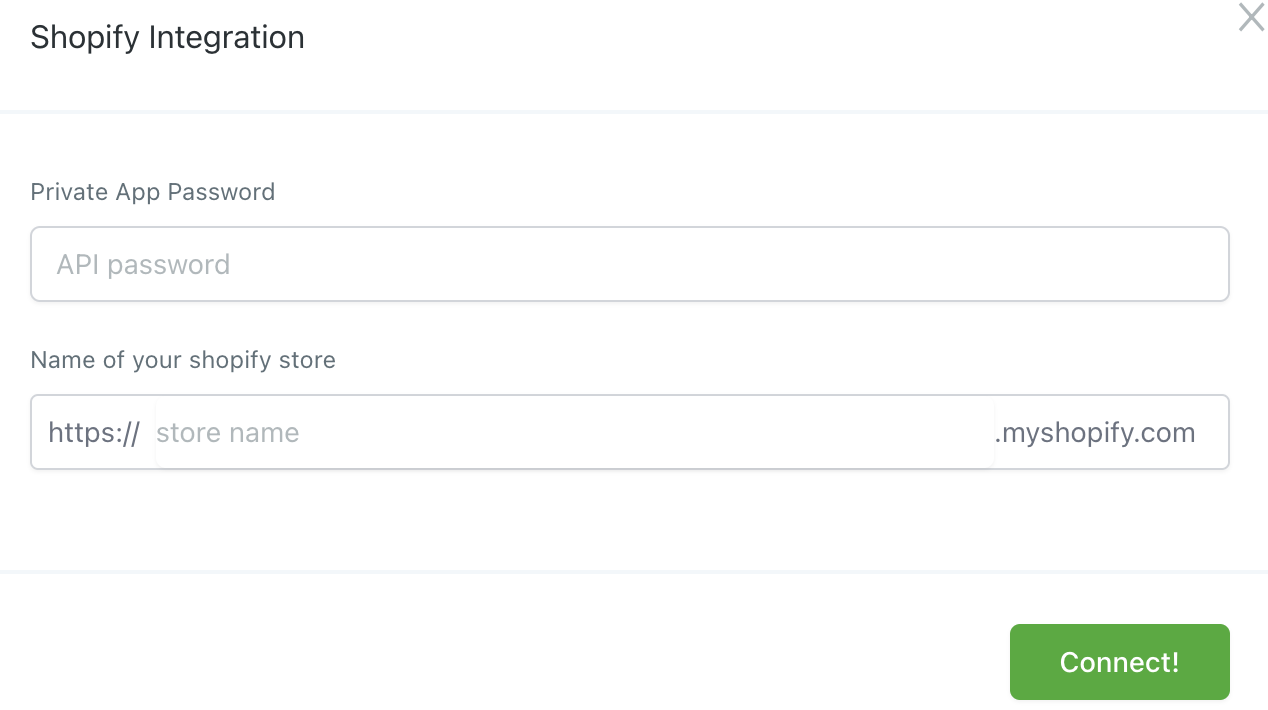
- Click “Connect” to complete the integration.
Keep learning