Contacts can be automatically tagged according to their behavior, simplifying the organization of the contact database. Here are some examples of use cases that can be achieved with this functionality.
Tag users who open or click on links in emails related to courses.
Tag users who click links to register for webinars.
Key Benefits
Personalization: Automatically tag users based on their actions, like clicks or opens, to send targeted follow-up emails that feel relevant.
Automation: Save time by automatically applying tags, eliminating manual effort and ensuring consistency.
Simplified Segmentation: Easily group users by their actions (e.g., “Clicked on Course Link”) to send more focused, effective messages.
This makes your email campaigns more efficient, relevant, and impactful.
Limitations
Tags can only be added once per interaction.
Trigger links (e.g., unsubscribe) are excluded.
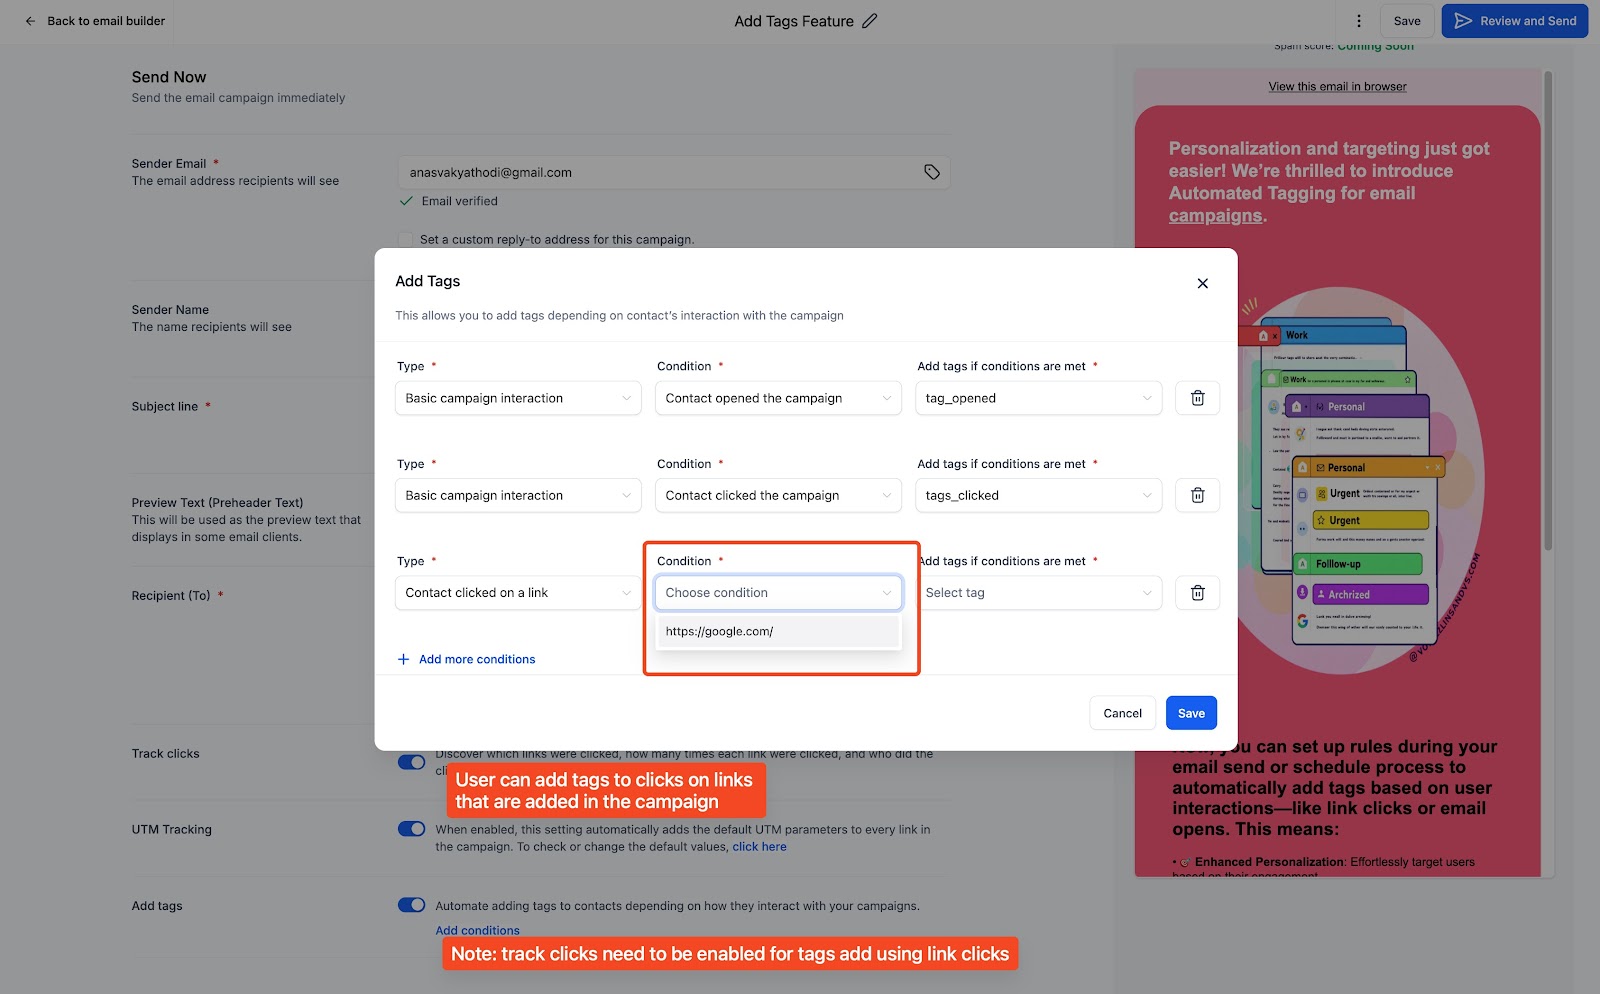
Tags based on clicks require tracking links to be enabled.
Steps to Set Up Automated Tagging
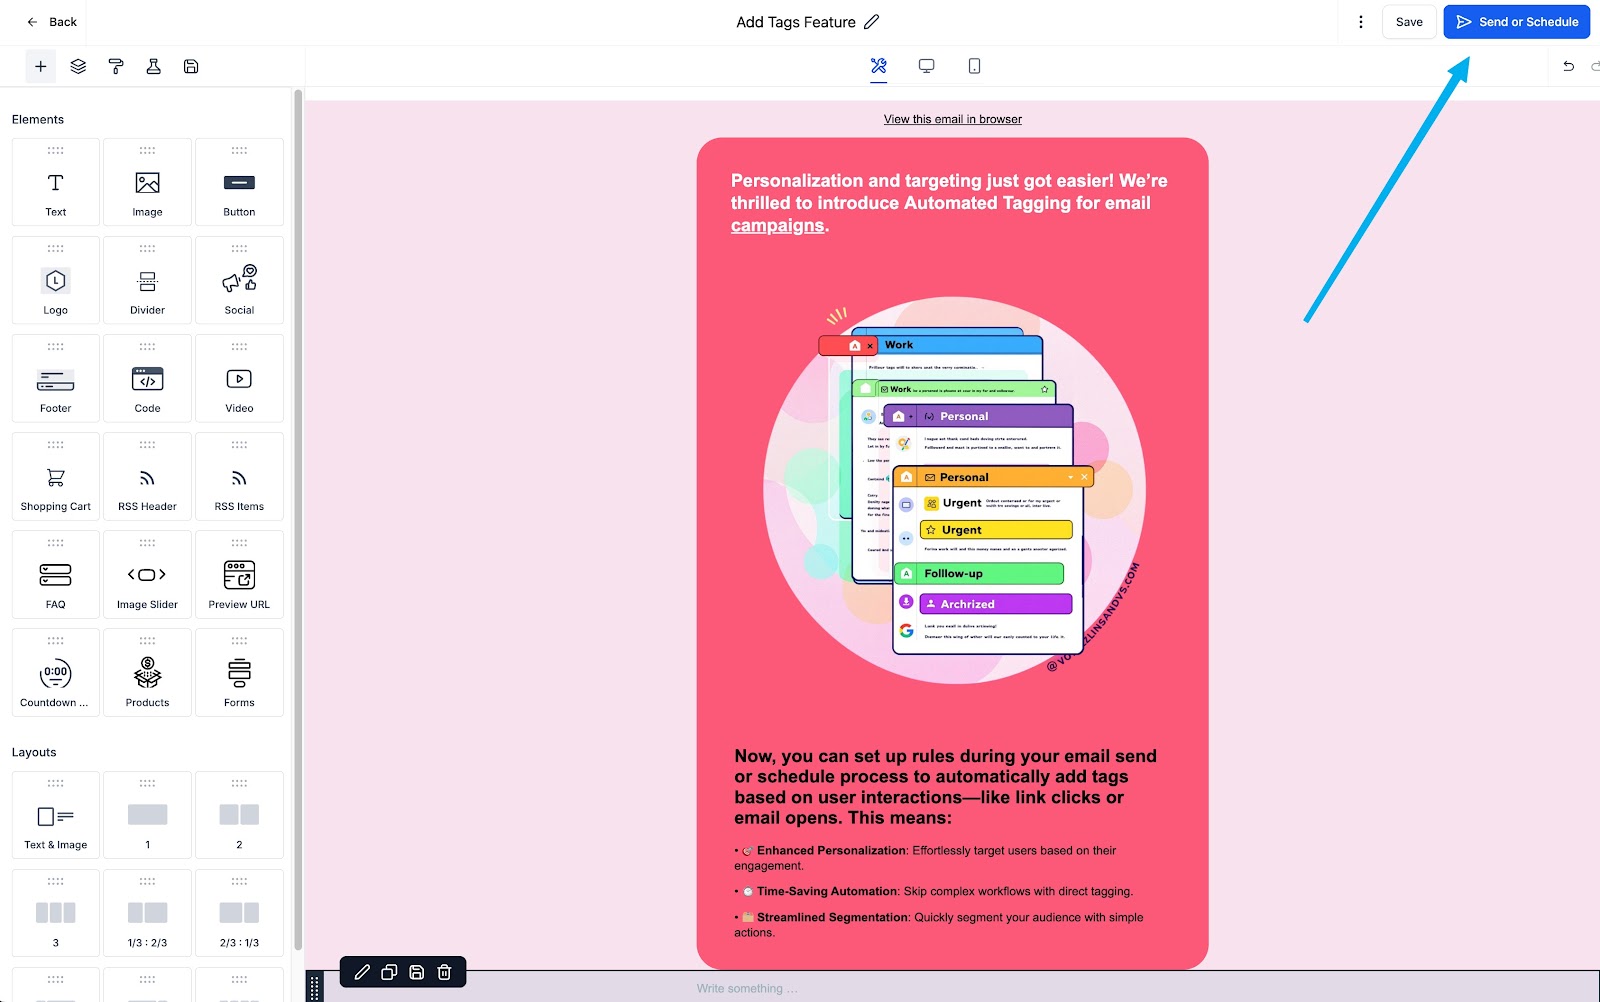
Create Your Campaign: Design and set up your email as usual.
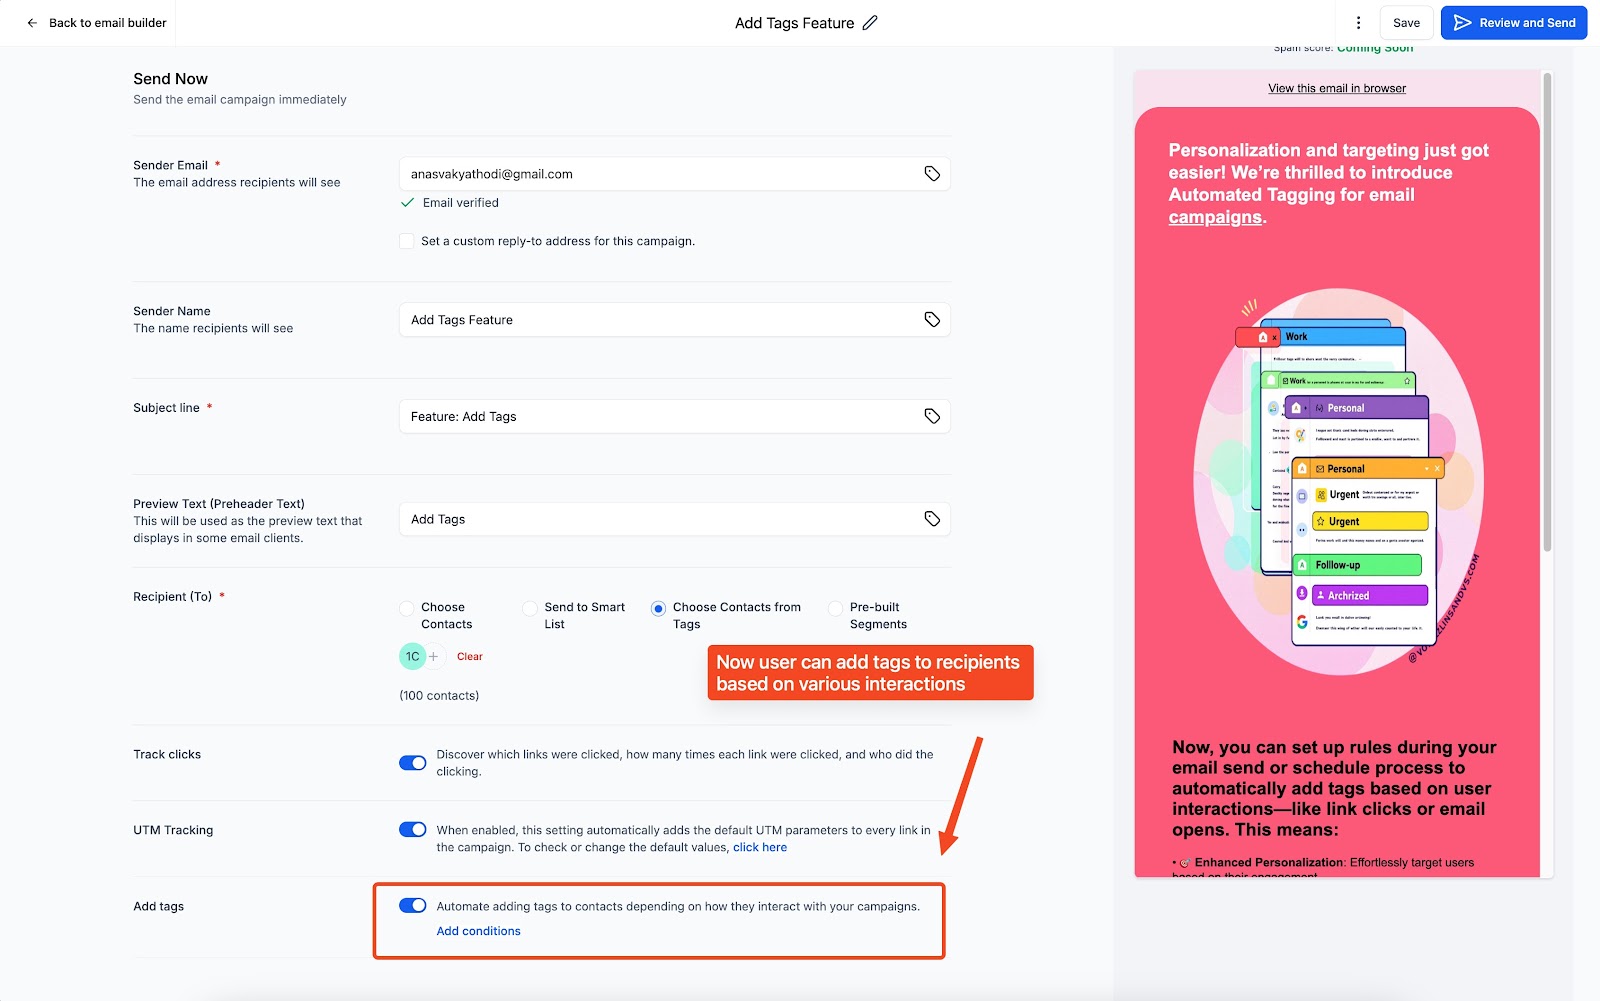
Enable Tagging: In the “Send or Schedule” screen, turn on “Add Tags” and click “Add Conditions.”
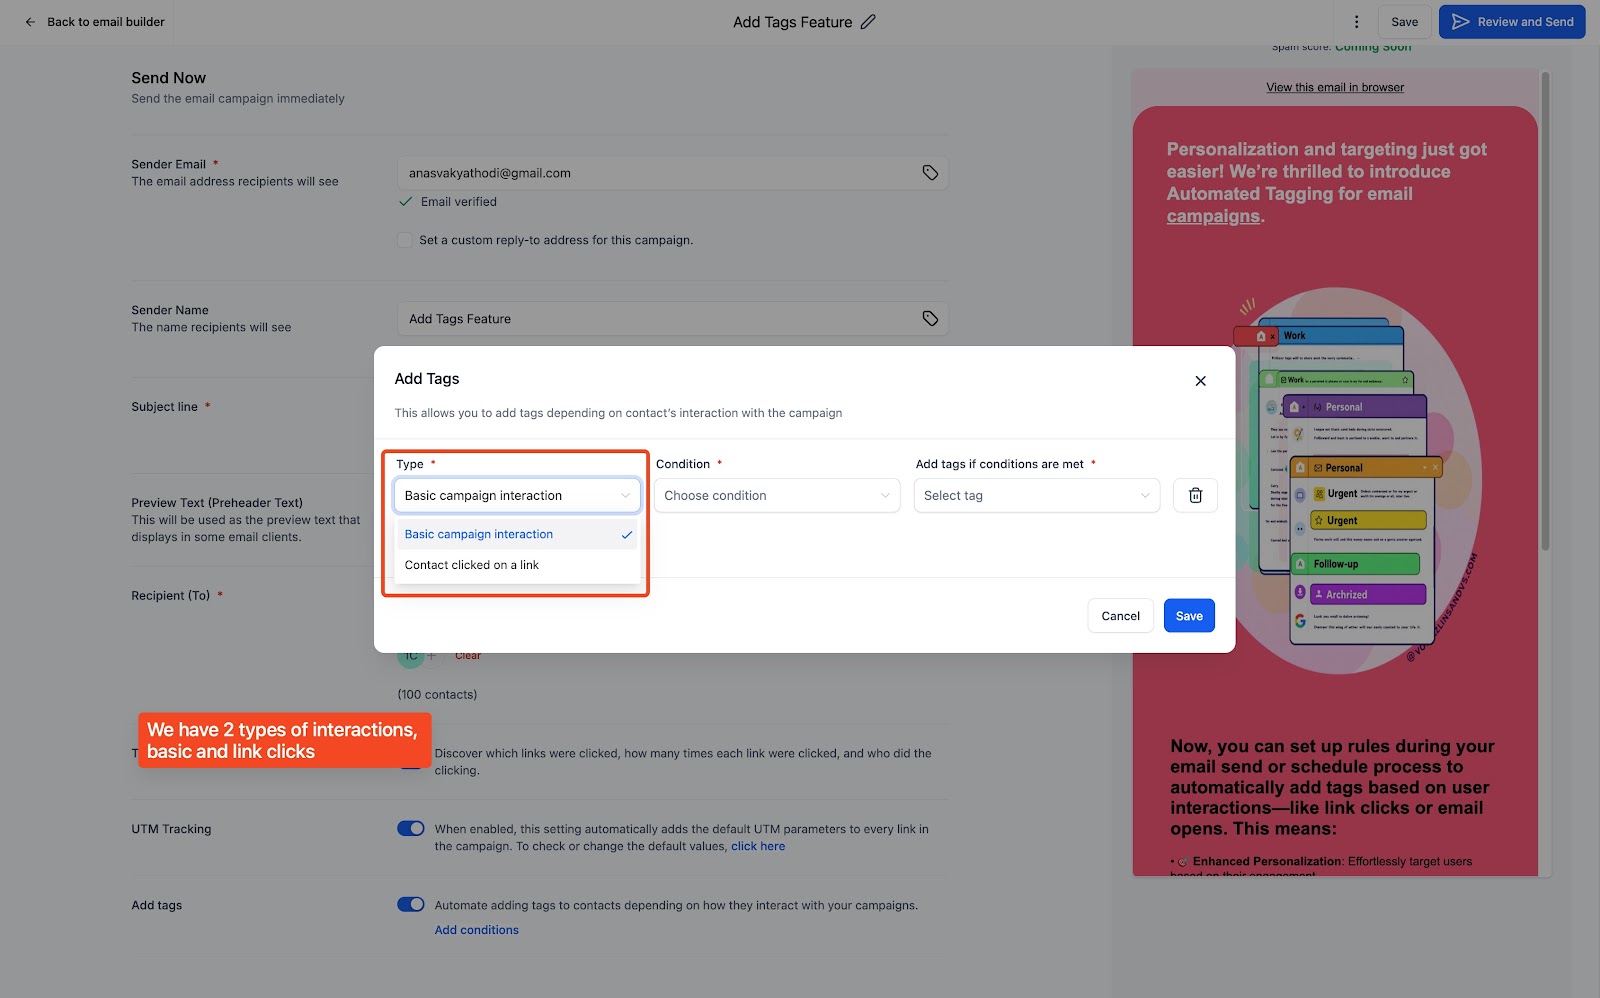
Set Your Conditions: Choose your interaction type, trigger and desired tag to be added
Save and Send: Save and send your campaign.
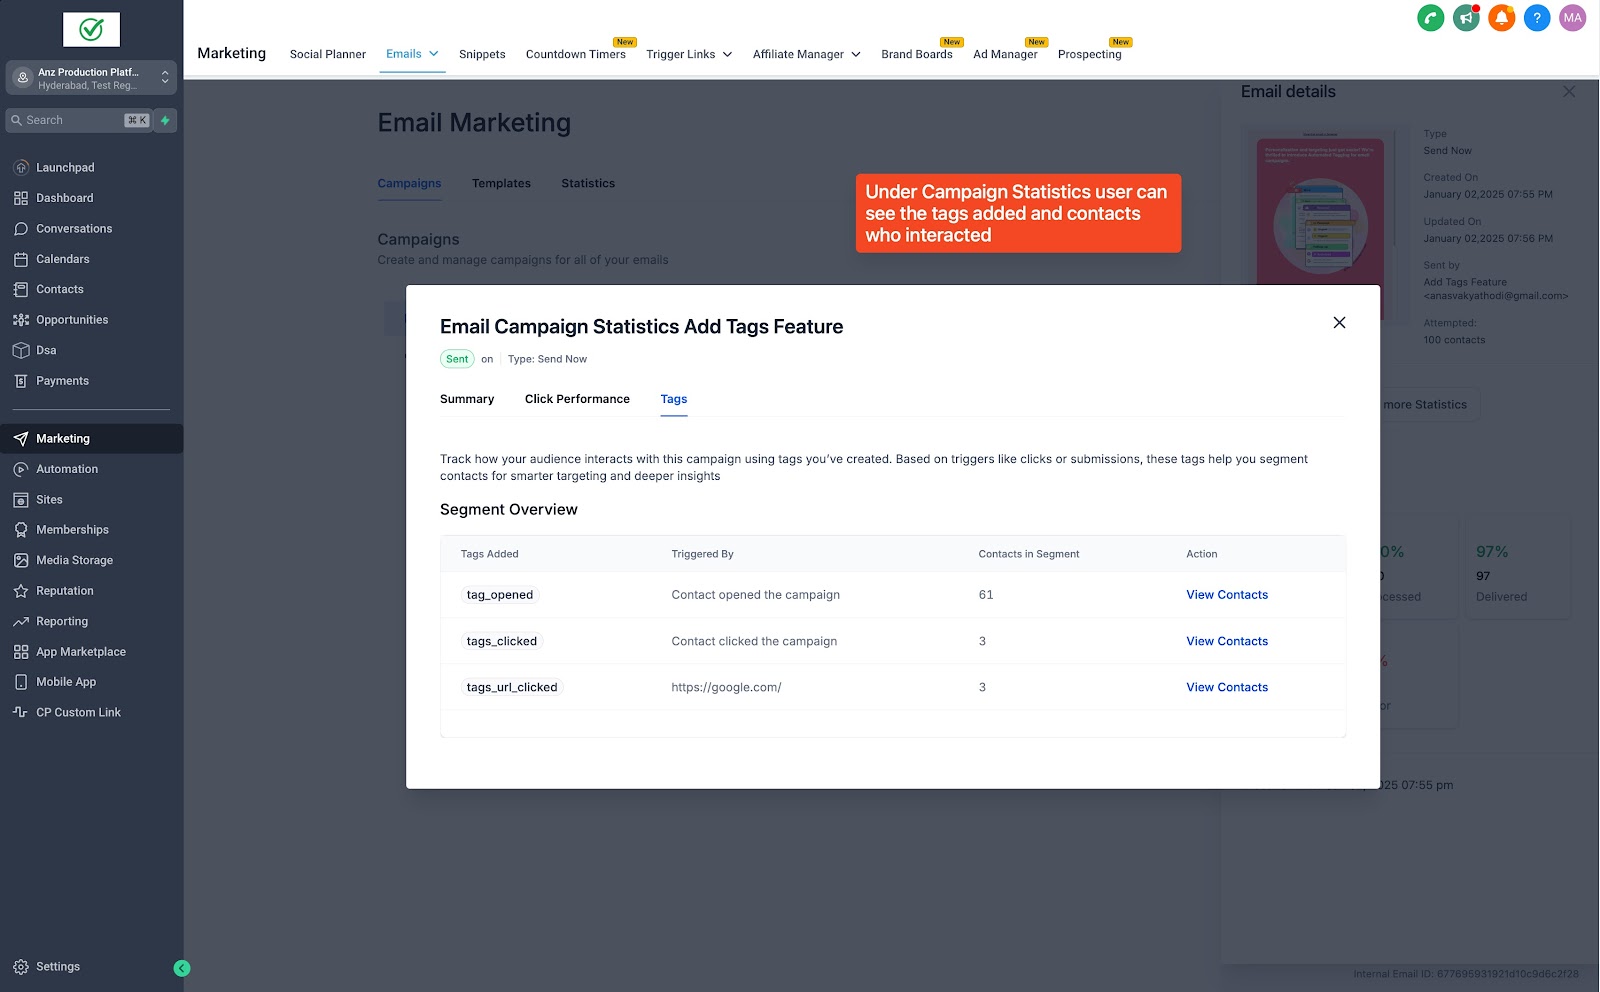
View Tags in Stats: After sending, go to the “Campaign Stats” page and click “Tags” to see your tag summary.
What’s Next
Soon, you’ll be able to add tags directly from the campaign stats page for even easier management.
Automated tagging makes it easy to track and engage users based on their actions, improving your email marketing efficiency!
FAQs
1. Can we create tags from the email builder? -> No, tags can be only created under contacts page as of now
2. Do we need to enable tracking links to use this feature? -> For the conditions where you wish to automate adding tags based on who clicked on which link, the tracking links needs to be enabled