How to Create and Edit Pipelines in GoHighLevel
Updated November 22, 2022
Without a structured pipeline, tracking leads through your sales process in GoHighLevel becomes inconsistent and time-consuming. Follow these steps to create a new pipeline, configure stages, set visibility options, and edit existing pipelines to match your workflow.
Using the Pipelines feature, you can more efficiently manage your leads for your business. This tutorial will show you how you can easily create a new pipeline, or make changes to existing ones.
Step 1: Accessing the Pipelines page
- Navigate to Settings > Pipelines
- Here you’ll see a list of all your existing pipelines.
- You can click the Edit or Delete icons to make changes or delete a pipeline.
- Click the green button to add a new pipeline
Step 2: Adding a New Pipeline
- Click the +Create new pipeline button
- Fill out the information in the popup window.
- Give the pipeline a name, add stages, and choose the visibility.
- NOTE: you can determine whether or not each individual stage is visible in the pie chart and funnel chart, as well as choose if the entire pipeline as a whole is visible or not.
- Using the arrows next to each stage, you can modify the order.
- Continue adding as many stages as you’d like.
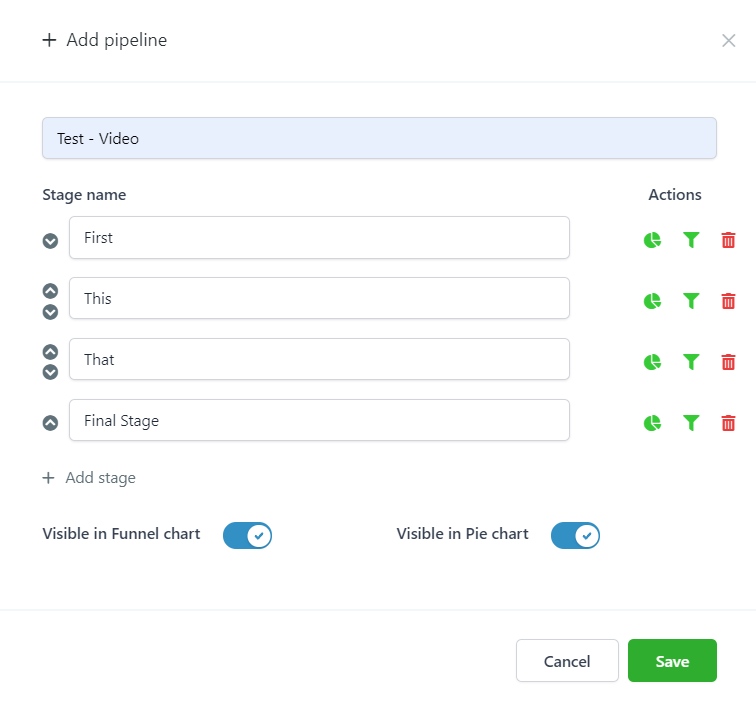
- Save to confirm your changes.
- Now this newly added pipeline will appear on your Pipelines page.
- You can click the edit icon to make any additional edits.
Keep learning