A contact form is an essential tool for gathering leads, inquiries, and customer feedback. With HighLevel, you can effortlessly design, customize, and integrate contact forms into your website or funnels. This step-by-step guide will walk you through the process of creating a contact form in HighLevel.
Step 1: Navigate to the Form Builder
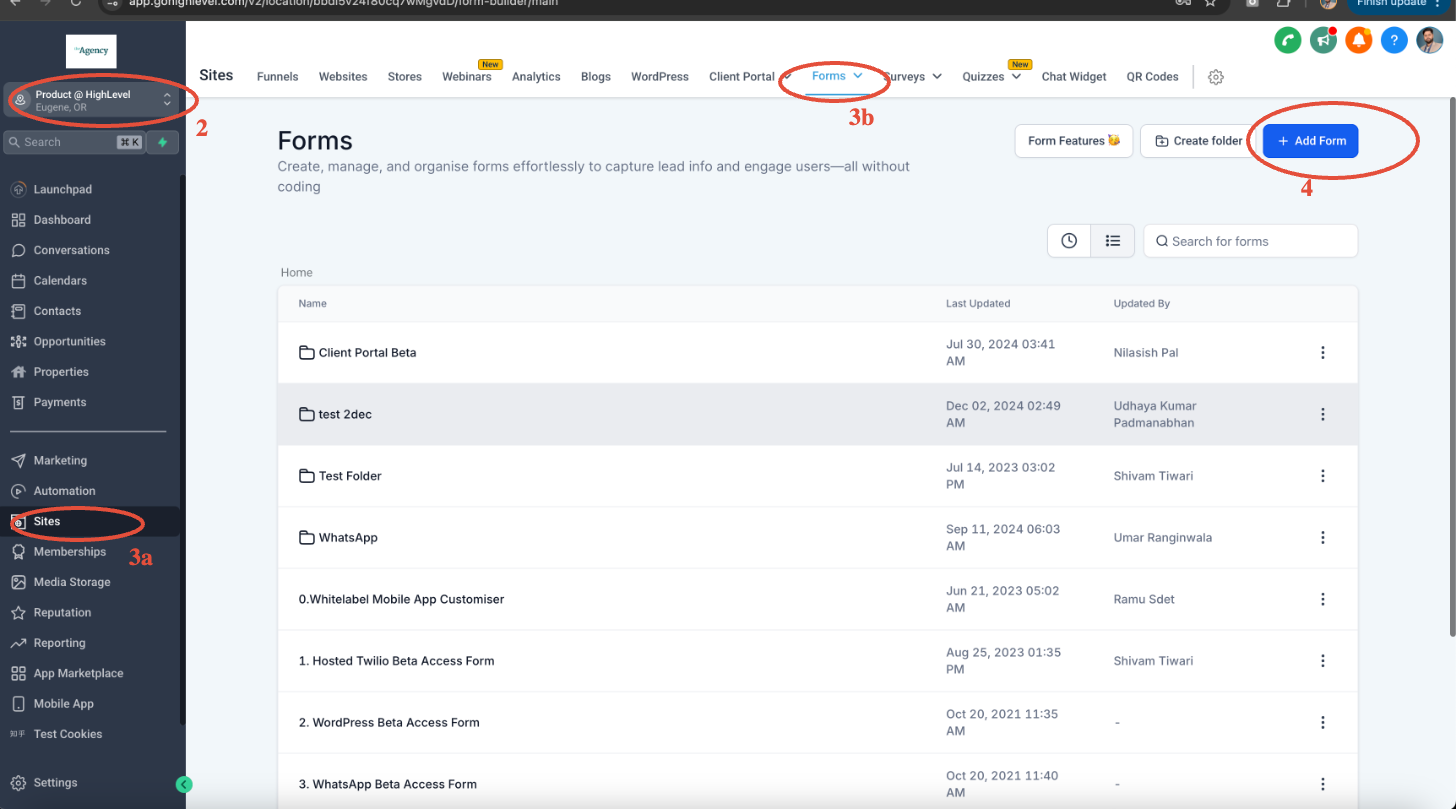
Log in to your HighLevel account.
Navigate to the correct client’s account (aka sub-account)
In the left-hand menu, click on Sites → Forms.
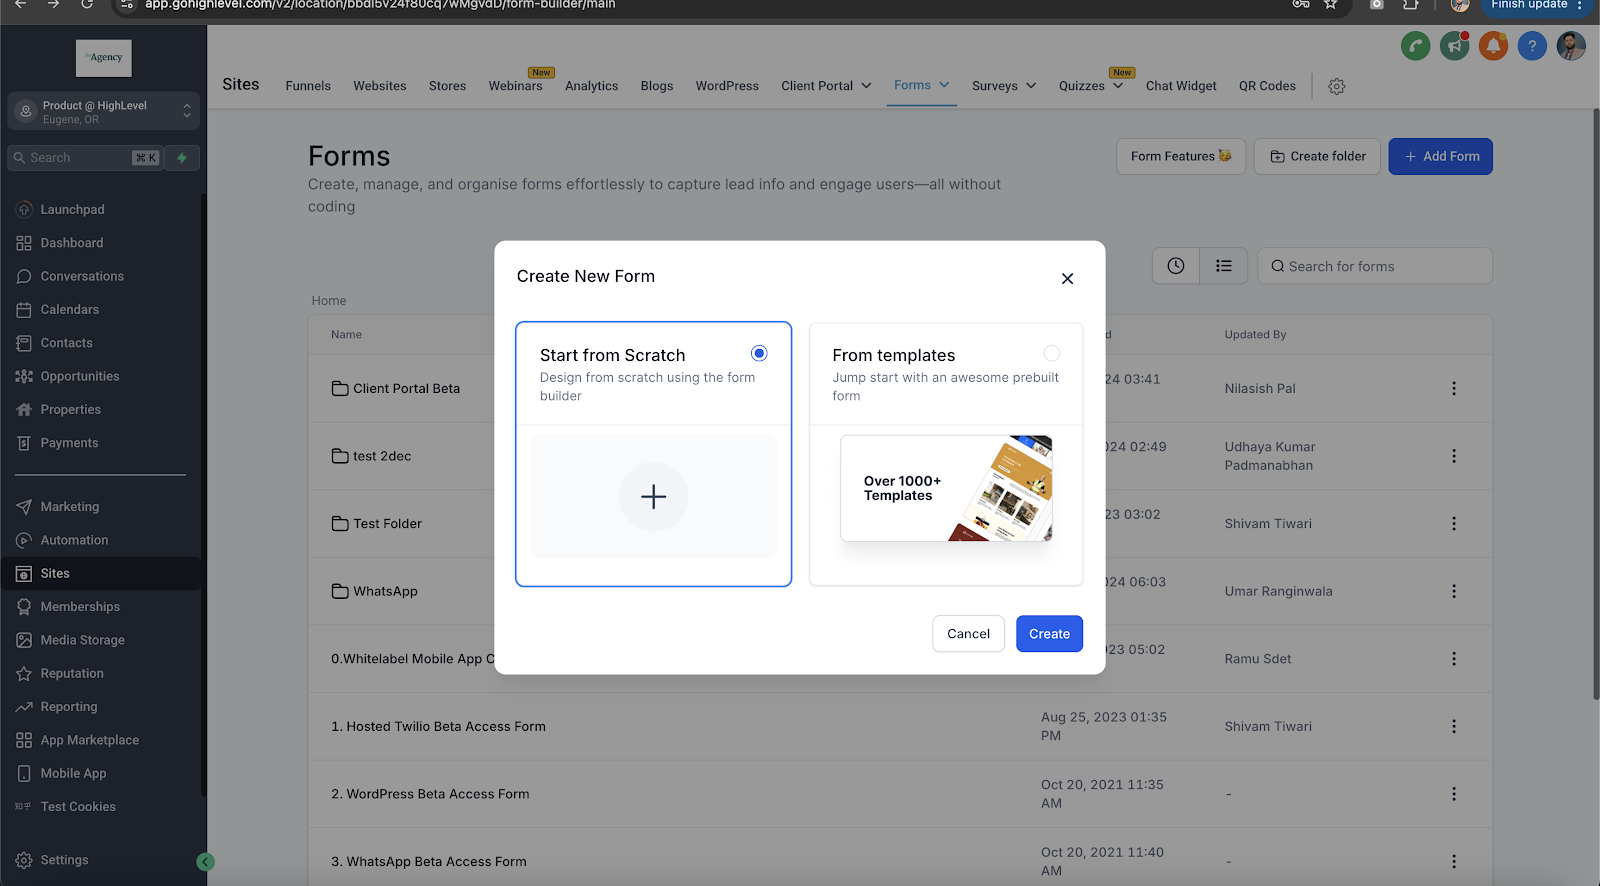
Click the + Create New Form button to start a new form.
You may choose to use one of our existing templates for “Contact Forms” or create a new one that suits your needs.
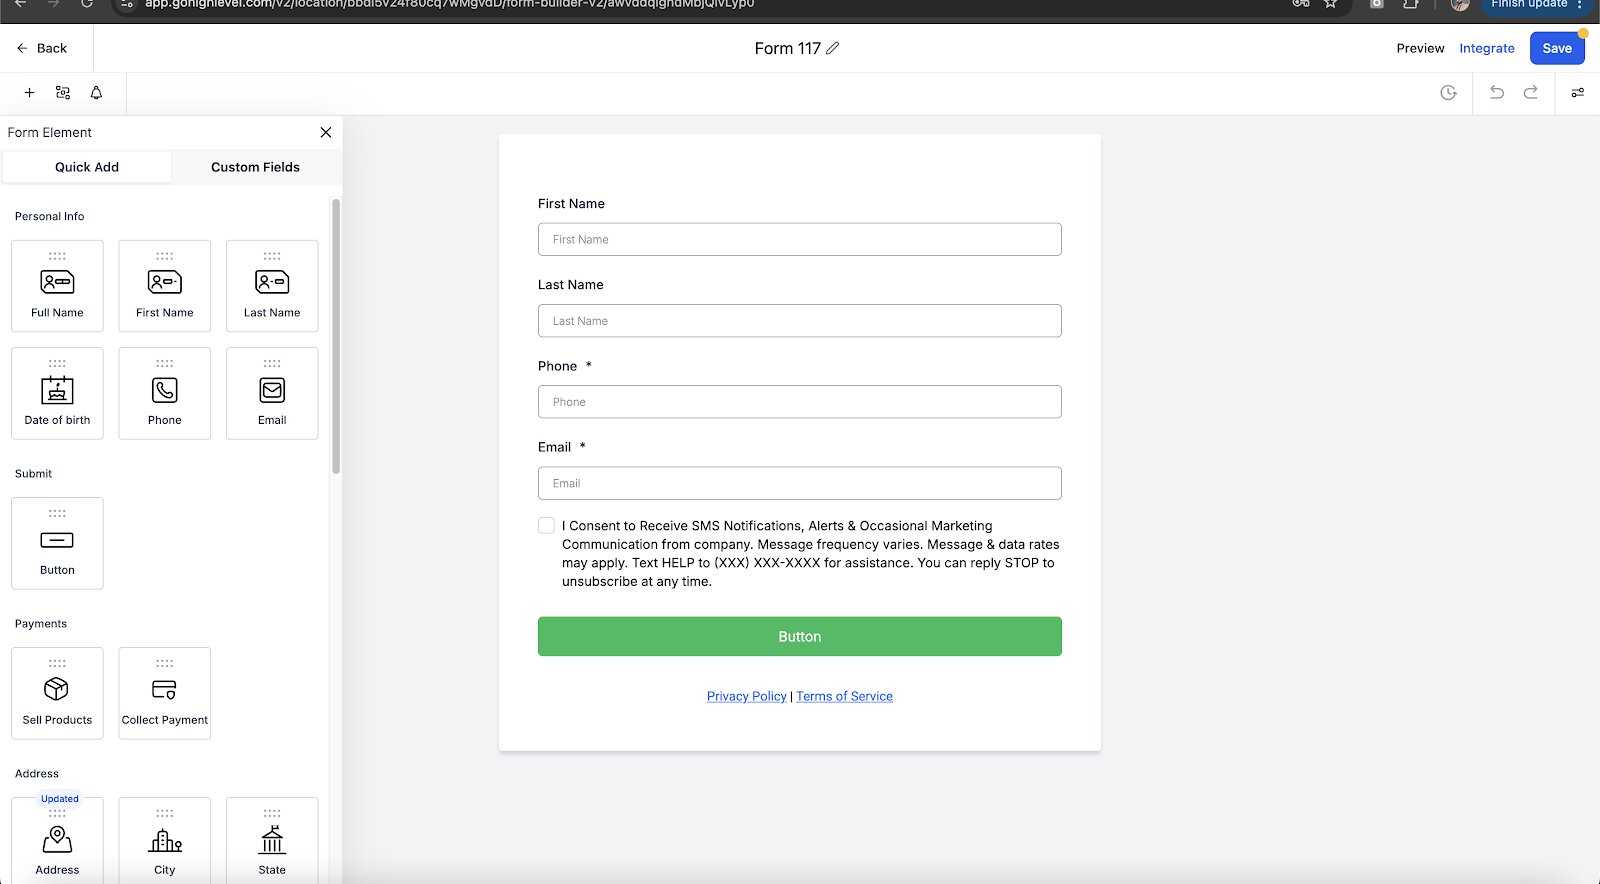
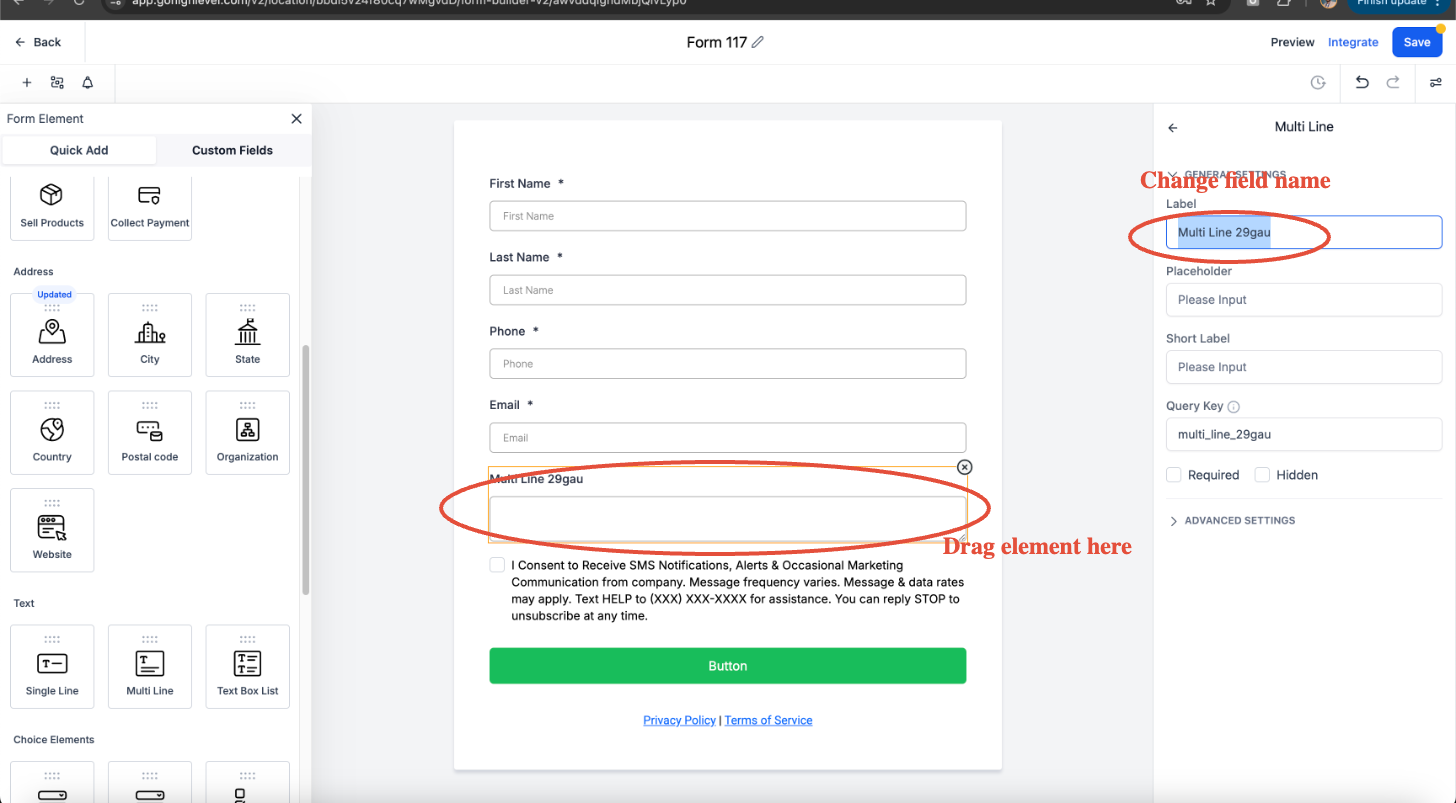
Step 2: Add Form Fields (optional)
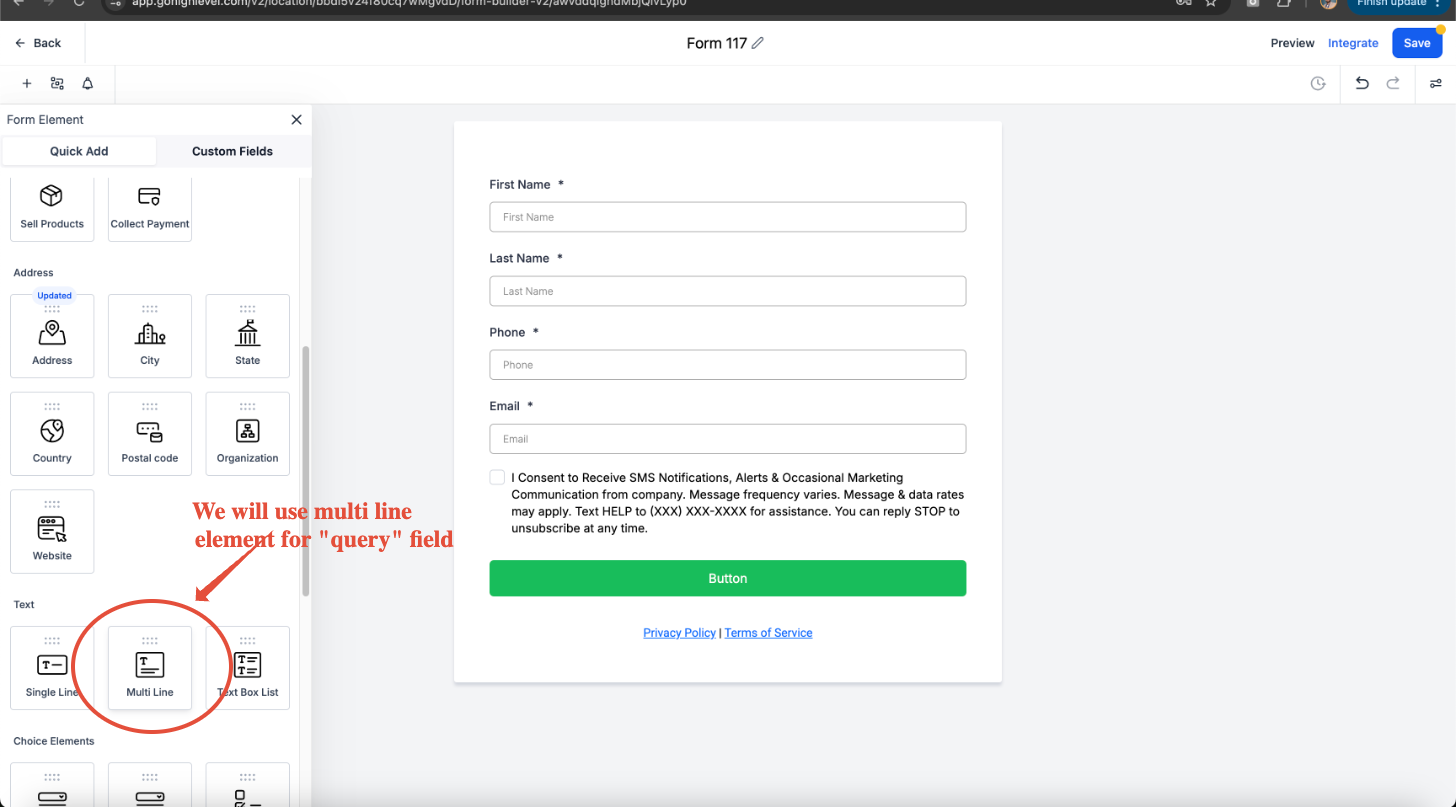
Simply drag and drop the necessary fields from the Form Elements section, such as Full Name, Email, Phone Number, or a Message/Custom Text Area. If you need extra fields, use the Custom Fields option to gather specific data. You can include dropdowns, checkboxes, or radio buttons for predefined choices. Plus, you can easily rearrange the fields by dragging them into your preferred order.
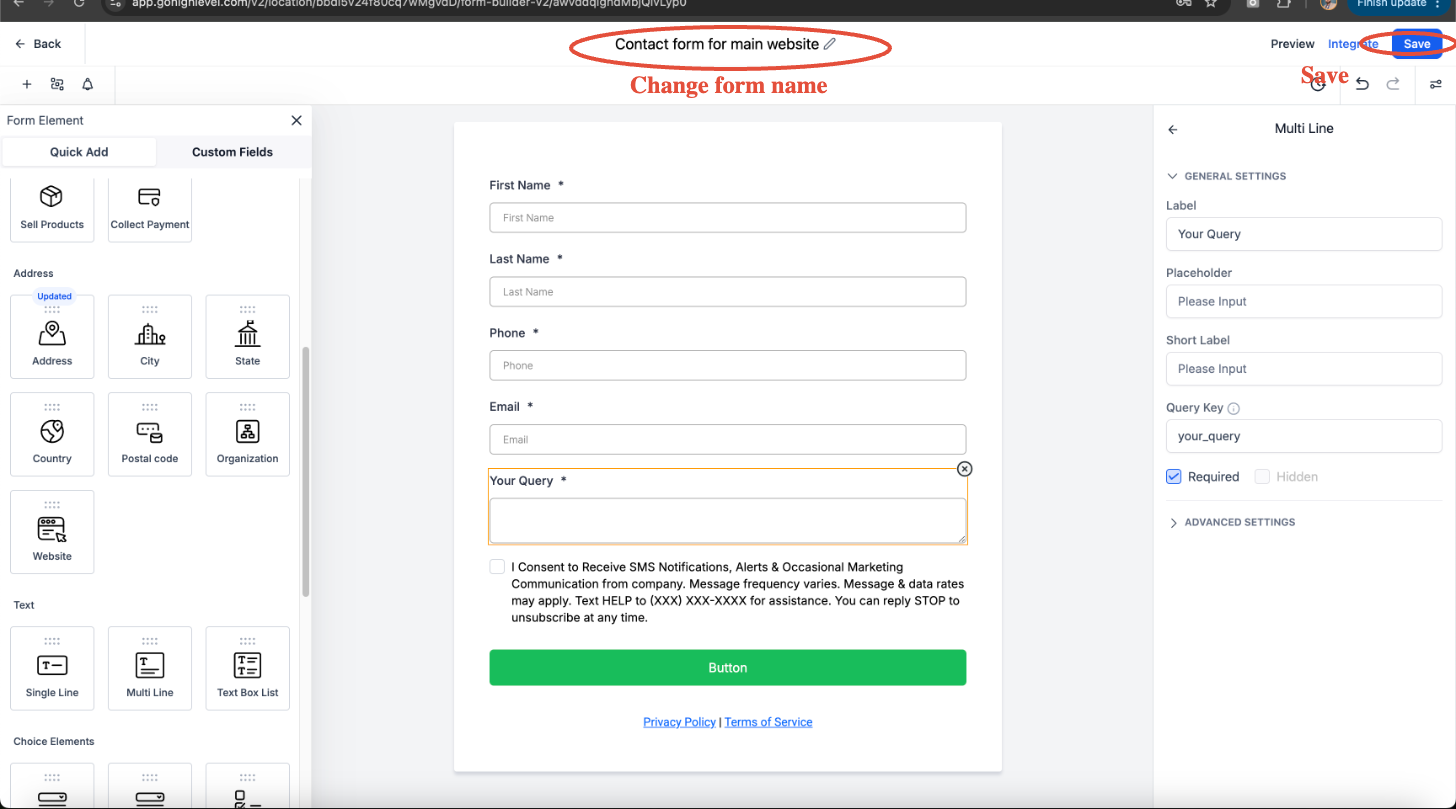
For the sake of this example we will use “query” as a field on the contact form.
Step 3: Customize Form Settings (Optional)
Notifications
You can setup notifications via email for yourself & also for the leads that fill your form
Form Style & Design:
Click the Styles tab to adjust the form’s background, text color, and spacing.
Toggle Full Width for responsive design.
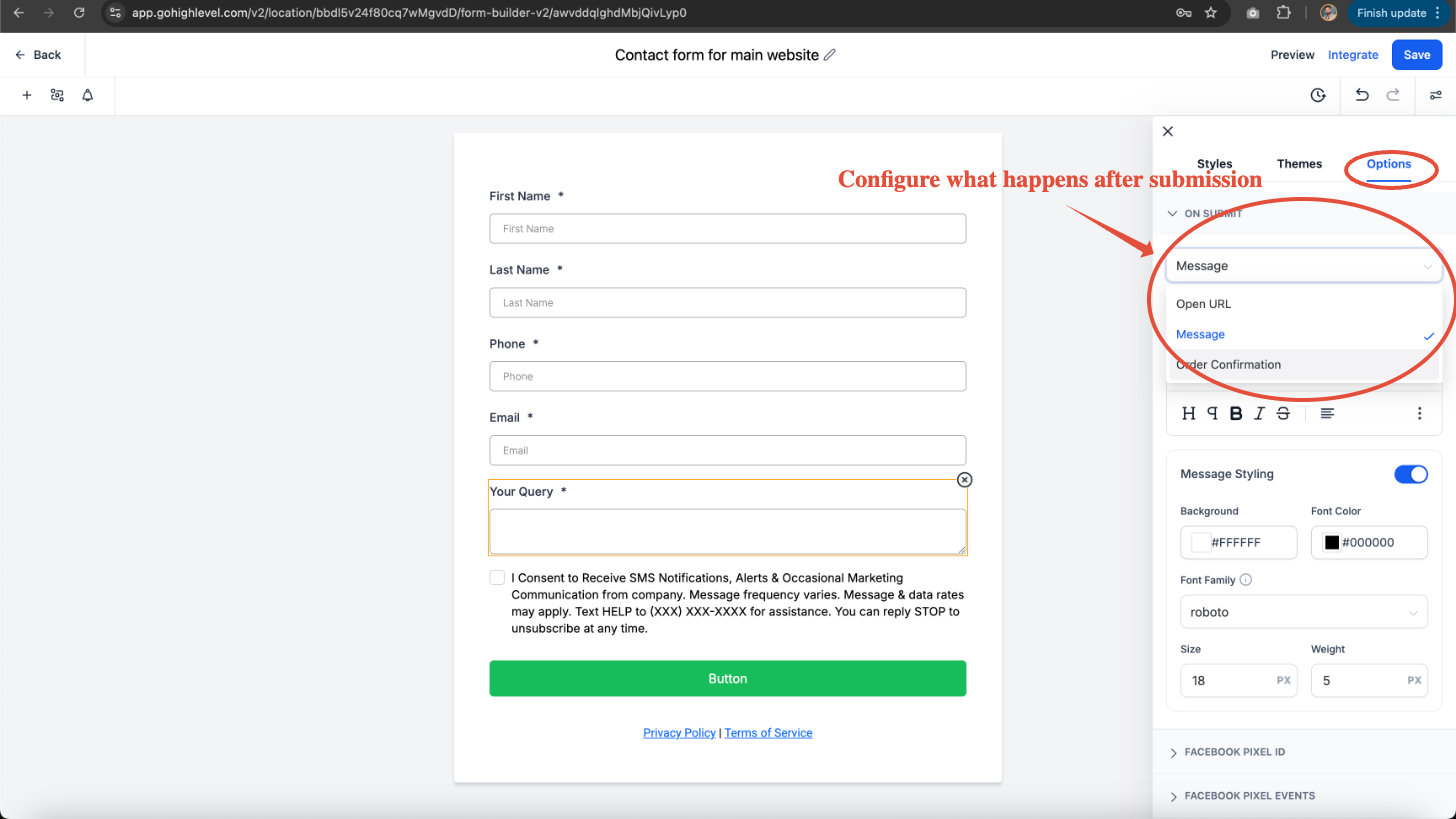
Form Actions:
Under Settings, choose what happens after submission: Show a Thank You Message (Enter a custom message) or Redirect to Another Page (Enter a URL). You can also Trigger a Workflow or Automation (e.g., Send a follow-up email)
Step 4: Save & Embed the Form
Click Save Form once satisfied.
Click the Integrate Form button to get embedding options
With these steps, you’ll have a fully functional contact form in HighLevel, ready to capture leads and engage with prospects.