How to Create and Edit an Unassigned Calendar in GoHighLevel
Updated March 9, 2023
Managing bookings without a structured calendar setup leads to scheduling conflicts and missed appointments in GoHighLevel. This guide walks you through every tab — from team and event setup to availability rules and confirmation settings — so your unassigned calendar is fully configured and ready to use.
This article provides a summary of the steps involved in setting up and modifying personal calendars that are not associated with any particular group or assignment.
Step 1: Create a New Calendar or Edit an existing Calendar
- To access the Calendars section, select it from the menu.
- To either create a new calendar or edit an existing one, click on the +New Calendar button or the … button located beside the corresponding calendar.
- Once selected, a pop-up window will emerge, allowing you to personalize the calendar to your liking.
Step 2: Fill out Tab 1 – Team and Event Setup
- Select the Name, Description, Title, and Meeting Location for the event.
- Pick a color for syncing the calendar.
- If you have a synced Google calendar, select a linked calendar.
- Choose a sync option, such as one-way, two-way, or disable trigger.
- NOTE: There is a comprehensive tutorial available that covers all the various options.
- Finally, save your changes and move on to the next tab.
Step 3: Fill out Tab 2 – Availability
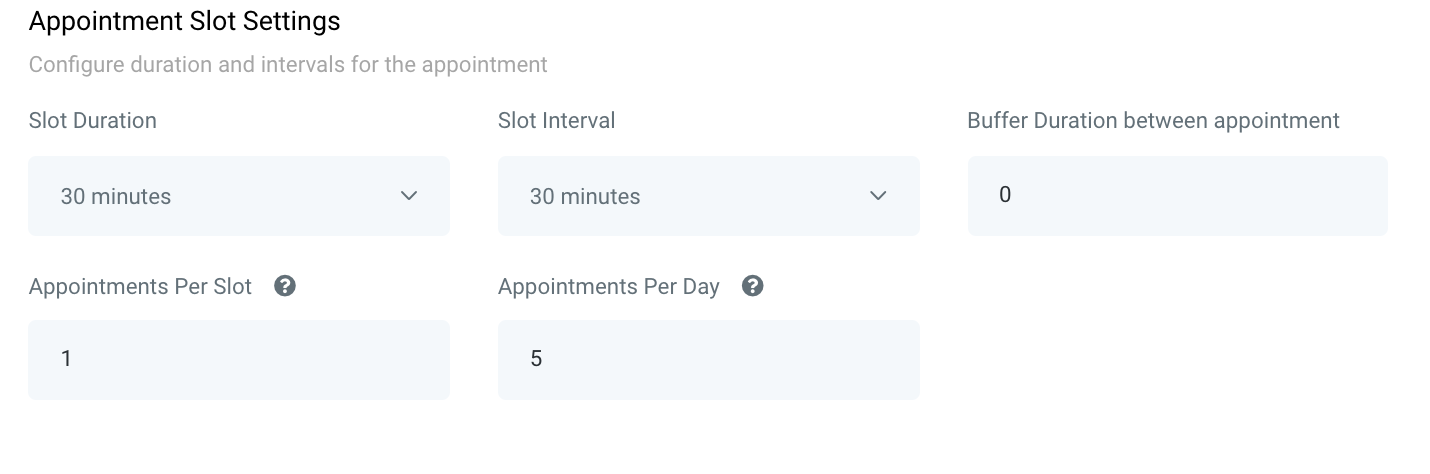
- Complete the “Appointment Slot Settings” to set the duration and frequency of appointments. In this section, you can personalize the duration of each appointment slot, include a time buffer between appointments, specify the maximum number of simultaneous appointments, and set the maximum number of appointments per day.
- Suppose you have a calendar dedicated to 30-minute meetings, and you want to schedule only one appointment per time period, without any buffer time in between. Additionally, you are okay with back-to-back appointments without any buffer, but you want to limit the maximum number of appointments to 5 per day. In this case, you would configure the slot settings as follows:
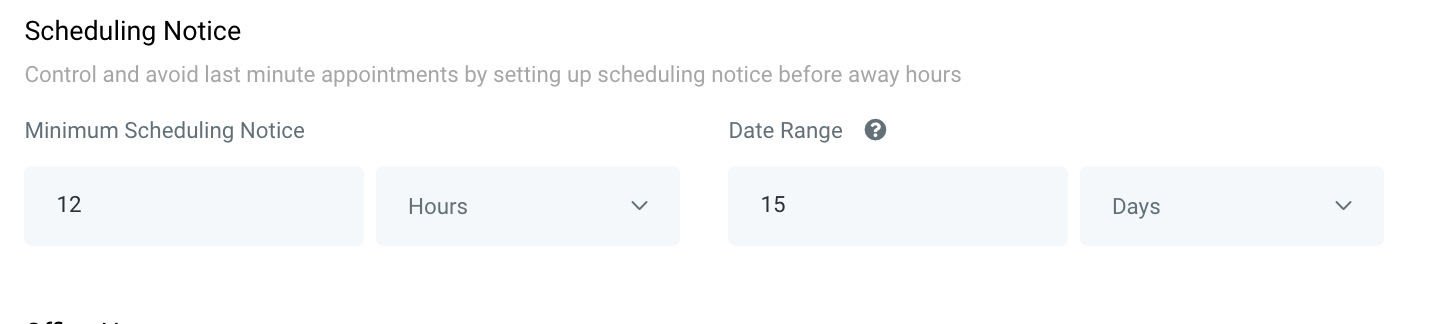
- Proceed to the Scheduling Notice section, where you can establish the period during which appointments can be scheduled. This feature can be useful in preventing last-minute reservations or reservations too far in advance.
- You can set the minimum timeframe by hours, days, weeks, or months, and the maximum timeframe by days, weeks, or months. As an illustration, the example below specifies a minimum notice of 12 hours and a maximum of 15 days in advance:
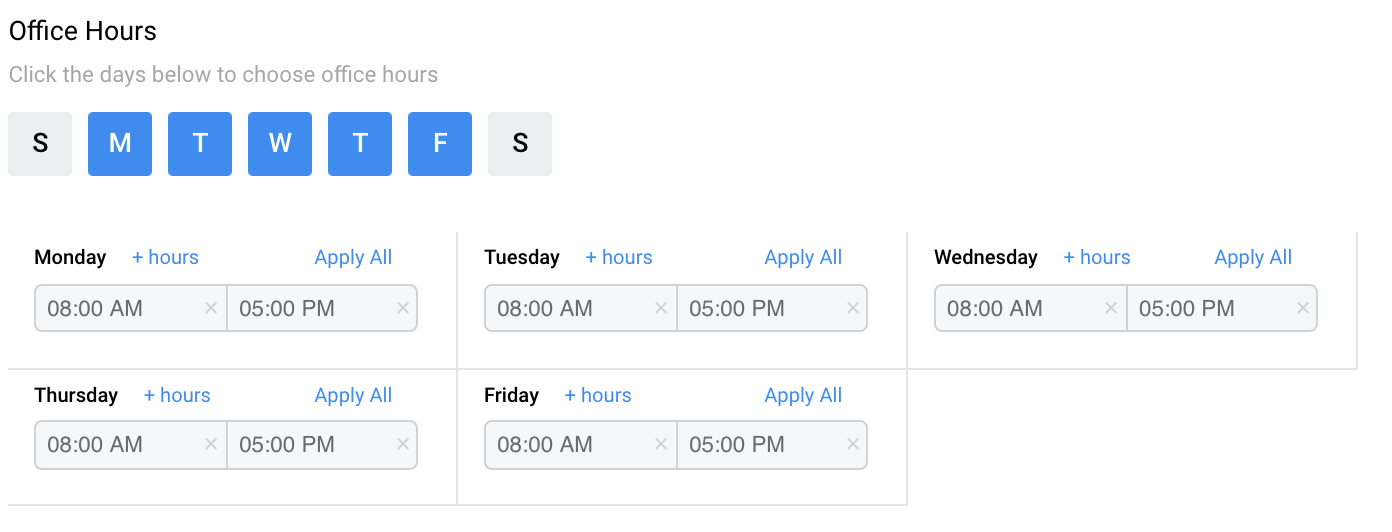
- To set your “Office Hours,” toggle the days of the week On or Off to indicate your availability (blue signifies availability). Next, set the hours for each day. In this example, Monday through Friday’s office hours are from 8 am to 5 pm:
- Save your changes and proceed to the next tab.
Step 4: Fill out Tab 3 – Confirmation
- In the “Form Settings” section, you can select a customized form if you have one that you want your contacts to complete before booking an appointment on your calendar.
- By enabling the “Sticky Contact” feature, the system will retain the contact’s inputted data and transfer it to other forms, surveys, or payment information they may encounter throughout the process.
- If you want to charge for the appointment, you can activate the Stripe payment option in this section.
- NOTE: To use the Stripe payment feature, you must have an integrated Stripe account. For further guidance on how to set this up, please refer to our other tutorials on the topic.
- In the “Notification & Additional Options” section, you can select various features such as auto-confirmation of appointments, sending alert emails, permitting Google calendar to send invitations or update emails to the attendees, enabling rescheduling and cancellation, and cancellation options.
- NOTE: We suggest updating the custom value to appointment.rescheduling and appointment.cancellation link if you intend to use them in campaigns or within this section.
- By entering your Facebook Pixel ID, it will be integrated into your scheduled events.
- In the “Custom code” section, you can input HTML or JavaScript (excluding CSS) to be loaded into the calendar.
- In the “Form Submissions” section, you can choose between displaying a personalized ‘Thank You’ message or redirecting the contact to a specific URL after form submission.
- Lastly, click on the “Complete” button to save all your changes.
Keep learning