How to Automate Appointment Booking in GHL Workflows
Updated February 28, 2025
Manually scheduling appointments after every form submission or webhook event slows down your pipeline and creates gaps in follow-up. Using the Book Appointment action in GoHighLevel workflows, you will set up fully automated scheduling with dynamic date support, team member assignment, and conditional booking logic.
Overview
The Book Appointment action allows users to schedule new appointments at designated times within specified calendars. With this feature, appointments can be automatically created through workflows, responding to trigger events. This is especially useful for businesses aiming to streamline their scheduling process through automation.
Example Use Case: When a form is submitted or an inbound webhook delivers data, a follow-up appointment can be instantly scheduled for a predetermined time.
Action Name: Book Appointment
How to Use
- Navigate to: Automations > Create New Workflow > Start From Scratch.
- Add a Trigger (e.g., Form Submitted).
- Add an Action:
- Select Add Action > Book Appointment.
- Enter the Action Name.
- Choose the Calendar where the appointment will be booked.
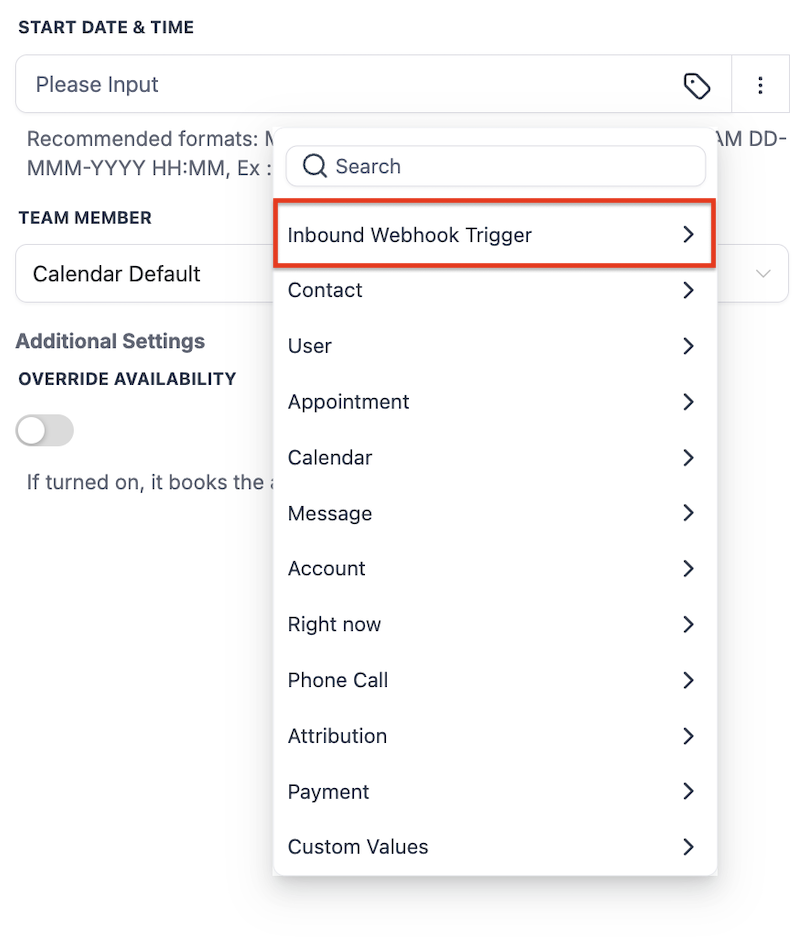
- Set the Appointment Date and Time:
- Standard: A fixed date and time applied to all appointments created by this workflow.
- Dynamic: A variable start date and time for different appointments. This can use data captured from inbound webhooks or custom values.
- Select a Team Member:
- Choose Calendar Default (team member selected through round-robin or default settings).
- Or, specify a particular team member for the booking.
- Additional Settings:
- Override Availability: If enabled, the system will book the appointment without checking availability. If disabled, the system will ensure availability before scheduling.
- Override Availability: If enabled, the system will book the appointment without checking availability. If disabled, the system will ensure availability before scheduling.

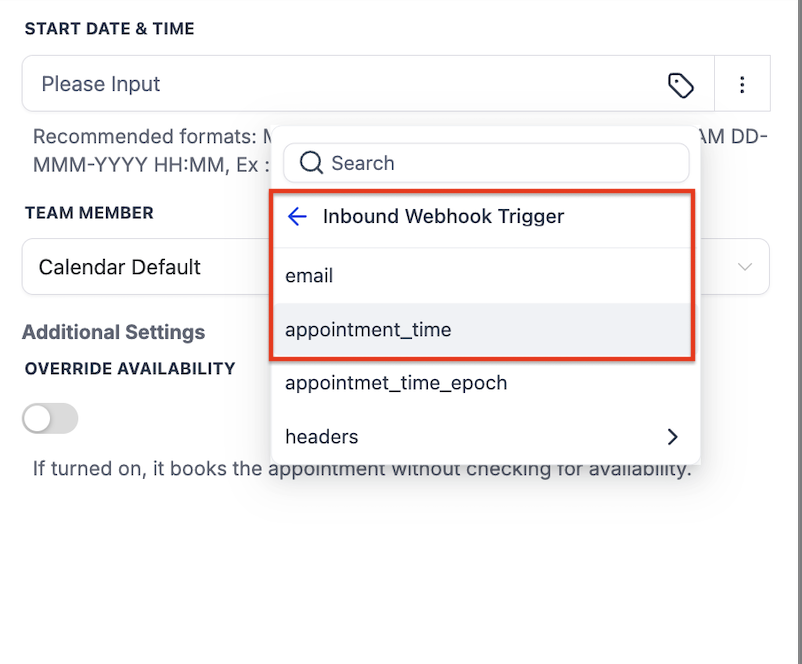

Note: For dynamic start dates and times, ensure your format is compatible. Use the Date Time Formatter action to convert the date and time format if necessary.
Supported Date and Time Formats:
- MM-DD-YYYY HH:MM (e.g., 12-21-2021 08:30 AM)
- DD-MMM-YYYY HH:MM (e.g., 21-OCT-2021 08:30 AM)
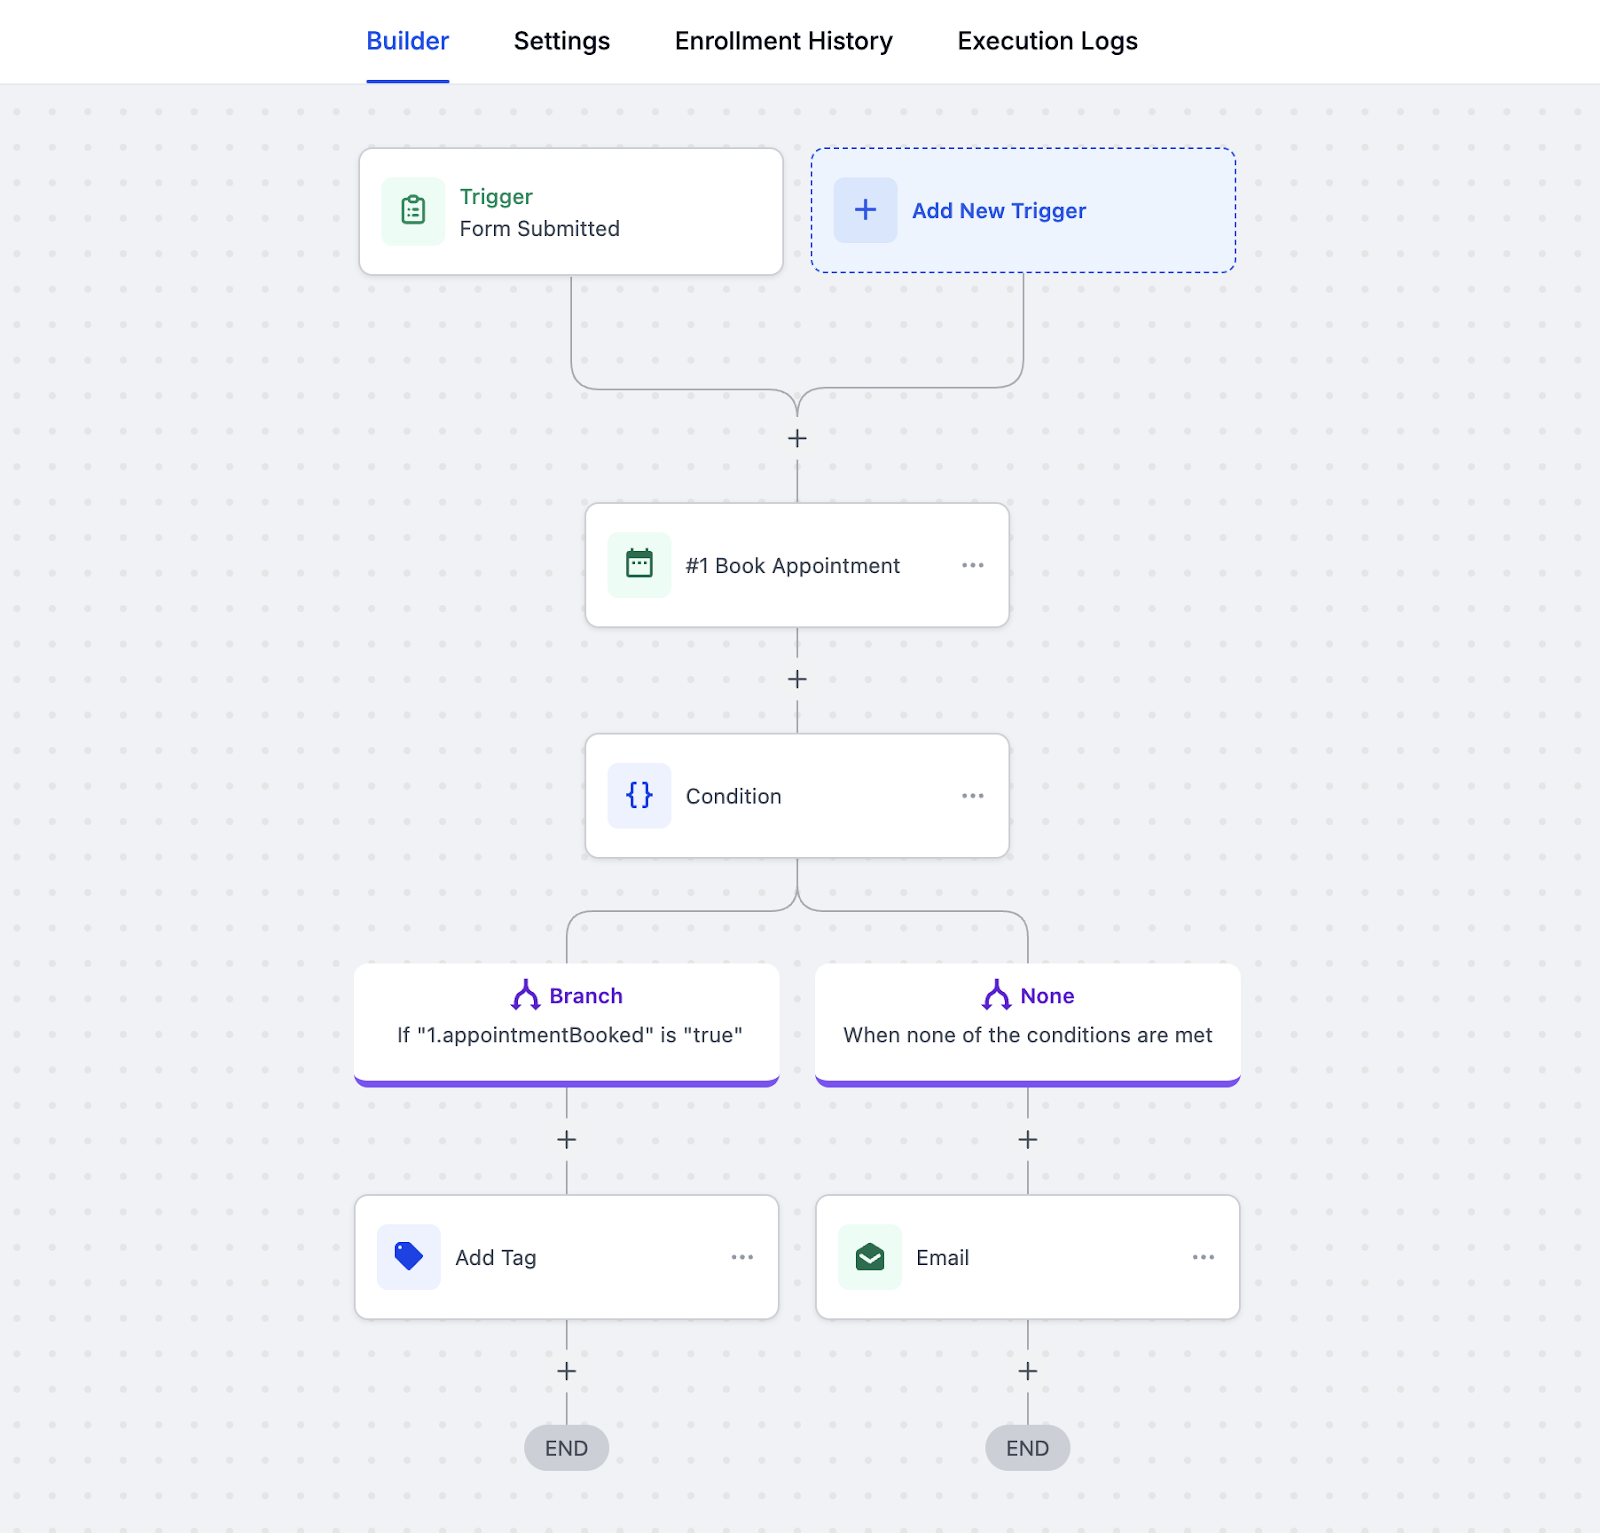
Conditional Logic (Adding an If/Else Condition)
You can also add an If/Else Condition to check if the appointment was successfully booked. To implement the conditional logic:
- Click on Add Action and select If/Else.
- Enter the Action Name.
- Set the BranchConditions:
- Under Branch, select Book Appointment and choose the specific action created earlier. In the adjacent field, select True for “Appointment booked successfully” and False for “Appointment not booked”.
- If Booked (True): Define next steps, such as sending a confirmation email.
- If Not Booked (False): Specify alternative actions, like notifying the user by email.
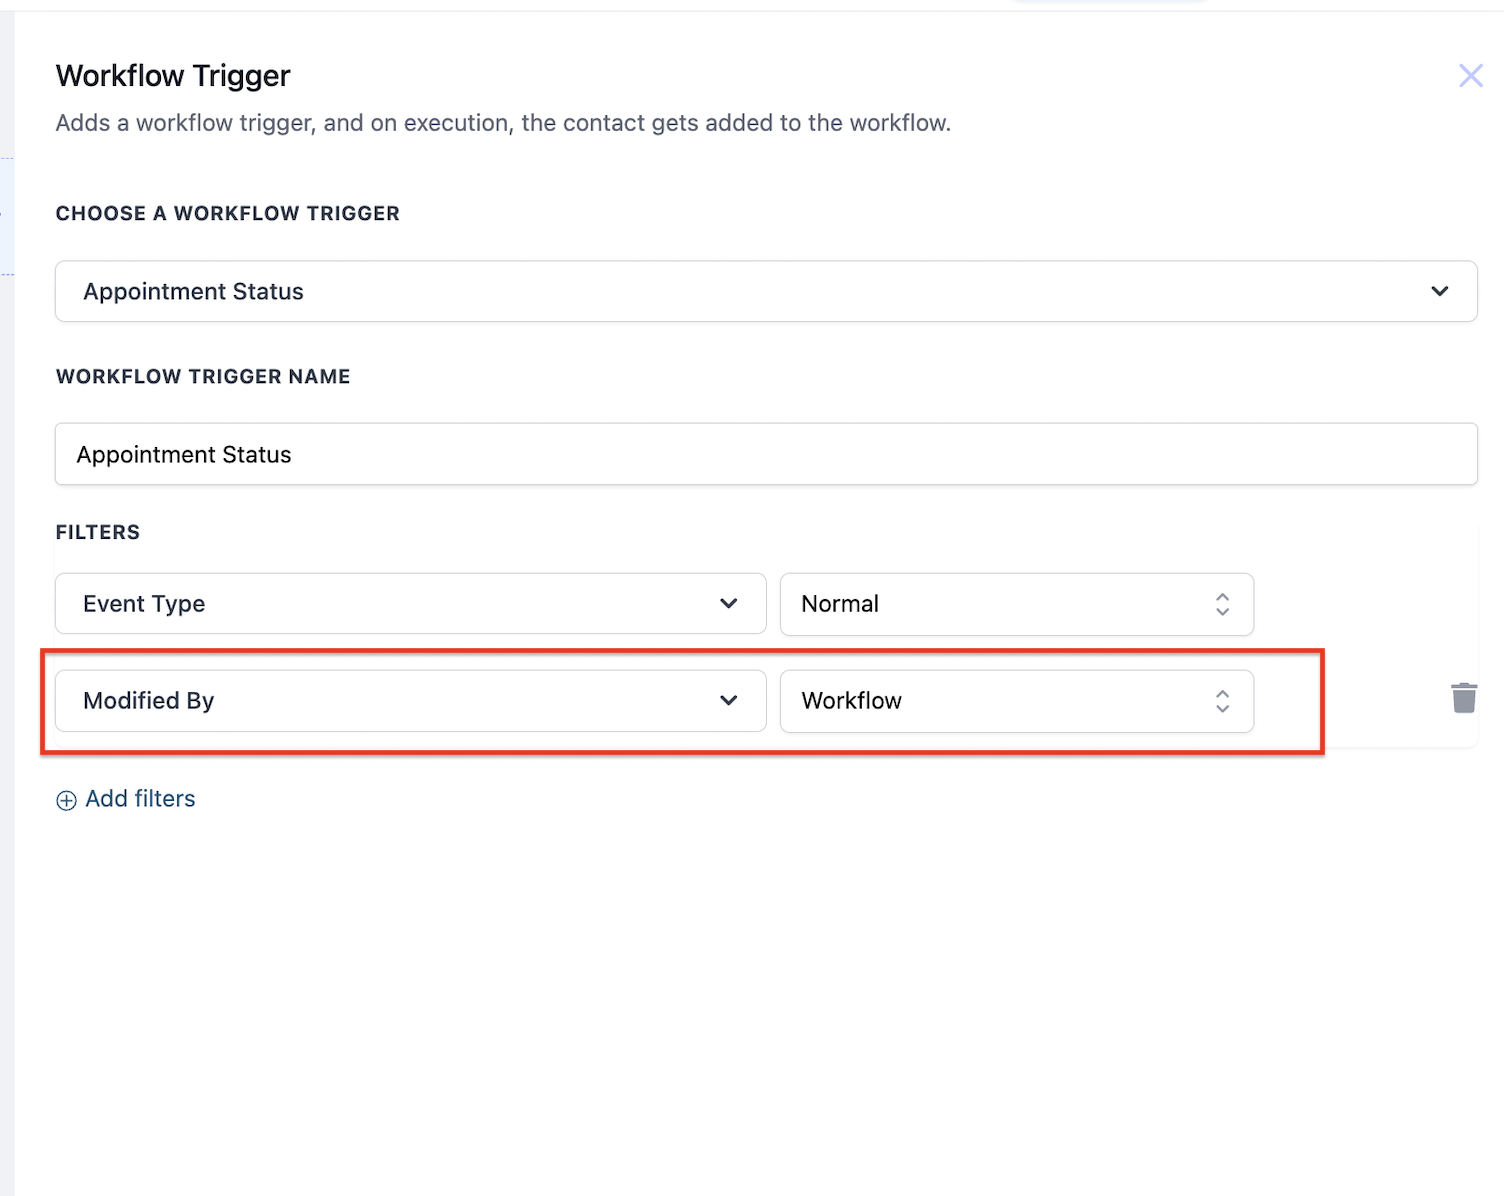
New Workflow Filter for Appointment Status Trigger
We’ve added a new filter to the Appointment Status Trigger! With the new ‘Modified By’ filter, you now have greater control over when a workflow activates whenever an appointment is booked or updated within the system.
Keep learning