GoHighLevel Workflow Builder: How to Create and Automate with Ease
Updated January 19, 2023
Managing disconnected campaigns and manual follow-ups costs agencies time and leads that should be converting. By mastering the GoHighLevel workflow builder, you'll set up multi-trigger automations with conditional logic that run your sequences on autopilot.
This is an overview of the workflow builder. The workflow builder is a visual builder feature that allows you to combine trigger and campaign type features with some added functionality.
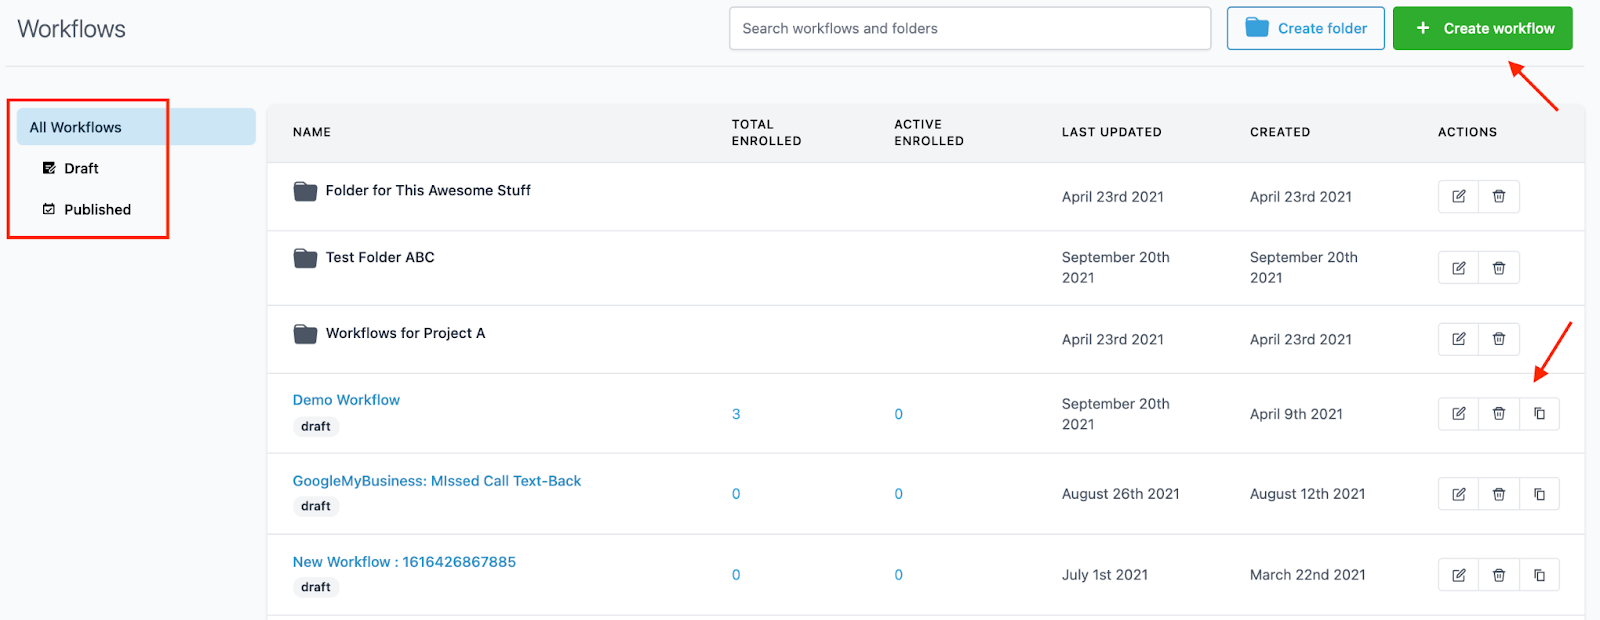
Step 1: Access the Workflow Dashboard
- Navigate to workflows, you’ll end up on this Workflow Dashboard page. Here you’ll see drafted and published workflows.
- You can Create a New workflow using the green button at the top.
- You can also edit, delete, or copy existing workflows using the icons on the right side under “Actions”.
- Additionally, you can click through multiple pages if you have several workflows.
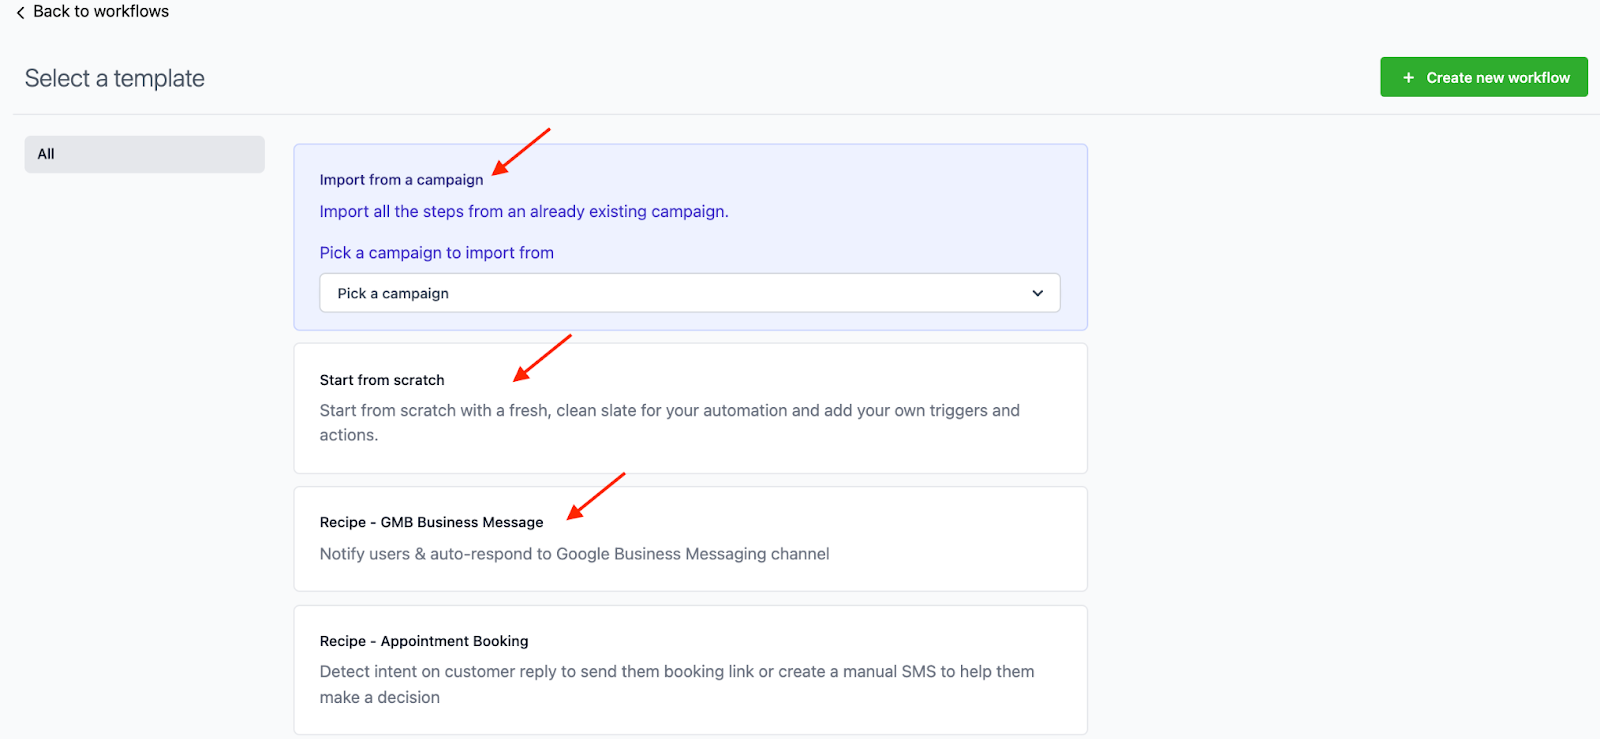
Step 2: Create a Workflow and Navigate through the Builder
- Click the +Create New Workflow button in the top right of the screen.
- Choose an option for the type of Workflow you wish to create. You can import events from an existing campaign, start a workflow from scratch, or choose from preexisting ‘recipes’ or templates.
- Click the +Create New Workflow button in the top right of the screen again, to enter the builder.
- In the Workflow Builder, you can rename a workflow using the pencil icon next to the title.
- By default, you’ll be on the Actions page. You can click to toggle between Actions, Settings, History, and Status tabs. (We’ll explain each tab in a separate tutorial.)
- Add your trigger(s) and create your workflow. You can have multiple triggers fire off the same chain of events.
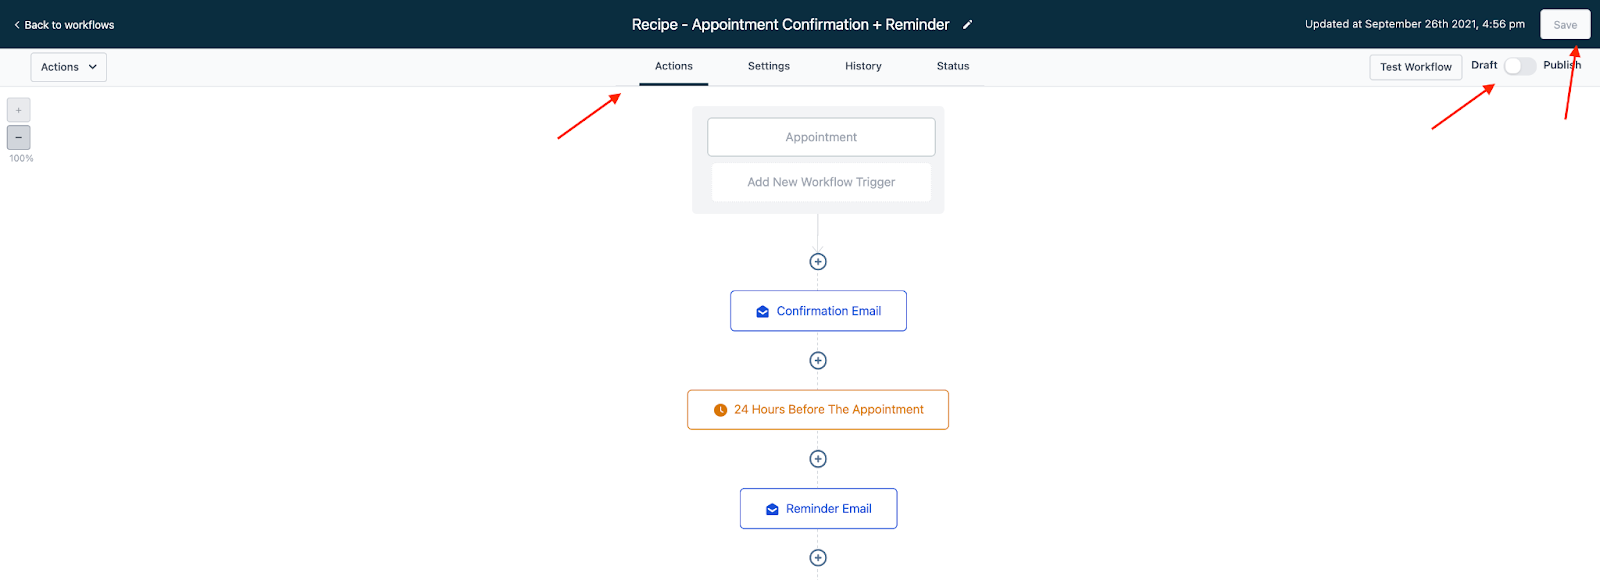
- In the top right, you can click the “Test Workflow” button. Save any changes, and then toggle the Workflow from Draft to Publish mode to activate it.
Step 3: Customizing Your Workflow Triggers
- Click the Add New Workflow Trigger in the gray box at the top of the builder.
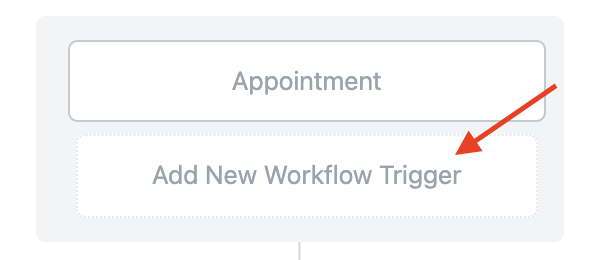
- Choose the Trigger type, and customize any needed filters.
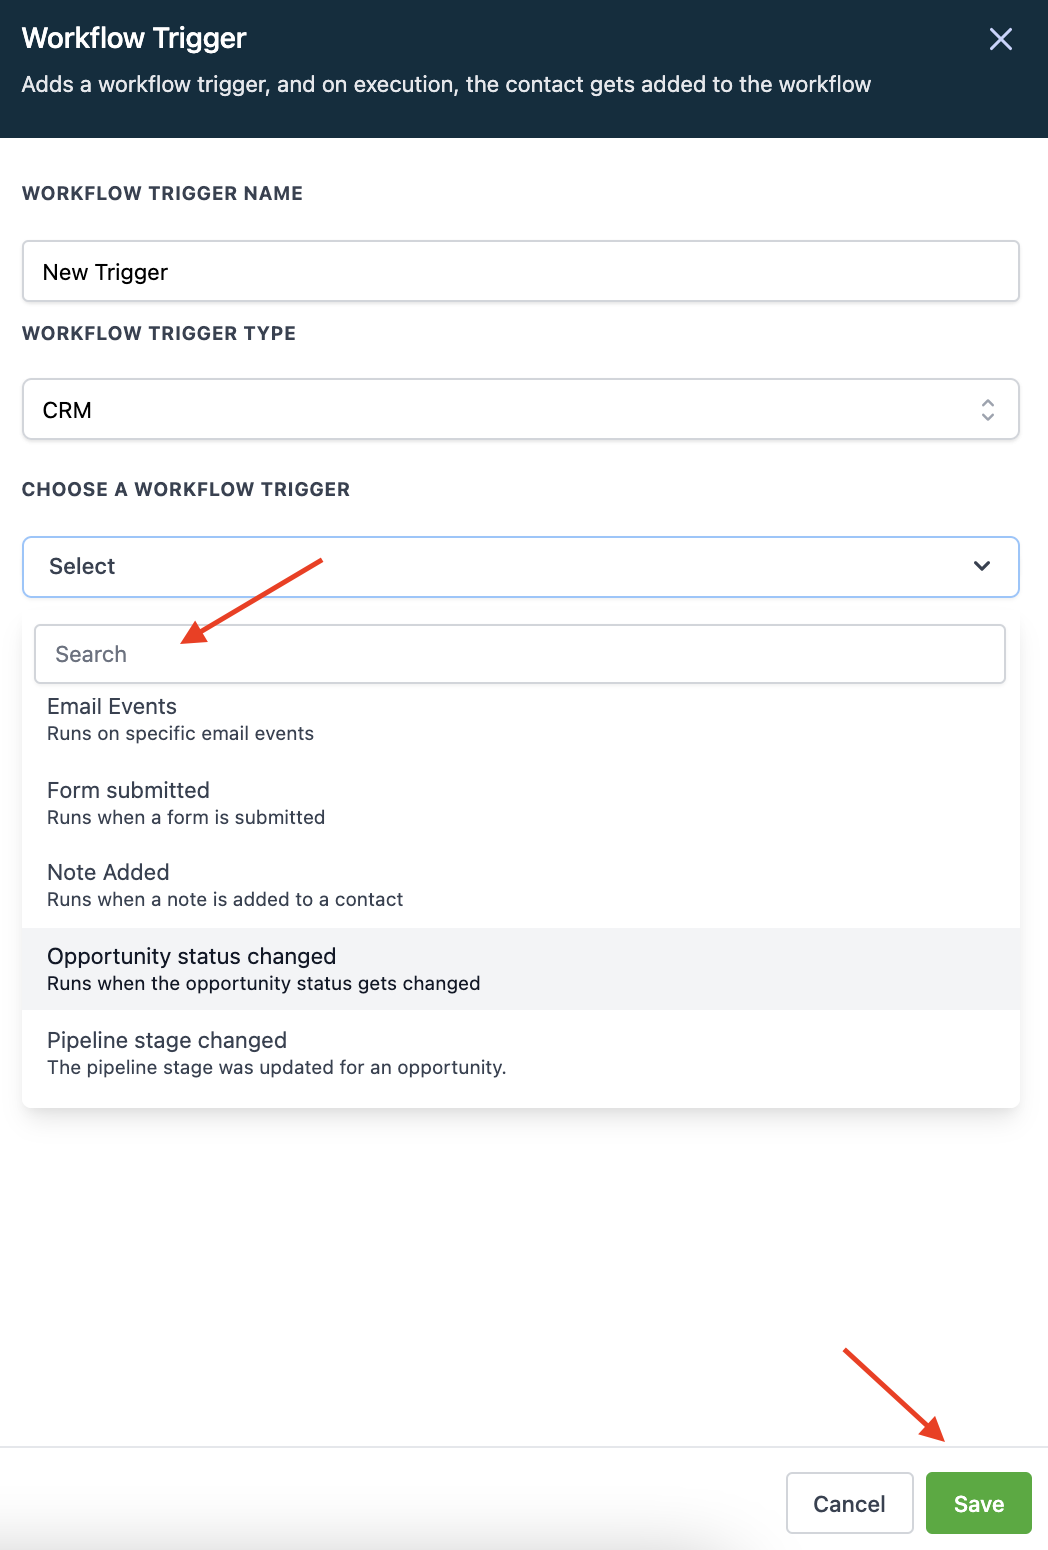
- Click Save and the trigger will be added to your workflow.
Note: a benefit of the Workflow feature is that you can have multiple triggers fire off the same sequence of events.
Step 4: Customizing Your Workflow Actions
- Click the + to add a new event to the workflow. Choose and customize the action in the menu on the right.

- Save to confirm the changes.
- You can also click into an existing event to update it. Be sure to save any changes you make.
NOTE: the If/Else workflow condition is a new feature which allows you to take different paths, or chains of events, depending on specific conditions within the workflow. You can specify the path based on contact details, date/time, contact reply, or trigger, you can set up the various paths. For example, you may want the workflow to send people from a certain company down one path, and people from another company down another path. You can further customize the if/else conditions to include several filters if you wish.
Keep learning