How to Build a Custom Website in GoHighLevel From Scratch
Updated January 17, 2023
Many agencies struggle to build client websites quickly without relying on developers or complex tools. Using GoHighLevel's drag-and-drop website builder, you'll create a fully customised, domain-connected website with pages, settings, and automation ready to go.
Custom Websites can be created by anyone even without in-depth coding or programming knowledge. The system is user-friendly and allows you to create web pages using a drag-n-drop website builder. Not only will your website look great, but the customization tools allow you to make it easy to navigate and user-friendly on the front end, while the system also allows you to set up automations and specifics on the backend to help you manage your business.
Step 1: Create a Website
- Navigate to Websites.
- Choose +New Website to get started

- In the popup window, you’ll need to choose a Website Name. This will help you track multiple websites in your system.
- After naming the Website, click “Create Website”. NOTE: You can ‘Clone’ and ‘Edit’ your website
- Click +Add New Page to start adding pages to your site.

- In the drag-n-drop Website Builder, there will be a menu in the top that allows you to drag sections, rows, columns, and elements onto the page. Then you can highlight elements (like the headline shown below) and use the menu on the left to customize the font, spacing, alignment, hyperlinks, and more for that particular element.)
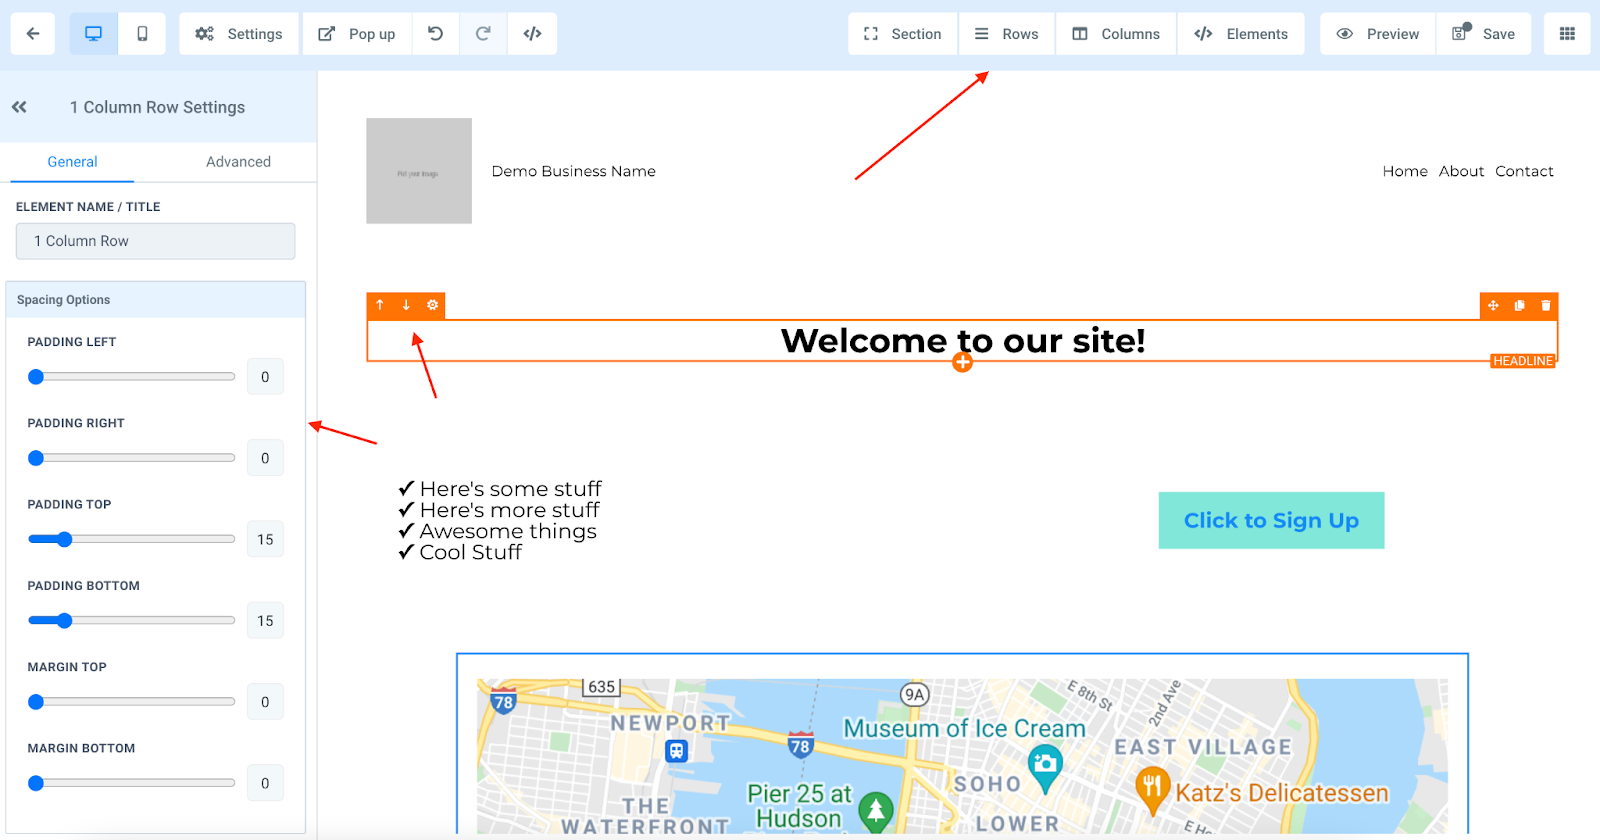
- Be sure to save any changes before leaving the builder.
- You can also use the “Preview” button in the top right corner to preview the page in your web browser.
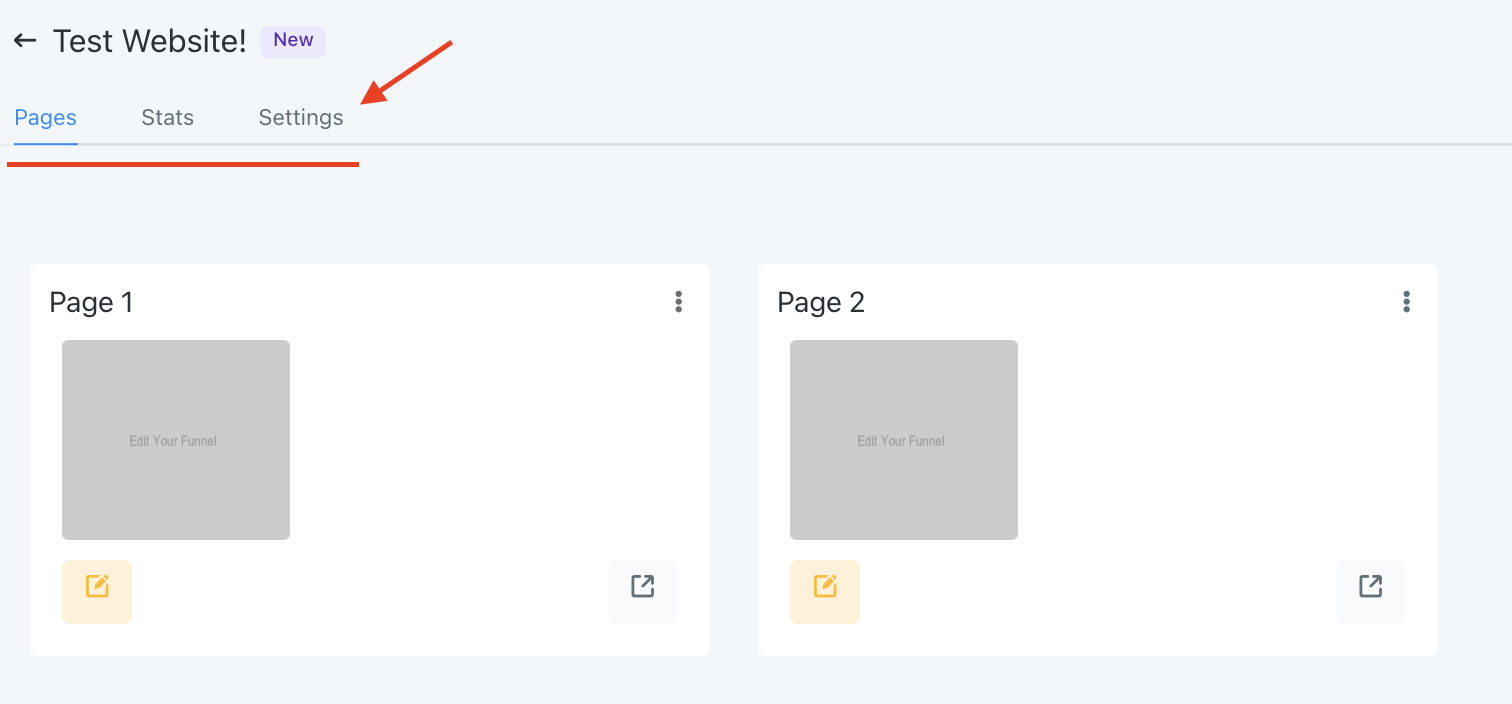
- Back in the “Pages” tab for the site, you can view an overview of all your pages for the particular website.
- At any time, you can use the menu in the top left to navigate to your Pages, Stats, and Settings.
- Under Settings, both the Domain and Path are important to ensure you have properly set up so people can actually navigate to and access your site. (This is how you make the website work with your domain, so that www.mydemoaccount.com/this-is-… would direct viewers to the specific page.) Check out our Domains tutorials for full guidance on how to best set up your domains.
Step 2: Managing Your Website(s)
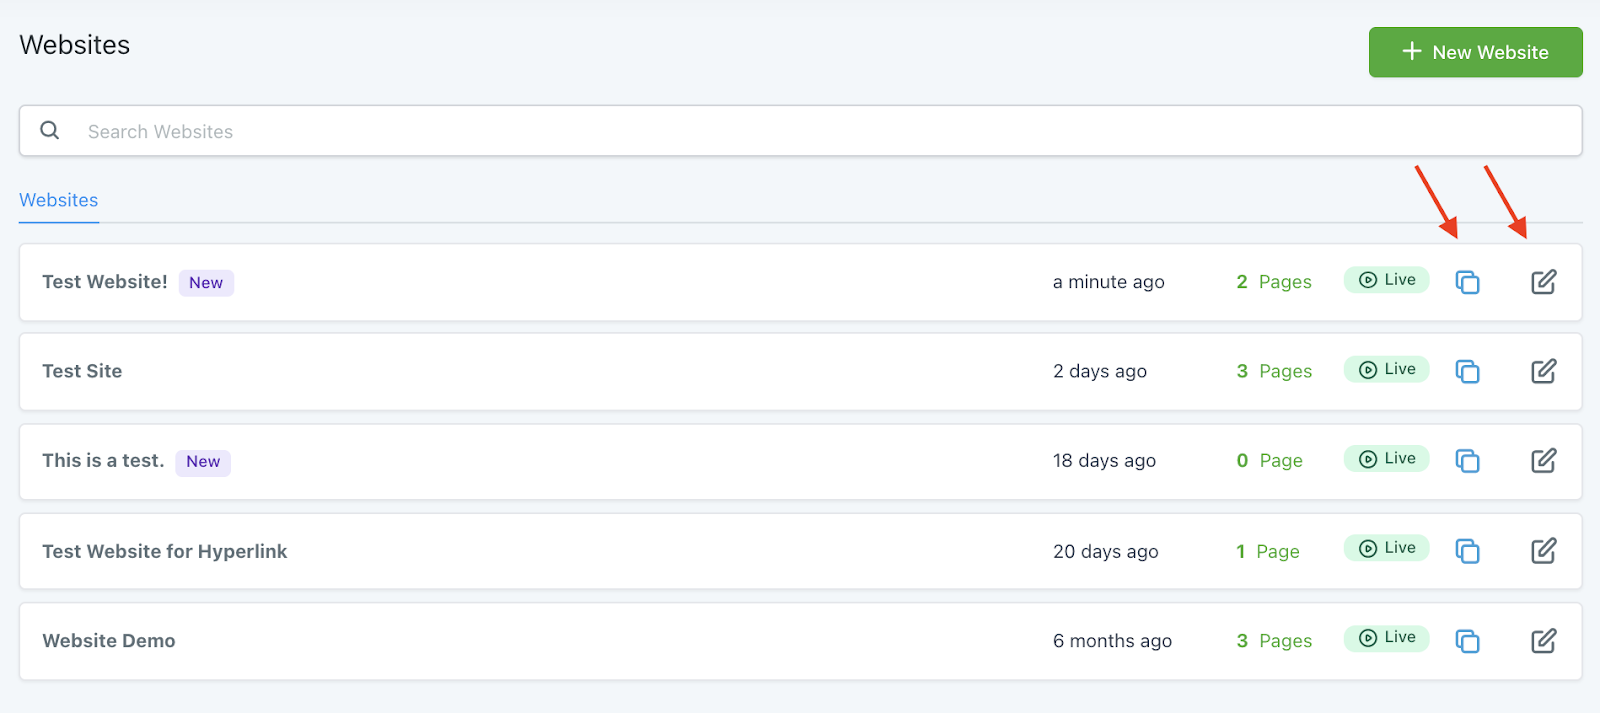
- Navigate to “Funnels & Websites”.
- This at-a-glance view provides an overview of all your websites. (Here is where you can click +New Website to get started with creating a new site too.) You can also use the search bar to search through your websites.
- There are 2 icons on the right side of each website’s row, indicating the ability to clone or edit the site. You can click either at anytime to clone your site or edit your site.
Keep learning