Using the Products within your system, you can create and send invoices to your customers and clients. This will allow you to streamline your payments processing, to ensure you capture your money for your business. Follow the steps below to learn how:
Part 1: Creating and Sending an Invoice
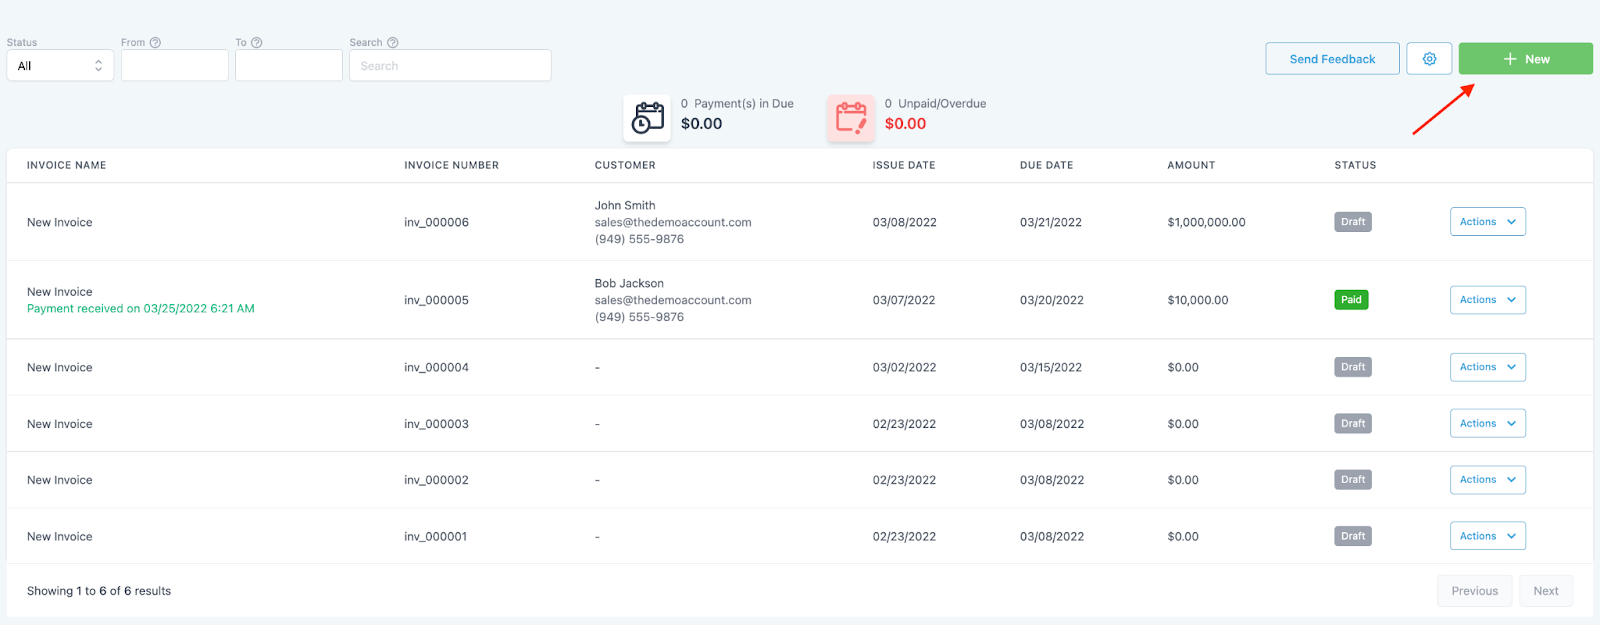
Step 1: Create an Invoice
Navigate to Payments and click into the Invoice tab.
Click +New to start creating your invoice.
NOTE: You may add generic notes for the invoice using the gear icon right before the “New” button.
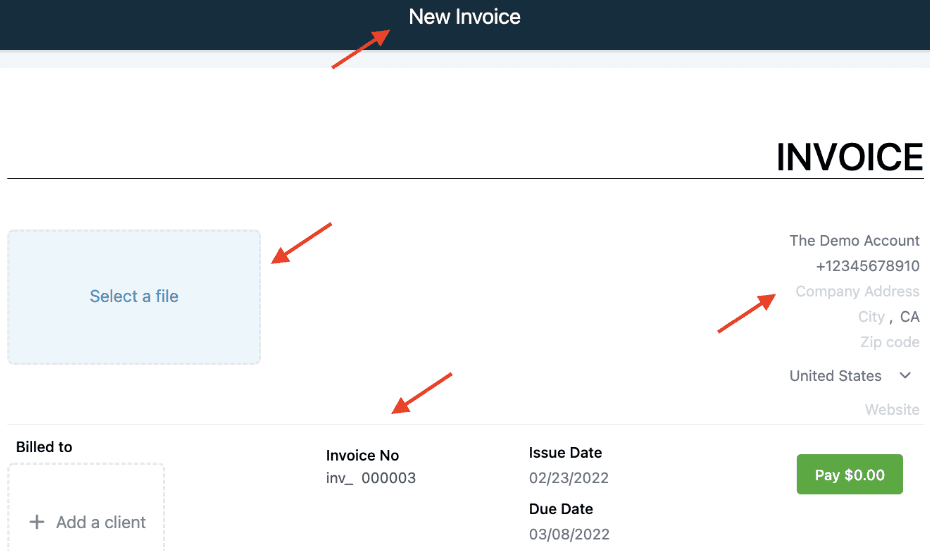
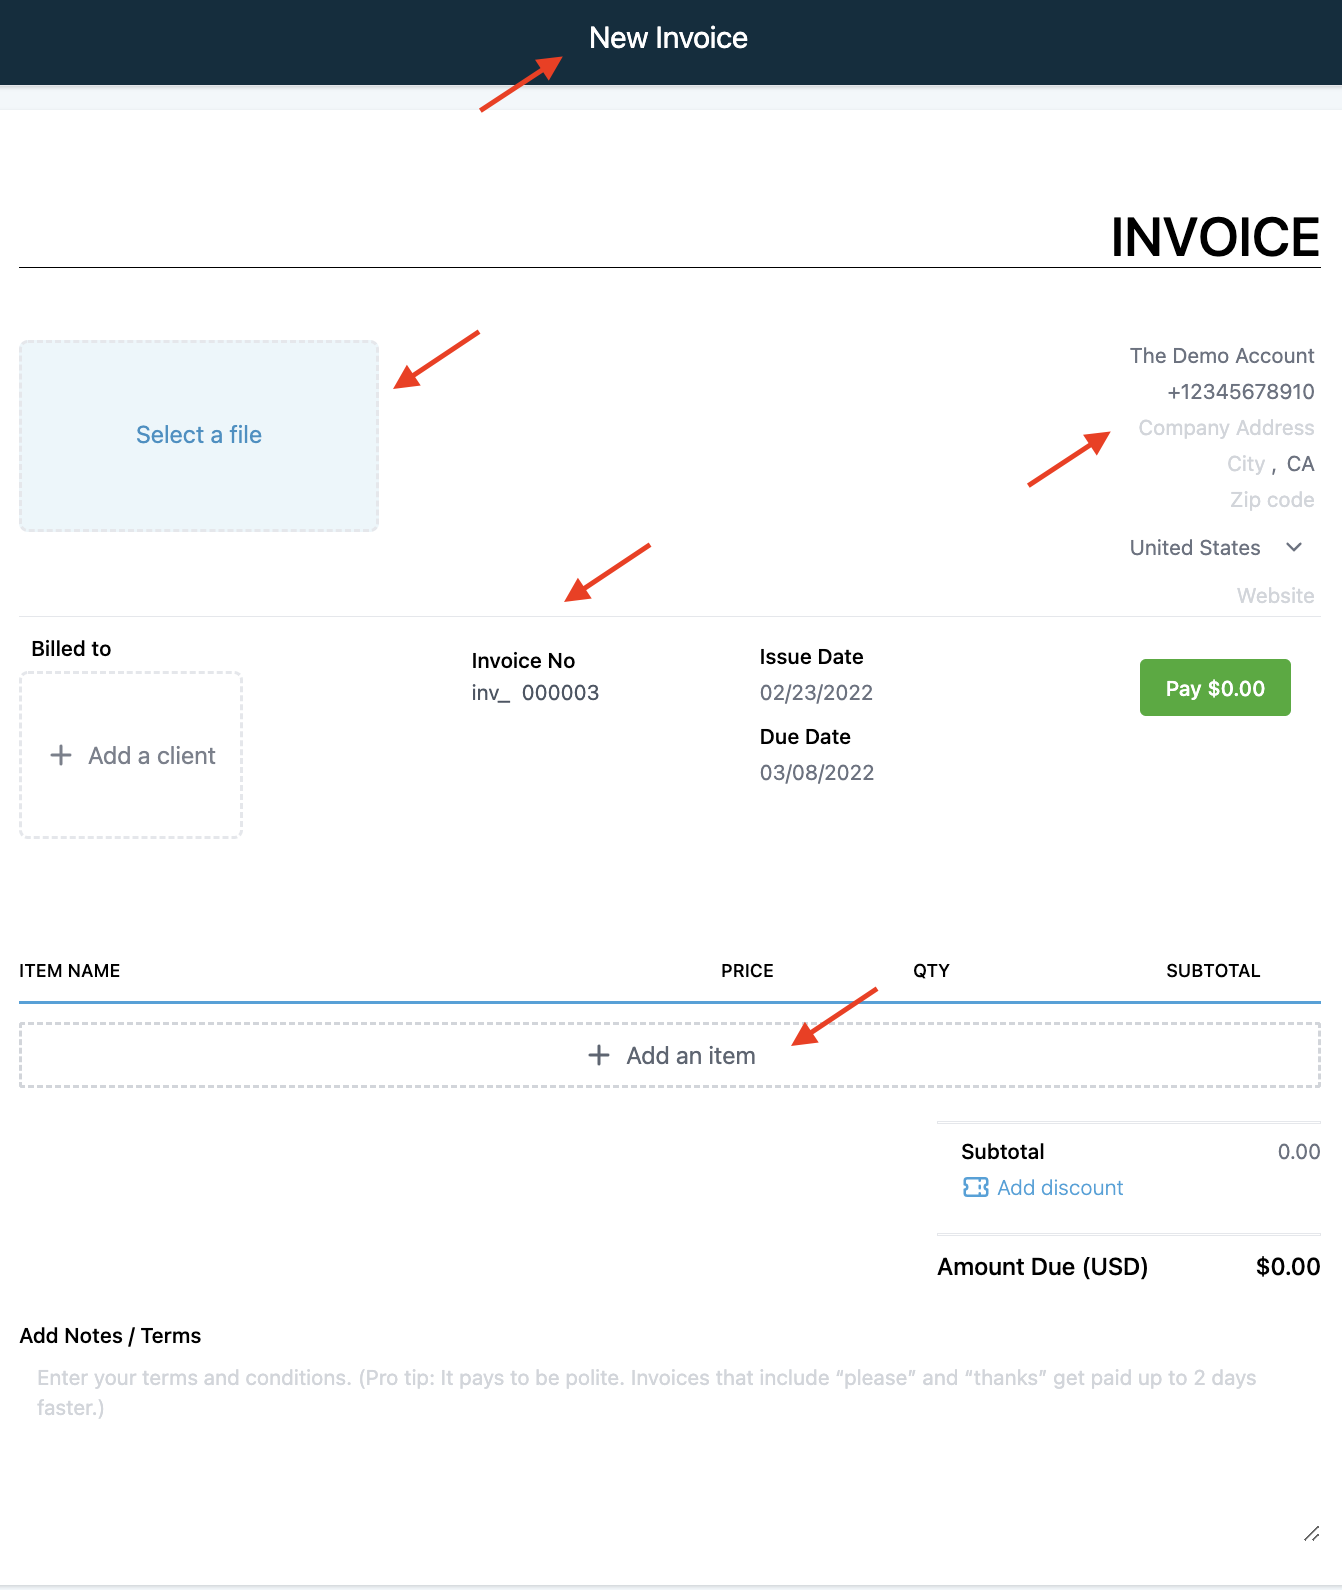
Step 2: Edit Your Invoice
Edit the image in the top left by clicking on it. This will open the media library where you may choose an existing image or upload a new image.
Edit the “from info” in the top right by clicking on the text so you can update that information accordingly.
Add the client/customer’s details under “Billed to” by clicking into the box under the section.
Click into the Invoice Number, Issue Date, and Due Date to update and make changes to each section.
Click “+Add an item” to add products from your products tab for the invoice.
NOTE: the product already needs to have been created in order to be included on an invoice. If you need to set up a new product, checkout our other tutorials on products.
Click into the Price and Quantity sections to update and make changes to each, as needed.
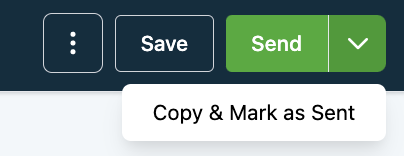
Step 3: Sending Your Invoice
Once you create the invoice, you can send it using the green button in the top right corner.
You can also “Copy and Mark as Sent” if you wish to send it using a different means.
When you click “Send”, a popup window will appear, and you may choose to send the invoice via email and text, or just one of the two methods.
Under “Additional Options” you can change the payment mode between test/live.
Step 4: Checking The Status of an Invoice
Navigate to your Invoices tab and you’ll see a list of all your invoices.
Under the “Status” tab you can view the various statuses such as draft, paid, or due in X days.
You can also search and filter by status and date range(s).
Invoices can also be found in the Transaction tab.
NOTE: Successful or Failed transactions will be visible under Payments > Transactions.
Part 2: Invoice Pro Tips
How To Add Taxes to Your Invoice
Click “Tax Settings”
Click “Add Tax”
Add the name of the Tax, the rate (in percentage form), a description, and/or Tax ID number in the popup window.
How To Add a Discount to Your Invoice
Click the “add discount” icon to include a discount on your invoice.
How To Record Payments
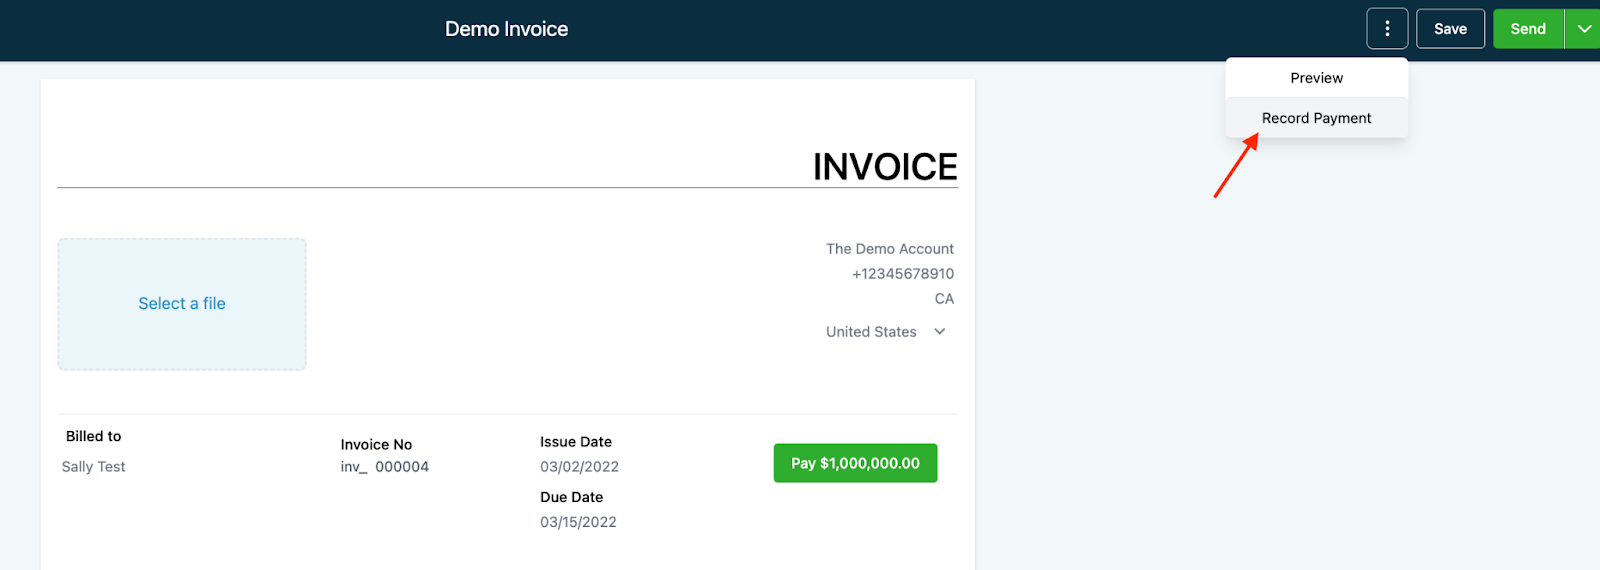
Within an Invoice, choose the three-dot menu and drop down the options.
Select “Record Payment”.
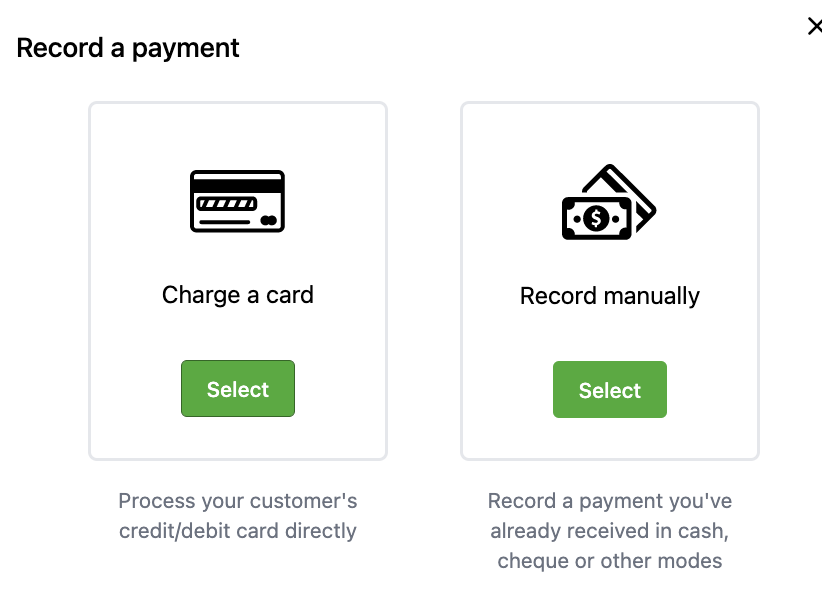
A popup will appear with two options:
Charge a card: add card information (which you can save to a contact) and charge that card on file, or charge a card already on file for the client
Record manually: use this option to record a payment you’ve captured outside the system, such as cash or check